AIR CONDITIONING
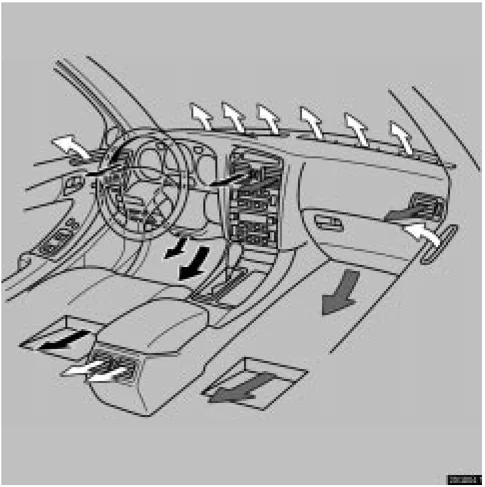
- Driver side setting
- Passenger side setting
- Mixed setting
SETTING OPERATION – manual control
When one of the manual control buttons is depressed while operating in automatic mode, the mode relevant to the depressed button is set. Other conditions continue to be adjusted automatically.
If manual air flow selection is desired –
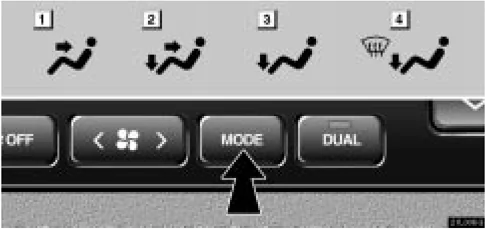
The outlets from which air is delivered can be selected manually by pushing the button. The function of each mode is as follows:
1 Panel – Air flows mainly from the instrument panel vents. 2 Bi-level – Air flows from both the floor vents and the instrument panel vents. 3 Floor – Air flows mainly from the floor vents.
It is recommended that you close the lower vent. For details about this, see page 149.
142
AIR CONDITIONING
[4] Floor/Windshield – Air flows mainly from the floor vents and windshield vents.
It is recommended that you close the lower vent. For details about this, see page 149.
If quick heating or cooling is desired –
Push the "TEMP" or "PASSENGER TEMP" button on either side and hold it until the maximum figure or minimum figure appears on the display.
If manual fan speed control is desired –
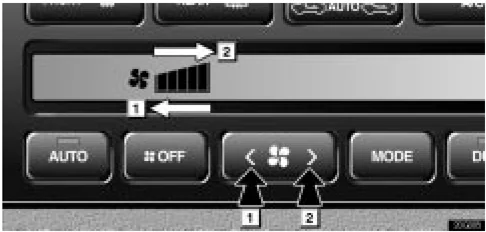
▶ [1] Fan speed at low [2] Fan speed at high
The fan speed can be set to your desired speed by pushing the appropriate side of fan speed control button. The higher the fan speed is, the more air is delivered. Pushing the "OFF" button turns off the fan.
To remove exterior windshield frost, use the high speed setting.
If manual switching of air intake is desired –
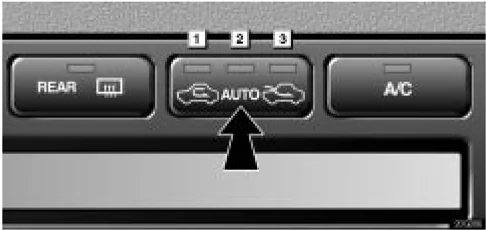
Each time you push the air intake control button, the mode changes in order from the RECIRCULATED AIR mode to AUTOMATIC mode to OUTSIDE AIR mode, then back to the RECIRCULATED AIR mode. Each indicator light shows which mode is now selected.
[1] RECIRCULATED mode – If quick circulation of cooled air is desired, select this mode.
[2] EXHAUST GAS AUTOMATIC mode – If the outside air contains harmful substances like exhaust gas (i.e., when the vehicle running just in front of your vehicle accelerates rapidly), the system changes automatically from the OUTSIDE AIR mode (with indicators [2] and [3] on) to the RECIRCULATED mode (with indicators [1] and [2] on).
[3] OUTSIDE AIR mode – The system will take fresh outside air into the vehicle.
AIR CONDITIONING
Turning off the air conditioning manually will cancel the EXHAUST GAS AUTOMATIC mode. If you select the "AUTO" mode during fan operating, the air conditioning turns on and the EXHAUST GAS AUTOMATIC mode will operate.
For normal use, it is best to keep the air intake control button set to OUTSIDE AIR mode. If recirculated air is used during heating, the windows will fog up more easily.
To change the sensitivity of the sensor switching between the RECIRCULATED and OUTSIDE AIR in the AUTOMATIC mode, push the air intake control button until the "AUTO" indicator light flashes. The display changes as illustrated below.
The sensitivity of the sensor can be adjusted only while the vehicle has stopped.
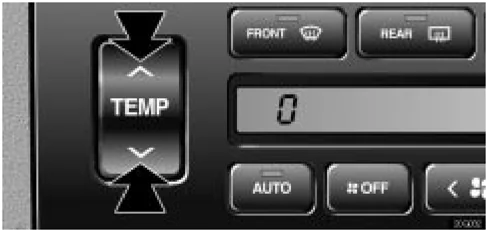
Each time you push the "TEMP" button, the sensitivity changes from "+3" down to "–3". If you do not operate any button for a few seconds or if you push a button other than the air intake control button and driver side temperature control button, the previous display returns.
144
AIR CONDITIONING
If manual on-off of the air conditioning is desired – Push the "A/C" button to turn the air conditioning on and push it again to turn the air conditioning off. If you turn off the air conditioning manually, the EXHAUST GAS AUTOMATIC mode will be cancelled.
If the outside temperature is lowered down to around 0°C (32°F), the air conditioning will turn off automatically. At this time, the indicator on the A/C button is off and the EXHAUST GAS AUTOMATIC indicator light remains on. However, the EXHAUST GAS AUTOMATIC mode does not operate. When the air conditioning turns on as with the raised temperature, the EXHAUST GAS AUTOMATIC mode resumes.
If the system is used for ventilation, heating in dry weather or removing frost or exterior fog on the windshield, turn the air conditioning off once it is no longer required. This will improve fuel economy. The air conditioning can be used for year-round automatic temperature control including cooling and dehumidifying operation.
If the air conditioning compressor does not operate, the indicator of the "A/C" button will blink. If the indicator of the "A/C" button blinks even when the "A/C" button is pushed again, have the compressor checked by your nearest Lexus dealer.
Displaying the outside temperature – The temperature display ranges from –30°C (–22°F) up to 50°C (122°F).
(b) Windshield defogging and defrosting
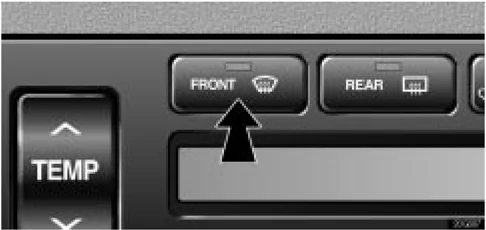
To remove interior fog on the windshield – Push the "FRONT WINDSHIELD" button.
To remove frost or exterior fog on the windshield –
- Place the temperature control button at the maximum temperature.
- Push the "FRONT WINDSHIELD" button.
- Push the fan speed control button on the right side to obtain a maximum air flow.
- Leave the air conditioning on-off button off.
For further information for removing frost and fog, see "Lower vent" on page 149.
145
AIR CONDITIONING
When the "FRONT WINDSHIELD" button is pushed while operating in automatic mode, the air conditioning is set to operate and the OUTSIDE AIR mode is set.
If you push the "FRONT WINDSHIELD" button once again while in the FRONT WINDSHIELD mode, the mode then returns to the last mode used.
CAUTION Do not use the "FRONT WINDSHIELD" button during cooled air operation in extremely humid weather. The difference between the temperature of the outside air and that of the windshield could cause the outer surface of the windshield to fog up blocking your vision.
(c) Air conditioning filter

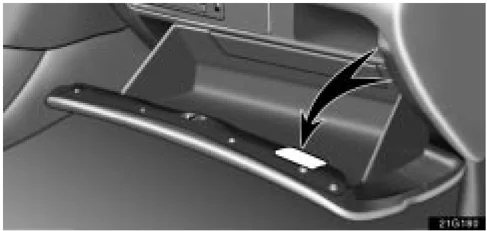
The air conditioning filter information label is placed in the glove box as shown and indicates that a filter has been installed.
The air conditioning filter prevents dust from entering the vehicle through the air conditioning vent.
The air conditioning filter is behind the glove box.
The air conditioning filter may clog after long use which will reduce the air flow. However, you can inspect the filter easily.
When you inspect and replace the filter, be sure to turn off the fan.
146
AIR CONDITIONING
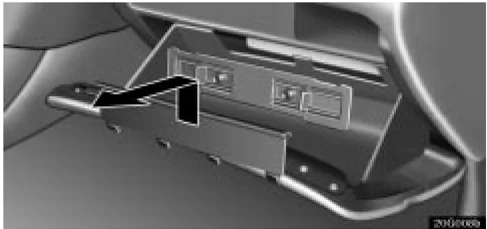
- Open the glove box and remove the two covers.
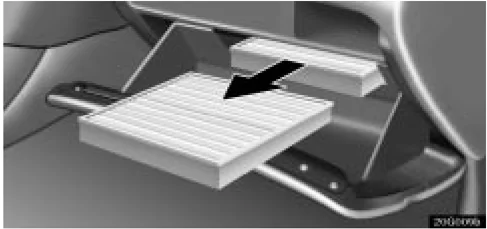
- Take out the filter.
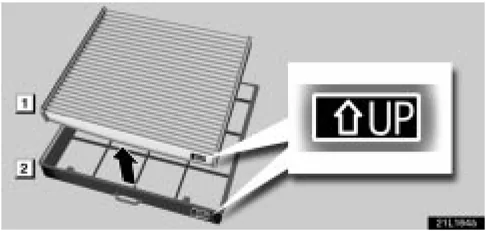
▶ 1 Filter 2 Filter case
- Remove the filter from the filter case.
- Inspect the filter on the surface.
If it is dirty, it should be replaced. To maintain the air conditioning efficiency, replace the filter according to the maintenance schedule. (For scheduled maintenance information, please refer to the "Owner's Manual Supplement/Scheduled Maintenance".)
NOTICE When setting the filter to the filter case, the UP marks shown on the filter and filter case should be noted and fitted as shown.
147
AIR CONDITIONING
INFORMATION
The filter should be installed properly in position. The use of air conditioning with the filter removed may cause deteriorated dustproof performance and then affect air conditioning performance.
(d) Operating tips
- Make sure the air inlet grilles in front of the windshield are not blocked by leaves or other obstructions.
- If air flow control is not satisfactory, check the dashboard vents. (See "Center vents", "Side vents", "Lower vent" and "Rear vents".)
- To help cool down the interior after parking in the hot sun, drive for the first few minutes with the windows open. After the excess heat has blown away, close the windows.
- When driving on dusty roads, close all windows. If dust thrown up by the vehicle is still drawn into the vehicle after closing the windows, it is recommended that the air intake control button be left to the OUTSIDE AIR mode and the fan speed control button be pressed to anywhere except the "OFF" button.
- If following another vehicle on a dusty road, or driving in windy and dusty conditions, it is recommended that the air intake control button be temporarily pressed in to the RECIRCULATED AIR mode, which will close off the outside passage and prevent outside air and dust from entering the vehicle interior.
Center vents
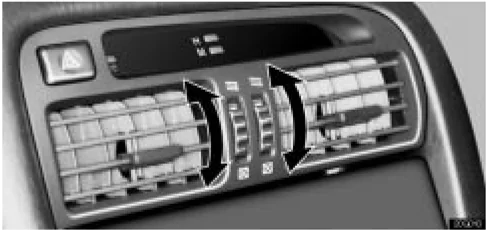
The center vents may be opened or closed as shown.
Side vents
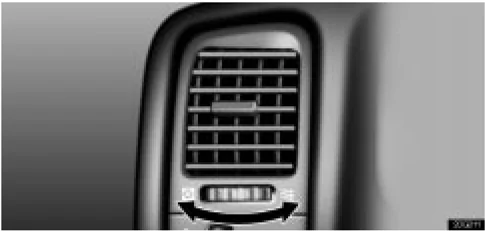
The side vents may be opened or closed as shown.
AIR CONDITIONING
Lower vent
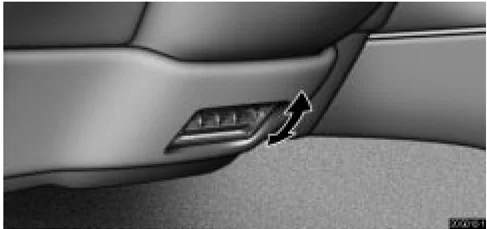
The lower vent may be opened or closed as shown. For removing frost or fog, it is recommended that you close the lower vent when you push the “FRONT WINDSHIELD” button or use the”Floor” or the “Floor/Windshield” mode.
Rear vents
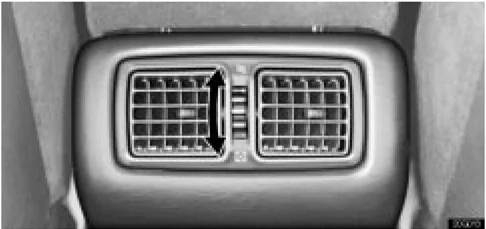
The rear vents may be opened or closed as shown.
149
150
SECTION 2-2
AIR CONDITIONING AND AUDIO
Audio
- Audio system . . . . . . . . . . . . . . . . . . . . . . . . . . . . . . . . . . . . . . . . . . . . . . . . . . . . . . . . . . . . . . . . . . . . . . . . . . . . . . . . . . . . . . . . . . . . . . . . . . . . . . . . . . . . . . . . . . . . . . . . . . . . . . . . . . . . . . . . . . . . . . . . . . . . . . . . . . . . . . . . . . . . . . . . . . . . . . . . . . . . . . . . . . . . . . . . . . . . . . . . . . . . . . . . . . . . . . . . . . . . . . . . ........ 152
For vehicles equipped with Navigation System, please refer to the separate “Navigation System Owner’s Manual”.
151

AUDIO
AUDIO SYSTEM Quick reference for your audio system
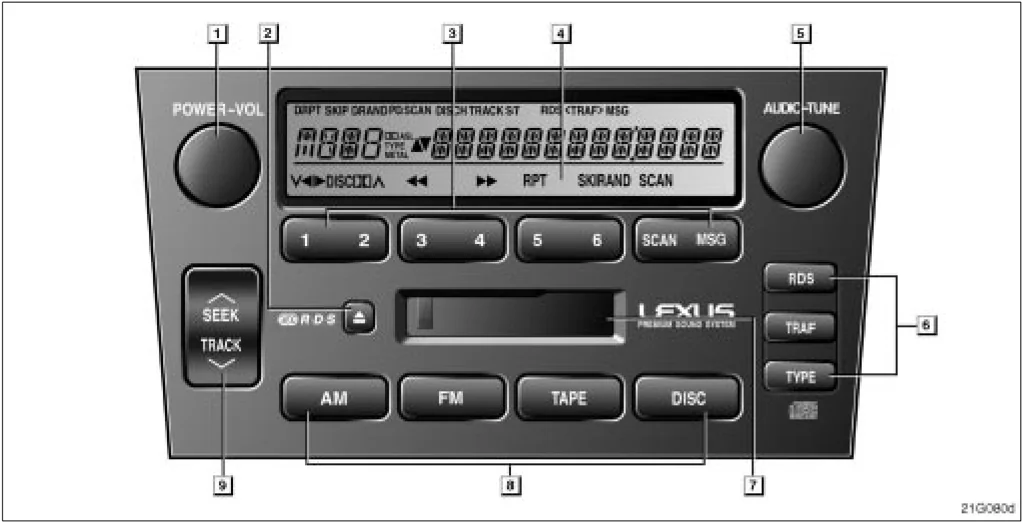
21G080d
►You can adjust the brightness of the display. See “Instrument panel light control” on page 50 for details. The “DISC” button works only when your Lexus is equipped with an automatic changer. If a Mark Levinson brand audio system is installed, the “Mark Levinson” logo is shown on the panel.
152
AUDIO
1 Turning the system on and adjusting the volume (See page 154 for details.) 2 Stopping and ejecting a cassette tape (See page 161 for details.) 3 Function buttons 1 – 6: Station selector buttons (See page 158 for details.) SCAN: Scan tuning (See page 159 for details.) MSG: Message button (See page 160 for details.) 4 Display of functions in TAPE mode ◄II► : Side change (See page 162 for details.) DOLBY NR (See page 161 for details.) ◄◄: Rewinding (See page 162 for details.) ►►: Fast forwarding (See page 162 for details.) RPT: Automatic repeat (See page 162 for details.) SKIP: Automatic skip of blank portions of tape (See page 162 for details.) 4 Display of functions in CD mode v ∧ : Disc selection (See page 166 for details.) ◄◄: Reversing (See page 167 for details.) ►►: Fast forwarding (See page 167 for details.) RPT: Automatic repeat (See page 168 for details.) RAND: Random access (See page 168 for details.) SCAN: Track and disc scan selection (See page 167 for details.) 5 AUDIO–TUNE knob (See page 155 for details.) 6 Radio data system/Traffic announcement/ Program type (See page 159 and 160 for details.) 7 Cassette tape slot (See page 161 for details.) 8 Mode selectors (See page 154 for details.) 9 Radio mode: Seek tuning (See page 158 for details.) TAPE mode: Direct access to a desired program (See page 163 for details.) CD mode: Direct access to a desired program (See page 167 for details.)
153
AUDIO
Using your audio system: some basics
This section describes some of the basic features of the Lexus audio system. Some information may not pertain to your system.
Your audio system works when the ignition key is in the "ACC" or "ON" position.
NOTICE To prevent the battery from being discharged, do not leave the car audio on longer than necessary when the engine is not running.
(a) Turning the system on and off
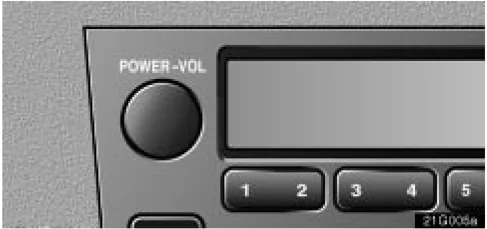
Push this knob to turn the audio system on and off. Turn this knob to adjust the volume.
The system turns on in the last mode used.
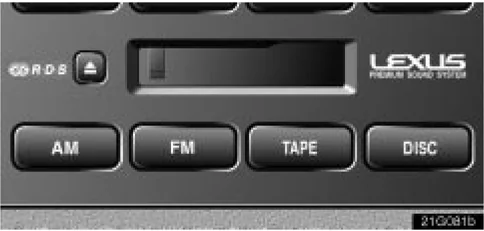
Push "AM", "FM", "TAPE" or "DISC" to turn on that mode. The selected mode turns on directly.
Push these buttons if you want to switch from one mode to another.
If the tape or disc is not set, the cassette player or compact disc player does not turn on.
You can turn off the cassette player by ejecting the cassette tape. If the audio system was previously off, then the entire audio system will be turned off when you eject the cassette tape. If another function was previously playing, it will come on again.
154
AUDIO
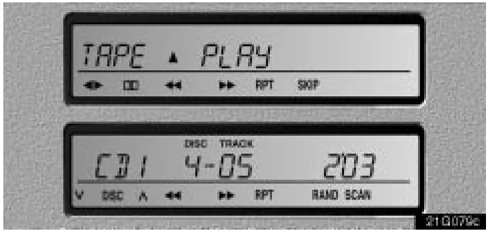
In the "TAPE" or "CD" mode, the applicable functions are shown in the lowest part of the display. Push the switch just below to turn on each function.
(b) Tone and balance
How good an audio program sounds to you is largely determined by the mix of the treble, mid-range, and bass levels. In fact, different kinds of music and vocal programs usually sound better with different mixes of treble, mid-range, and bass.
A good balance of the left and right stereo channels and of the front and rear sound levels is also important.
Keep in mind that if you are listening to a stereo recording or broadcast, changing the right/left balance will increase the volume of one group of sounds while decreasing the volume of another.
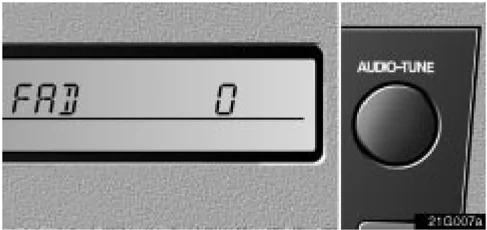
Each time you push the "AUDIO-TUNE" knob, the display changes as in the following. To adjust the tone and balance or turn on or off the automatic sound levelizer, turn the knob.
BAS: Adjusts low-pitched tones. MID: Adjusts mid-pitched tones. TRE: Adjusts high-pitched tones. BAL: Adjusts the sound balance between the right and left speakers. FAD: Adjusts the sound balance between the front and rear speakers. ASL: Turns on or off the automatic sound levelizer.
Automatic sound levelizer: When the audio sound becomes difficult to be heard due to road noise, wind noise, etc. during driving, the system adjusts to the optimum volume and tone quality according to the noise level. While the automatic sound levelizer is on, "ASL" appears on the display.
155
AUDIO
(c) Your radio antenna The wire antenna is mounted inside the rear window.
NOTICE
- When cleaning the inside of the rear window, be careful not to scratch or damage the wire antenna.
- Putting a window tint (especially, conductive or metallic type) on the rear window may affect the reception of radio or mobile telephone. For the installation of the window tint, consult with your Lexus dealer.
(d) Your cassette player When you insert a cassette, the exposed tape should be to the right.
NOTICE Do not oil any part of the cassette player, and do not insert anything except a cassette tape into the slot.
(e) Your changer
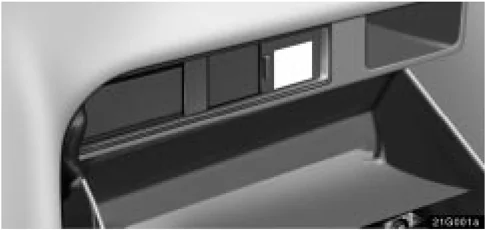
If your Lexus is equipped with a changer, it can play selected discs or continuously play all the discs set in the magazine. When you set discs into the magazine, make sure they face the correct way. If not, the player will display "ERROR" and the disc number.
NOTICE Never try to disassemble or oil any part of the compact disc player. Do not insert anything other than compact discs into the magazine.
The player is intended for use with 12 cm (4.7 in.) discs only.
156
AUDIO
Radio operation (a) Listening to the radio
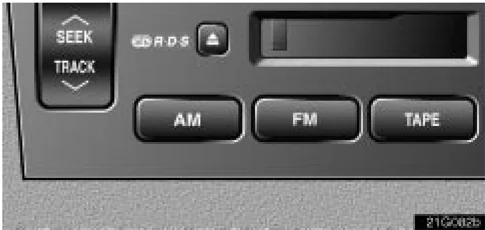
Push these buttons to choose either an AM or FM station. "AM", "FM1", "FM2" or "FM TYPE" appear on the display.
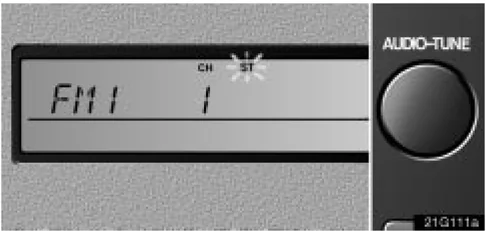
Turn this knob to the right to step up the station band or to the left to step down.
Your radio automatically changes to stereo reception when a stereo broadcast is received. "ST" appears on the display. If the signal becomes weak, the radio reduces the amount of channel separation to prevent the weak signal from creating noise. If the signal becomes extremely weak, the radio switches from stereo to mono reception. In this case, "ST" disappears from the display.
157
AUDIO
(b) Presetting a station
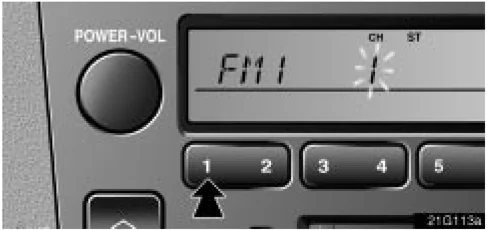
- Tune in the desired station.
- Push one of the station selector buttons ( 1–6 ) and hold it until a beep is heard. This sets the station to the button and the button number ( 1–6 ) appears on the display.
Each button can store one AM station and two FM stations. To change the preset station to a different one, follow the same procedure.
The preset station memory is cancelled when the power source is interrupted by battery disconnection or a blown fuse.
(c) Selecting a station
Tune in the desired station using one of the following methods.
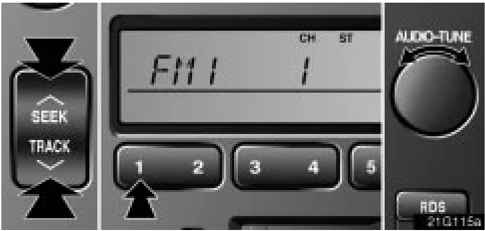
Preset tuning: Push the button ( 1–6 ) for the station you want. The button number ( 1–6 ) and station frequency appear on the display.
Manual tuning: Turn the "AUDIO-TUNE" knob. The radio will step up or down to another frequency.
Seek tuning: Push the "SEEK" button. The radio will begin seeking up or down for a station of the nearest frequency and will stop on reception. Each time you push the button, the stations will be searched automatically one after another.
158
AUDIO
 To scan all the frequencies: Push the "SCAN" button. "SCAN" appears on the display. The radio will find the next station up the band, stay there for a few seconds, and then scan again. To select a station, push the "SCAN" button a second time.
To scan the preset stations: Push the "SCAN" button until you hear a beep. "P.SCAN" appears on the display. The radio will tune in the next preset station up the band, stay there for a few seconds, and then move to the next preset station. To select a station, push the "SCAN" button a second time.
(d) RDS (Radio Data System)
 When you push the "RDS" button briefly during FM reception, the RDS turns on. "RDS" and "RDS SEARCH" appear on the display and the radio starts to search RDS stations.
If no RDS stations can be found, "NOTHING" appears and the display returns to the previous mode.
If RDS stations are found, "FOUND ST" appears on the display ( indicating the number of stations which are found) in the FM TYPE mode and the RDS stations are preset by program type.
To turn off the RDS, push the "RDS" button until you hear a beep.
159
AUDIO
TYPE (Program type):
When you push the "TYPE" button while receiving an RDS station, the current program type appears on the display.
Each time you push the "TYPE" button, the program type changes as in the following:
- ROCK
- EASY LIS (Easy listening)
- CLS/JAZZ (Classical music and jazz)
- R&B (Rhythm and Blues)
- INFORM (Information)
- RELIGION
- MISC
- ALERT (Emergency message)
TRAF (Traffic) function: A station that regularly broadcasts traffic information is automatically located.
When you push the "TRAF" button, "TRAF SEEK" appears on the display and the radio will start seeking any traffic program station.
If no traffic program station is found, "NO TRAF INFO" appears on the display for a few seconds and the display returns to the previous mode.
Radio text message:
 If the radio receives a radio text message during FM reception, "MSG" and a text message appears on the display. After the text message goes off, "MSG" also goes off.
After the text message goes off from the display, pushing the "MSG" button during message reception shows the text message again on the display.
The RDS audio system can store three messages consisting of 64 characters in memory. To store a message in memory, push the "MSG" button until you hear a beep.
If three messages are already stored in memory, the oldest message will be overwritten by the new message.
To recall a radio text message, push the "MSG" button. Each time you push the button, the available message will be displayed beginning with the newest one.
If there is no radio text message in memory and when no message is received, "NO MSG STORED" appears on the display. After this, the display returns to the previous mode.
160
AUDIO
Cassette tape player operation (a) Playing a cassette tape
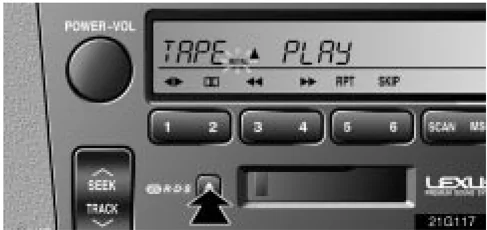
When you insert a cassette tape, the exposed tape should face to the right.
The player will automatically start when you insert a cassette tape. At this time, "TAPE" appears on the display.
If a metal or chrome equivalent cassette tape is put in the cassette player, the player will automatically recognize it and "METAL" appears on the display.
To stop or eject the cassette tape, push the "EJECT" button.
Auto-reverse feature: After the cassette player reaches the end of a tape, it automatically reverses and begins to play the other side, regardless of whether the cassette was playing or fast forwarding.
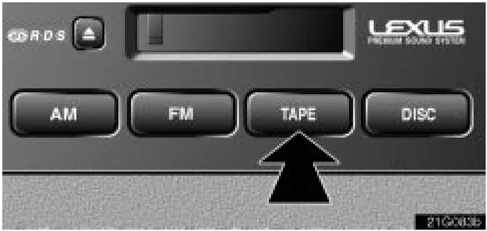
If a cassette is already in the slot, push the "TAPE" button.
Dolby® Noise Reduction* feature: If you are listening to a tape that was recorded with Dolby* Noise Reduction, push the button by the double-D symbol. The display will indicate that the Dolby noise reduction system is on.
The Dolby NR mode reduces tape noise by about 10 dB. For best sound reproduction, play your tapes with the Dolby NR on or off according to the mode used for recording the tape.
To play a tape recorded without Dolby NR, push the button again to turn off the Dolby NR.
- Dolby noise reduction manufactured under license from Dolby Laboratories Licensing Corporation. "DOLBY" and the double-D symbol are trademarks of Dolby Laboratories Licensing Corporation.
161