STARTING AND DRIVING
(a) Normal driving
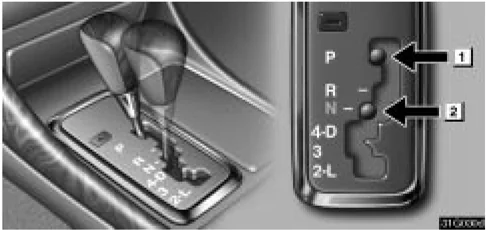
► 1 "P" (Park) position 2 "N" (Neutral) position
- Start the engine as instructed in "How to start the engine" on page 180.
The transmission must be in "P" or "N". The engine will not start in any drive position even if the ignition key is turned to "START".
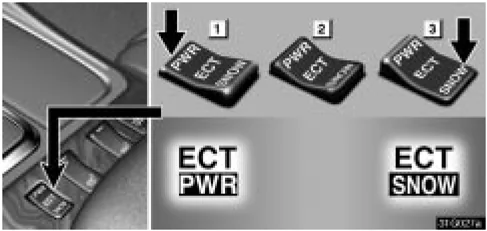
► 1 Power position 2 Normal position 3 Snow position
- Set the driving pattern selector switch to the "Normal" position.
Your transmission has a driving pattern selector switch which allows you to select "Power", "Normal" or "Snow" mode to suit your driving condition. For ordinary driving, Lexus recommends that you use the "Normal" position to improve fuel economy.
- For more powerful acceleration and sporty driving, use the "Power" position.
In the "Power" position, the "ECT PWR" light in the instrument cluster is on and the transmission is shifted up at higher vehicle speeds and shifted down more responsively than in the "Normal" position.
For "Snow" mode, see "Electronic Throttle Control System" on page 189.
183
STARTING AND DRIVING
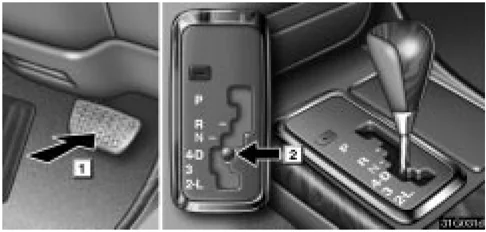
▶ 1 Brake pedal 2 "D" (Drive) position
- With your foot holding down the brake pedal, shift the selector lever to "D".
Always use the "D" position to improve fuel economy and quiet driving. Only in this position, shifting into the overdrive gear is possible. However, while the engine coolant temperature is low, the transmission will not shift into the overdrive gear even in the "D" position. (See "(c) Using engine braking" and "(g) Good driving practice" for exceptions.)
CAUTION Never put your foot on the accelerator pedal while shifting.
- Release the parking brake and brake pedal. Depress the accelerator pedal slowly for smooth starting.
In normal cruising, the vehicle will start in first gear and automatically shift up to the most suitable gear. On inclines, declines or winding roads, etc., the vehicle shifts up and down automatically according to the running conditions to obtain the suitable driving power and engine braking.
When the lever is in "4" position, the automatic transmission system will select the most suitable gear for the running conditions such as hill climbing, hard towing, etc.
If you need to accelerate rapidly while driving, depress the accelerator pedal to the full throttle position. This provides more acceleration by automatically downshifting the transmission to the next lower gear or beyond, depending on the vehicle speed.
If engine braking is needed, such as in descending a long hill, see "(c) Using engine braking".
184
STARTING AND DRIVING
(b) Driving in M mode (GS300 only)
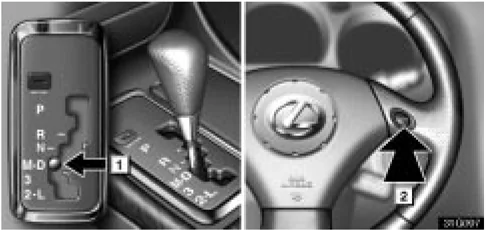
► 1 "M" position 2 Downshifting on the front, Upshifting on the rear
When the selector lever is put in the "M" position, the "M" indicator is shown on the instrument cluster. Pushing either of the switches on the front or rear of the steering wheel downshifts the transmission from "D" to "2" position or upshifts from "2" to "D" position.
The current gear position is displayed on the instrument cluster.
Each time you push the switch located on the front of the steering wheel, the transmission downshifts (from "D") to "4", "3" and then "2".
When you push the switch located on the back of the steering wheel, the transmission upshifts to "3", "4" and then "D".
For the precautions on each position, see the description on the previous page.
2 warning tones sound in the following case:
- You attempt to downshift the transmission when it is not possible to downshift due to the high vehicle speed.
If the "M" indicator flashes, there is a problem somewhere in the system. In this case, it should be noted that you cannot downshift or upshift the transmission using the switches on the steering wheel. Consult with your Lexus dealer as soon as possible. The transmission works exactly in the same way as when you put the selector lever in the "D" position.
⚠ CAUTION Be careful when downshifting on a slippery surface. The abrupt change in engine speed could cause the vehicle to spin or skid.
185

STARTING AND DRIVING
(c) Using engine braking
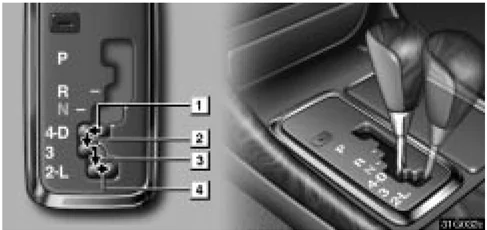
To use the braking power of the engine, downshift the transmission in the way described below:
-
Shift into the "4" position. The transmission will downshift to fourth gear and engine braking will be enabled.
When the cruise control is being used, even if you downshift from "D" to "4", engine braking will not be enabled because the cruise control is not cancelled. If you need to decrease the vehicle speed, see page 192.
-
Shift into the "3" position. The transmission will downshift to third gear when the vehicle speed is or becomes lower than the speed listed below and stronger engine braking will be enabled.
-
Shift into the "2" position. The transmission will downshift to second gear when the vehicle speed is or becomes lower than the speed listed below and more powerful engine braking than that of "3" position will be enabled.
-
Shift into the "L" position. The transmission will downshift to first gear when the vehicle speed is or becomes lower than the speed listed below and maximum engine braking will be enabled.
| GS430 km/h (mph) | GS300 km/h (mph) |
|---|---|
| "3" 153 (95) | 128 (80) |
| "2" 100 (62) | 85 (53) |
| "L" 39 (24) | 16 (10) |
CAUTION Be careful when downshifting on a slippery surface. The abrupt change in engine speed could cause the vehicle to spin or skid.
186
STARTING AND DRIVING
(d) Using the "3", "2" and "L" positions
The "3", "2" and "L" positions are used for strong engine braking as described previously.
With the selector lever in "3", "2" or "L", you can start the vehicle in motion as with the lever in "D".
With the selector lever in "3" or "2", the vehicle will start in first gear and automatically shift to third or second gear.
With the selector lever in "L", the transmission is engaged in first gear.
NOTICE
- Be careful not to over-rev the engine. Watch the tachometer to keep engine rpm from going into the red zone. The approximate maximum allowable speed for each position is given below for your reference:
| GS430 km/h (mph) | GS300 km/h (mph) | |
|---|---|---|
| "3" | 156 (97) | 130 (81) |
| "2" | 102 (63) | 85 (53) |
| "L" | 66 (41) | 55 (34) |
- Do not continue hill climbing or hard towing for a long time in the "3", "2" or "L" position. This may cause severe automatic transmission damage from overheating. To prevent such damage, "4" position should be used in hill climbing or hard towing.
(e) Backing up
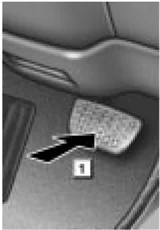
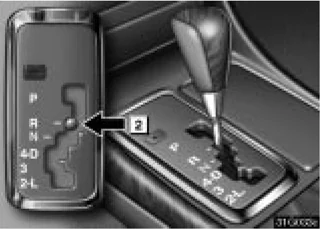
▶ [1] Brake pedal [2] "R" (Reverse) position
- Bring the vehicle to a complete stop.
- With the brake pedal held down with your foot, shift the selector lever to the "R" position.
NOTICE
Never shift into reverse while the vehicle is moving.
187
STARTING AND DRIVING
(f) Parking
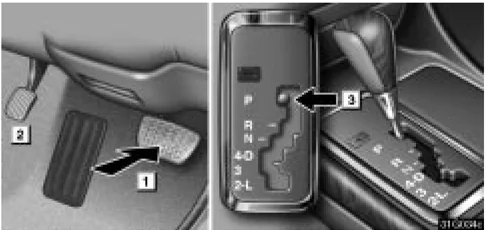
▶ 1 Brake pedal 2 Parking brake pedal 3 "P" (Park) position
- Bring the vehicle to a complete stop.
- Depress the parking brake pedal fully.
- With the brake pedal held down with your foot, shift the selector lever to the "P" position.
CAUTION Never attempt to move the selector lever into "P" under any circumstances while the vehicle is moving. Serious mechanical damage and loss of vehicle control may result.
(g) Good driving practice
If the transmission repeatedly shifts up and down between the fourth and overdrive gears when climbing a gentle slope, shift the selector lever to the "4" position. Be sure to shift the selector lever to the "D" position after climbing the slope.
CAUTION Always keep your foot on the brake pedal while stopped with the engine running. This prevents the vehicle from creeping.
NOTICE Always use the brake pedal or the parking brake to hold the vehicle on an upgrade. Do not attempt to hold the vehicle using the accelerator pedal, as this can cause the transmission to overheat.
188
STARTING AND DRIVING
(h) If you cannot shift the selector If you cannot shift the selector lever even though the brake pedal is depressed, use the shift lock override button. For instructions, see "If you cannot shift automatic transmission selector lever" on page 230.
ELECTRONIC THROTTLE CONTROL SYSTEM
The electronic throttle control system always maintains appropriate engine output in relation to the accelerator opening in all driving conditions.
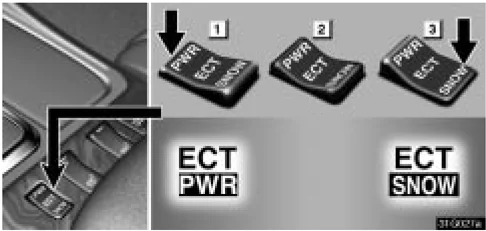
► 1 Power position 2 Normal position 3 Snow position
The electronic throttle control system has 3 modes: Normal, Power and Snow modes.
Normal mode: For ordinary driving, Lexus recommends that you use the normal mode to improve fuel economy.
Power mode: For more powerful acceleration and sporty driving.
189
STARTING AND DRIVING
In the power mode, the "ECT PWR" light in the instrument cluster is on and the transmission is shifted up at higher vehicle speeds and shifted down more responsively than in the normal mode.
To return to the normal mode, push the driving pattern selector switch lightly on the "SNOW" side.
Snow mode: For slippery road surfaces such as in snow. In this mode, the spinning of the rear wheels is controlled appropriately.
When you push the driving pattern selector switch on the "SNOW" side, the snow mode is turned on and the "ECT SNOW" light in the instrument cluster comes on.
To return to the normal mode, push the driving pattern selector switch on the "SNOW" side again.
When you turn the ignition switch off in the snow mode, the mode automatically changes to the normal mode.
CRUISE CONTROL
The cruise control allows you to cruise the vehicle at a desired speed over 40 km/h (25 mph) with your foot off the accelerator pedal.
Your cruising speed can be maintained although a slight speed change may occur when driving up or down a gradient, within the limits of engine performance. On steeper hills, a great speed change will occur so it is better to drive without the cruise control.
When the cruise control is on, the driving pattern of the automatic transmission is fixed in the normal position, regardless of the position of the selector switch.
CAUTION
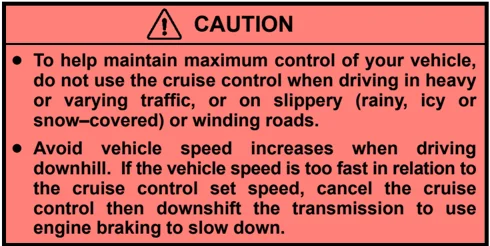
- To help maintain maximum control of your vehicle, do not use the cruise control when driving in heavy or varying traffic, or on slippery (rainy, icy or snow-covered) or winding roads.
- Avoid vehicle speed increases when driving downhill. If the vehicle speed is too fast in relation to the cruise control set speed, cancel the cruise control then downshift the transmission to use engine braking to slow down.
190
STARTING AND DRIVING
Turning the system on
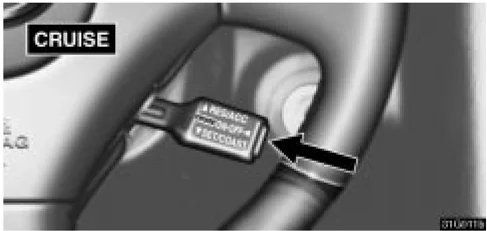
To operate the cruise control, push the main switch. This turns the system on. The indicator light in the instrument cluster shows that you can now set your desired cruising speed. Another push on the switch will turn the system completely off.
When the ignition key is turned off, the main switch is also automatically turned off. To use the cruise control again, push the main switch again to turn it on.
CAUTION To avoid accidental cruise control engagement, keep the main switch off when not using the cruise control.
Setting operation
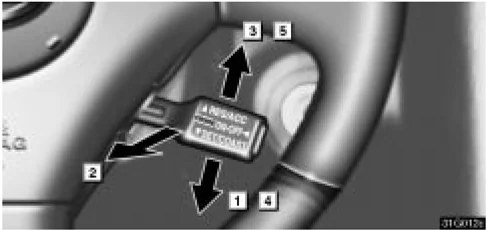
Each function is described below.
1 Setting at a desired speed.
The transmission must be in "D" or "4" before you set the cruise control speed.
Bring the vehicle to the desired speed, press the control lever downward in the "SET/COAST" direction and release it. This sets the vehicle at that speed. Now you may take your foot off the accelerator pedal. If you need acceleration – for example, when passing – depress the accelerator pedal enough for the vehicle to exceed the set speed. When you release the accelerator pedal, the vehicle will return to the speed set prior to the acceleration.
191

STARTING AND DRIVING
2 Cancelling the preset speed You can cancel the preset speed by either of the following: a. Pulling the control lever in the "CANCEL" direction. b. Depressing the brake pedal.
If the vehicle speed falls below about 40 km/h (25 mph), the preset speed will be automatically cancelled.
If the vehicle speed drops 16 km/h (10 mph) below the preset speed, the preset speed will also automatically be cancelled.
If the preset speed automatically cancels out for other than these reasons, have your vehicle checked by your Lexus dealer at the earliest opportunity.
3 Resetting to a faster speed Press the control lever upward in the "RES/ACC" direction and hold it. Release the lever when the desired speed is attained. While the lever is held upward, the vehicle will gradually gain speed.
When the difference between the actual vehicle speed and the set speed is less than 5 km/h (3 mph), the set speed can be increased 1.6 km/h (1 mph) each time by pressing the control lever upward in the "RES/ACC" direction quickly within 0.6 seconds.
However, a quicker way to reset is to accelerate the vehicle and then press the control lever downward in the "SET/COAST" direction.
4 Resetting to a slower speed Press the control lever downward in the "SET/COAST" direction and hold it. Release the lever when the desired speed is attained. While the lever is held downward, the vehicle speed will gradually decrease.
When the difference between the actual vehicle speed and the set speed is less than 5 km/h (3 mph), the set speed can be lowered 1.6 km/h (1 mph) each time by pressing the control lever downward in the "SET/COAST" direction quickly within 0.6 seconds.
However, a quicker way to reset is to depress the brake pedal and then press the control lever downward in the "SET/COAST" direction.
Even if you downshift the transmission from the "D" position to "4" with the cruise control on, engine braking will not be applied because the cruise control is not cancelled. To decrease the vehicle speed, reset to a slower speed with the cruise control lever or depress the brake pedal. If you use the brake pedal, cruise control is cancelled.
5 Resuming the preset speed If the preset speed is cancelled by pulling the control lever or by depressing the brake pedal, pushing the lever up in the "RES/ACC" direction will restore the speed set prior to cancellation. However, once the vehicle speed falls below about 40 km/h (25 mph), the preset speed will not be resumed.
192
STARTING AND DRIVING
Cruise control failure warning
If the "CRUISE" indicator light in the instrument cluster flashes five times and then goes out when using the cruise control, it means that there is trouble in the cruise control system. Contact your Lexus dealer.
TRACTION CONTROL SYSTEM
The traction control system automatically helps control the spinning of the rear wheels which may occur when accelerating on slippery road surfaces, thus assisting driver to control the driving power of the rear wheels.
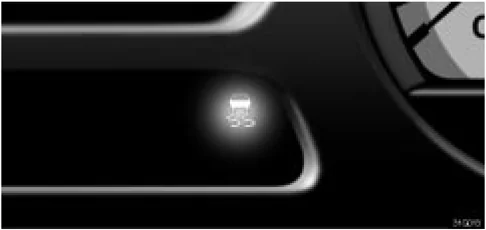
Slip indicator light
When you turn the ignition switch on, this system always turns on. Leave the system on during ordinary driving so that it can operate when needed. When traction control is applied, the slip indicator light blinks.
You may hear a sound in the engine compartment for a few seconds when the engine is started or just after the vehicle begins to move. This means that the traction control system is in the self-check mode, and does not indicate malfunction.
When the traction control system is operating, you may feel vibration of your vehicle, caused by operation of the brakes. This indicates the system is functioning properly.
193
STARTING AND DRIVING
When getting the vehicle out of mud or new snow, etc. the traction control system will help operate to prevent the wheels from spinning.
To turn off the traction control system, see page 195.
CAUTION
Under certain slippery road conditions, full traction of the vehicle and power to the rear wheels cannot be maintained, even though the traction control system is in operation. Do not drive the vehicle under any speed or maneuvering conditions which will cause the vehicle to lose traction. In situations where the road surface is covered with ice or snow, your vehicle should be fitted with snow tires or tire chains. Always drive at an appropriate and cautious pace.
VEHICLE STABILITY CONTROL SYSTEM
The vehicle stability control system helps provide integrated control of the systems such as an anti-lock brake system, traction control, engine control, etc. This system automatically controls the output of the brakes or engine to help prevent the vehicle from skidding when cornering on a slippery road surface or abrupt steering wheel operation occurs.

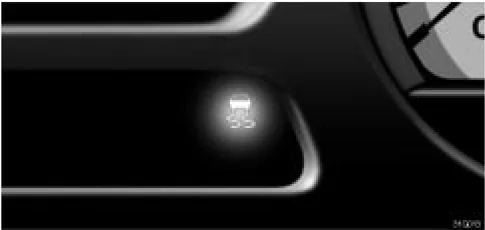
►Slip indicator light
If the vehicle is going to skid during driving, the slip indicator light flashes and an alarm sounds intermittently.
The vehicle stability control activates when the vehicle speed is about more than 15 km/h (9 mph).
194
STARTING AND DRIVING
You may hear a sound in the engine compartment for a few seconds when the engine is started or just after the vehicle begins to move. This means that the vehicle stability control is in the self-check mode and does not indicate a malfunction.
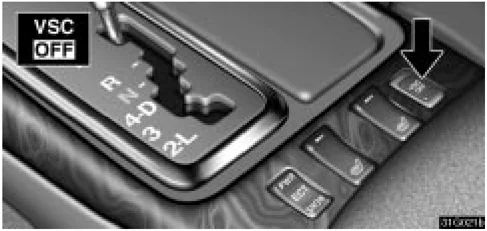
You can turn off the vehicle stability control system by pushing the "VSC OFF" switch. The "VSC OFF" indicator comes on. At this time, the traction control system also turns off. You cannot turn off either one of them. Pushing the "VSC OFF" switch a second time turns the system back on and extinguishes the "VSC OFF" indicator light. When you turn the ignition switch on, this system always turns on.
Vehicle stability control system failure warning
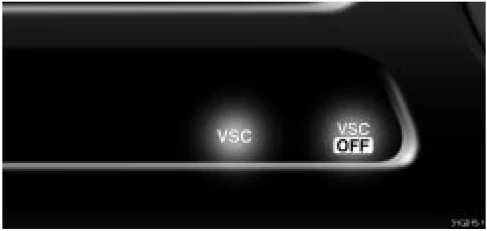
These lights warn when there is a problem somewhere in the vehicle stability control system or traction control system. If the "VSC" warning light and "VSC OFF" indicator light come on, have your vehicle checked by Lexus dealer as soon as possible. The lights will come on when the ignition key is turned to "ON", and will go off after about a few seconds. The lights may stay on for 60 seconds after the ignition key is turned to the "ON" position. It is normal if they go out after a while. Depressing the brake pedal repeatedly may turn on the lights. It is normal if they go out after a few seconds. If the "VSC" warning light and "VSC OFF" indicator light come on, the vehicle stability control system does not activate, however, it is no problem to continue your driving.
195
STARTING AND DRIVING
CAUTION
- Do not rely excessively on the vehicle stability control system. Even if the vehicle stability control system is operating, you must always drive carefully and attentively to avoid serious injury. Reckless driving will result in an unexpected accident. If the slip indicator light flashes, sounding an alarm, special care should be taken while driving.
- Only use tires of specified size. The size, manufacturer, brand and tread pattern for all 4 tires should be the same. If you use the tires other than specified, or different type or size, the vehicle stability control system may not function correctly. When replacing the tires or wheels, contact your Lexus dealer.
BRAKE SYSTEM
This brake system has 2 independent hydraulic circuits. If either circuit should fail, the other will still work. However, the pedal will be harder to press, and your stopping distance will increase. Also, the brake system warning light may come on.
CAUTION Do not drive your vehicle with only a single brake system. Have your brakes fixed immediately.
Brake booster
The brake booster uses brake fluid pressurized by the pump to power-assist the brakes. If the brake booster fails during driving, the brake system warning light comes on and buzzer sounds continuously. In this case, the brakes may not work properly. If they do not work well, depress the brake pedal firmly. If the brake system warning light comes on, immediately stop your vehicle and contact your Lexus dealer.
The brake system warning light may stay on for about 60 seconds after the ignition key is turned to the “ON” position. It is normal if the light turns off after a while.
Depressing the brake pedal repeatedly may turn on the brake system warning light and buzzer. It is normal if the light goes out and the buzzer stops sounding after a few seconds.
196
STARTING AND DRIVING
You may hear a small sound in the engine compartment after the engine is started or the brake pedal is depressed repeatedly. This is a pump pulsating sound of the brake system, and it is not a malfunction.
CAUTION
- Do not pump the brake pedal if the engine stalls. Each push on the pedal uses up your brake fluid pressure reserve.
- Even if the power assist is completely lost, the brakes will still work. But you will have to push the pedal hard, much harder than normal. And your braking distance will increase.
Anti-lock brake system
The anti-lock brake system is designed to automatically help prevent lock-up of the wheels during a sudden braking or braking on slippery road surfaces. This assists in providing directional stability and steering performance of the vehicle under these circumstances.
Effective way to press the ABS brake pedal: When the anti-lock brake system function is in action, you may feel the brake pedal pulsating and hear a noise. In this situation, to let the anti-lock brake system work for you, just hold the brake pedal down more firmly. Do not pump the brake in a panic stop. This will result in reduced braking performance.
The anti-lock brake system becomes operative after the vehicle has accelerated to a speed in excess of approximately 10 km/h (6 mph). It stops operating when the vehicle decelerates to a speed below approximately 5 km/h (3 mph).
Depressing the brake pedal on slippery road surfaces such as on a manhole cover, a steel plate at a construction site, joints in a bridge, etc. on a rainy day tends to activate the anti-lock brake system.
You may hear a click or motor sound in the engine compartment for a few seconds when the engine is started or just after the vehicle begins to move. This means that the anti-lock brake system is in the self-check mode, and does not indicate a malfunction.
When the anti-lock brake system is activated, the following conditions may occur. They do not indicate a malfunction of the system:
- You may hear the anti-lock brake system operating and feel the brake pedal pulsating and the vibrations of the vehicle body and steering wheel. You may also hear the motor sound in the engine compartment even after the vehicle is stopped.
- At the end of the anti-lock brake system activation, the brake pedal may move a little forward.
197
STARTING AND DRIVING
⚠ CAUTION Do not overestimate the anti-lock brake system: Although the anti-lock brake system assists in providing vehicle control, it is still important to drive with all due care and maintain a moderate speed and safe distance from the vehicle in front of you, because there are limits to the vehicle stability and effectiveness of steering wheel operation even with the anti-lock brake system on.
If tire grip performance exceeds its capability, or if hydroplaning occurs during high speed driving in the rain, the anti-lock brake system does not provide vehicle control.
Anti-lock brake system is not designed to shorten the stopping distance: Always drive at a moderate speed and maintain a safe distance from the vehicle in front of you. Compared with vehicles without an anti-lock brake system, your vehicle may require a longer stopping distance in the following cases: • Driving on rough, gravel or snow-covered roads. • Driving with tire chains installed.
• Driving over the steps such as the joints on the road. • Driving on roads where the road surface is pitted or has other differences in surface height.
Install all 4 tires of specified size at appropriate pressure: The anti-lock brake system detects vehicle speeds using the speed sensors for respective wheels' turning speeds. The use of tires other than specified may fail to detect the accurate turning speed resulting in a longer stopping distance.
198
STARTING AND DRIVING
"ABS" warning light
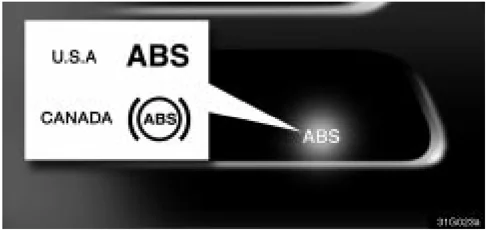
The light comes on when the ignition key is turned to the “ON” position. If the anti-lock brake system and the brake assist system work properly, the light turns off after a few seconds. Thereafter, if either of the systems malfunctions, the light comes on again.
When the “ABS” warning light is on (and the brake system warning light is off), the anti-lock brake system, the brake assist system, the traction control system and/or the vehicle stability control system do/does not operate, but the brake system still operates conventionally.
When the “ABS” warning light is on (and the brake system warning light is off), the anti-lock brake system does not operate so that the wheels could lock up during a sudden braking or braking on slippery road surfaces.
If either of the following conditions occur, this indicates a malfunction somewhere in the components monitored by the warning light system. Contact your Lexus dealer as soon as possible to service the vehicle.
- The light does not come on when the ignition key is turned to the “ON” position, or remains on.
- The light comes on while you are driving.
A warning light turning on briefly during operation does not indicate a problem.
CAUTION
If the “ABS” warning light remains on together with the brake system warning light, immediately stop your vehicle at a safe place and contact your Lexus dealer.
In this case, not only the anti-lock brake system will fail but also the vehicle will become extremely unstable during braking.
Either of the following conditions may occur, but do not indicate a malfunction:
- The light may stay on for about 60 seconds after the ignition key is turned to the “ON” position. It is normal if it turns off after a while.
- Depressing the brake pedal repeatedly may turn on the light. It is normal if it turns off after a few seconds.
199

STARTING AND DRIVING
Drum-in-disc type parking brake system Your vehicle has a drum-in-disc type parking brake system. This type of brake system needs bedding-down of the brake shoes periodically or whenever the parking brake shoes and/or drums are replaced.
Have your Lexus dealer perform the bedding-down.
Brake assist system When you slam the brakes on, the brake assist system judges as an emergency stop and provides more powerful braking for a driver who cannot hold down the brake pedal firmly.
When you slam the brakes on, more powerful braking will be applied. At this time, you may hear a sound in the engine compartment and feel the vibrations of the brake pedal. This does not indicate a malfunction.
The brake assist system becomes operative after the vehicle has accelerated to a speed in excess of approximately 10 km/h (6 mph). It stops operating when the vehicle decelerates to a speed below approximately 5 km/h (3 mph).
The brake assist system may not work for about 60 seconds after the engine is started.
For an explanation of this system's warning light, see "ABS" warning light on page 47 or 199.
BRAKE PAD WEAR LIMIT INDICATORS
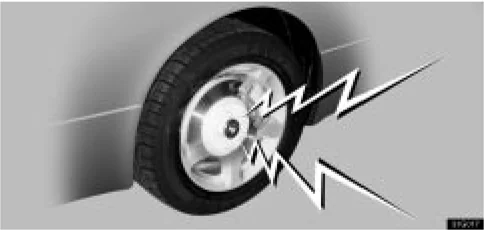
The brake pad wear limit indicators on your disc brakes give a warning noise when the brake pads are worn to the extent that replacement is required.
If you hear a squealing or scraping noise while driving, have the brake pads checked and replaced by your Lexus dealer as soon as possible. Expensive rotor damage can result if the pads are not replaced when needed.
200
STARTING AND DRIVING
TYPES OF TIRES
Determine what kind of tires your vehicle is originally equipped with.
- Summer tires
Summer tires are high-speed capability tires best suited to highway driving under dry conditions.
Since summer tires do not have the same traction performance as snow tires, summer tires are inadequate for driving on snow-covered or icy roads. For driving on snow-covered or icy roads, we recommend using snow tires. If installing snow tires, be sure to replace all four tires.
- All season tires
All season tires are designed to provide better traction in snow and to be adequate for driving in most winter conditions, as well as for use all year round.
All season tires, however, do not have adequate traction performance compared with snow tires in heavy or loose snow. Also, all season tires fall short in acceleration and handling performance compared with summer tires in highway driving.
⚠ CAUTION
- Do not mix summer and all season tires on your vehicle as this can cause dangerous handling characteristics, resulting in loss of control.
- Do not use tires other than the manufacturer's designated tires, and never mix tires or wheels of the sizes different from the originals.
201
202
SECTION 3 – 2
STARTING AND DRIVING
Driving tips
- Break-in period . . . . . . . . . . . . . . . . . . . . . . . . . . . . . . . . . . . . . . . . . . . . . . . . . . . . . . . . . . . . . . . . . . . . . . . . . . . . . . . . . . . . . . . . . . . . . . . . . . . . . . . . . . . . . . . . . . . . . . . . . . . . . . . . . . . . . . . . . . . . . . . . . . . . . . . . . . . . . . . . . . . . . . . . . . . . . . . . . . . . . . . . . . . . . . . . . . . . . . . . . . . . . . . . . . . . . . . . . . . . . ........ 204
- Operation in foreign countries . . . . . . . . . . . . . . . . . . . . . . . . . . . . . . . . . . . . . . . . . . . . . . . . . . . . . . . . . . . . . . . . . . . . . . . . . . . . . . . . . . . . . . . . . . . . . . . . . . . . . . . . . . . ........ 204
- Tips for driving in various conditionss . . . . . . . . . . . . . . . . . . . . . . . . . . . . . . . . . . . . . . . . . . . . . . . . . . . . . . . . . . . . . . . . . . . . . . . . . . . . . . . . . . . . . . . . . . . . . . . . . . . . . . . . ........

DRIVING TIPS
BREAK-IN PERIOD
Drive gently and avoid high speeds.
You need not follow a break-in schedule with your new Lexus. But following a few simple tips for the first 1600 km (1000 miles) can add to the future economy and long life of your vehicle:
- Avoid full throttle acceleration when starting and driving.
- Avoid racing the engine.
- Try to avoid hard stops during the first 300 km (200 miles).
- Do not drive for a long time at any single speed, either fast or slow.
OPERATION IN FOREIGN COUNTRIES
If you plan to drive your Lexus in another country ...
First, comply with the vehicle registration laws.
Second, confirm the availability of the correct fuel (unleaded and minimum octane rating).
TIPS FOR DRIVING IN VARIOUS CONDITIONS
- Always slow down in gusty crosswinds. This will allow you much better control.
- Drive slowly onto curbs and, if possible, at a right angle. Avoid driving onto high, sharp-edged objects and other road hazards. Failure to do so can lead to severe tire damage such as a tire burst. Drive slowly when passing over bumps or travelling on a bumpy road. Otherwise, the impact could cause severe damage to the tires and/or wheels.
- When parking on a hill, turn the front wheels until they touch the curb so that the vehicle will not roll. Apply the parking brake, and place the transmission in "P". If necessary, block the wheels.
- Washing your vehicle or driving through deep water may get the brakes wet. To see whether they are wet, check that there is no traffic near you and then press the pedal lightly. If you do not feel a normal braking force, the brakes are probably wet. To dry them, drive the vehicle cautiously while lightly pressing the brake pedal with the parking brake applied. If they still do not work safely, pull to the side of the road and call a Lexus dealer for assistance.
204
DRIVING TIPS
CAUTION
-
Before driving off, make sure the parking brake is fully released and that the parking brake reminder light is off.
-
Do not leave your vehicle unattended while the engine is running.
-
Do not rest your foot on the brake pedal while driving. It can cause dangerous overheating, needless wear, and poor fuel economy.
-
To drive down a long or steep hill, reduce your speed and downshift. Remember, if you ride the brakes excessively, they may overheat and not work properly. See page 186.
-
Be careful when accelerating, upshifting, downshifting or braking on a slippery surface. The abrupt change in engine speed, such as sudden acceleration or engine braking, could cause the vehicle to spin or skid.
-
Even if the legal speed limit permits it, do not drive over 140 km/h (85 mph) unless your vehicle has high-speed capability tires. Driving over 140 km/h (85 mph) may result in tire failure, loss of control and possible injury. Be sure to consult a tire dealer to determine whether the tires on your vehicle are high-speed capability tires or not before driving at such speeds.
-
Do not continue normal driving when the brakes are wet. If they are wet, your vehicle will require a longer stopping distance, and it may pull to one side when the brakes are applied. Also, the parking brake will not hold the vehicle securely.
205
DRIVING TIPS
WINTER DRIVING TIPS
Make sure your coolant is properly protected against freezing.
Your coolant must contain ethylene–glycol type coolant for a proper corrosion protection of aluminum components. Use "Toyota Genuine Long Life Coolant" or equivalent. See "Checking the engine coolant level" on page 264 for instructions.
NOTICE Do not use alcohol type antifreeze or plain water alone.
When it is extremely cold, we recommend to use 60% solution for your Lexus, to provide protection down to about –50°C (–58°F). Do not use more than 70% solution for better coolant performance.
Check the condition of the battery and cables.
Cold temperatures reduce the capacity of any battery, so it must be in top shape to provide enough power for winter starting. Page 296 tells you how to visually inspect the battery. Your Lexus dealer and most service stations will be pleased to check the battery charge level.
Make sure the engine oil viscosity is suitable for the cold weather.
See page 263 for recommended viscosity. Leaving a heavy summer oil in your vehicle during winter months may cause harder starting. If you are not sure about which oil to use, call your Lexus dealer – they will be pleased to help.
Check the electronic ignition system for loose connections or obvious damage.
Keep the door locks from freezing.
Squirt lock de-icer or glycerine into the locks to keep them from freezing.
Use a washer fluid containing an antifreeze solution.
This product is available at your Lexus dealer and most auto parts stores. Follow the manufacturer's directions for how much to mix with water.
NOTICE Do not use engine antifreeze or any other substitute because it may damage your vehicle’s paint.
Do not use your parking brake when there is a possibility it could freeze.
When parking, put the transmission into "P" and block the front wheels. Do not use the parking brake, or snow or water accumulated in and around the parking brake mechanism may freeze the parking brake, making it hard to release.
Keep ice and snow from accumulating under the fenders.
Ice and snow built up under your fenders can make steering difficult. During bad winter driving, stop and check under the fenders occasionally.
206
Depending on where you are driving, we recommend you carry some emergency equipment.
Some of the things you might put in the vehicle are tire chains, window scraper, bag of sand or salt, flares, small shovel, jumper cables, etc.
DINGHY TOWING
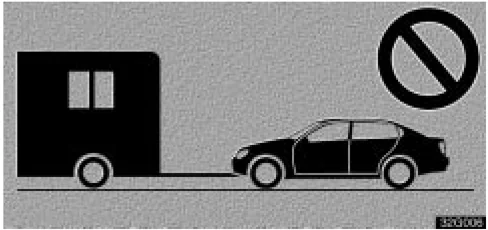
Your vehicle is not designed to be dinghy towed (with four wheels on the ground) behind a motorhome.
NOTICE Do not tow your vehicle with four wheels on the ground. This may cause serious damage to your vehicle.
TRAILER TOWING
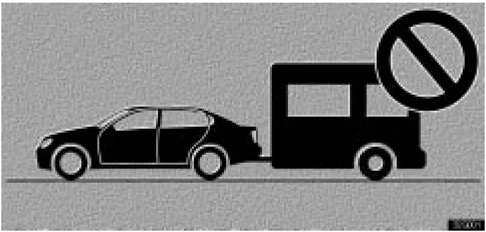
Lexus does not recommend towing a trailer with your vehicle. It is not designed for trailer towing.
DRIVING TIPS
HOW TO SAVE FUEL AND MAKE YOUR VEHICLE LAST LONGER
Improving fuel economy is easy – just take it easy. It will help make your vehicle last longer, too. Here are some specific tips on how to save money on both fuel and repairs:
- Keep your tires inflated at the correct pressure. Check the pressure every two weeks, or at least once a month. Underinflation causes tire wear and wastes fuel.
- Do not carry unneeded weight in your vehicle. Excess weight puts a heavier load on the engine, causing greater fuel consumption.
- Avoid lengthy warm-up idling. Once the engine is running smoothly, begin driving – but gently. Remember, however, that on cold winter days this may take a little longer.
- Accelerate slowly and smoothly. Avoid jackrabbit starts.
- Avoid long engine idling. If you have a long wait and you are not in traffic, it is better to turn off the engine and start again later.
- Avoid engine over-revving. Use a gear position suitable for the road on which you are traveling.
- Avoid continuous speeding up and slowing down. Stop-and-go driving wastes fuel.
- Avoid unnecessary stopping and braking. Maintain a steady pace. Try to time the traffic signals so you only need to stop as little as possible or take advantage of through streets to avoid traffic lights. Keep a proper distance from other vehicles to avoid sudden braking. This will also reduce wear on your brakes.
- Avoid heavy traffic or traffic jams whenever possible.
- Do not rest your foot on the brake pedal. This causes premature wear, overheating and poor fuel economy.
- Maintain a moderate speed on highways. The faster you drive, the greater the fuel consumption. By reducing your speed, you will cut down on fuel consumption.
- Keep the front wheels in proper alignment. Avoid hitting the curb and slow down on rough roads. Improper alignment not only causes faster tire wear but also puts an extra load on the engine, which, in turn, wastes fuel.
- Keep the bottom of your vehicle free from mud, etc. This not only lessens weight but also helps prevent corrosion.
- Keep your vehicle tuned-up and in top shape. A dirty air cleaner, improper valve clearance, dirty plugs, dirty oil and grease, brakes not adjusted, etc. all lower engine performance and contribute to poor fuel economy. For longer life of all parts and lower operating costs, keep all maintenance work on schedule, and if you often drive under severe conditions, see that your vehicle receives more frequent maintenance (For scheduled maintenance information, please refer to the “Owner’s Manual Supplement / Scheduled Maintenance”.)
208
DRIVING TIPS
CAUTION Never turn off the engine to coast down hills. Your power steering and brake booster will not function without the engine running. Also, the emission control system operates properly only when the engine is running.
209
210
SECTION 4
IN CASE OF AN EMERGENCY
In case of an emergency
- If your engine stalls while driving . . . . . . . . . . . . . . . . . . . . . . . . . . . . . . . . . . . . . . . . . . . . . . . . . . . . . . . . . . . . . . . . . . . . . . . . . . . . . . . . . . . . . . . . . . . . . . . . . . . . . . . . . . . . . . . . . . . . . . . . . . . . . . . . . . . . . . . . . . . . . . . . . . . . . . . . . . . . . . . . . . . . . . . . . . . . . . . . . . . . . . . . . . . . . . . . . . . . . . . . . . . . . . . . ........ 212
- If your vehicle will not start . . . . . . . . . . . . . . . . . . . . . . . . . . . . . . . . . . . . . . . . . . . . . . . . . . . . . . . . . . . . . . . . . . . . . . . . . . . . . . . . . . . . . . . . . . . . . . . . . . . . . . . . . . . . . ........ 212
- If you cannot increase the engine speed . . . . . . . . . . . . . . . . . . . . . . . . . . . . . . . . . . . . . . . . . . . . . . . . . . . . . . . . . . . . . . . . . . . . . . . . . . . . . . . . . . . . . . . . . . . . . . . . . . . . . . . . . . ........

IN CASE OF AN EMERGENCY
IF YOUR ENGINE STALLS WHILE DRIVING
If your engine stalls while driving . . . .
- Reduce your speed gradually, keeping a straight line. Move cautiously off the road to a safe place.
- Turn on your emergency flashers.
- Try starting the engine again.
If the engine will not start, see "If your vehicle will not start".
CAUTION If the engine is not running, the power assist for the brakes and steering will not work, so steering and braking will be much harder than usual.
IF YOUR VEHICLE WILL NOT START
(a) Simple checks
Before making these checks, make sure you have followed the correct starting procedure instructions in "How to start the engine" on page 180 and that you have sufficient fuel. Since your vehicle is equipped with the engine immobiliser system, also check whether the other keys will start the engine. If they work, your key may be broken. Have the key checked at your Lexus dealer. If none of your keys work, there may be a malfunction in the immobiliser system. Call your Lexus dealer. See "Keys" on page 8.
If the engine is not turning over or is turning over too slowly –
- Check that the battery terminals are tight and clean.
- If the battery terminals are O.K., switch on the interior light.
- If the light is out, dim or goes out when the starter is cranked, the battery is discharged. You may try jump starting. See "(c) Jump starting" for further instruction.
If the light is O.K., but the engine still will not start, it needs adjustment or repair. Call a Lexus dealer, Roadside Assistance or Customer Service Assistance. (See "Foreword".)
212
IN CASE OF AN EMERGENCY
NOTICE Do not pull- or push-start the vehicle. It may damage the vehicle or cause a collision when the engine starts. Also the three-way catalytic converter may overheat and become a fire hazard.
If the engine turns over at its normal speed but will not start –
- The engine may be flooded because of repeated cranking. See "(b) Starting a flooded engine" for further instructions.
- If the engine still will not start, it needs adjustment or repair. Call a Lexus dealer, Roadside Assistance or Customer Service Assistance. (See "Foreword".)
(b) Starting a flooded engine
If the engine will not start, your engine may be flooded because of repeated cranking.
If this happens, turn the key to "START" with the accelerator pedal fully depressed. Continue this operation for 30 seconds and then stop cranking. Then try starting the engine with your foot off the accelerator pedal.
If the engine does not start after 30 seconds of cranking, release the key, wait a few minutes and try again.
If the engine still will not start, it needs adjustment or repair. Call a Lexus dealer, Roadside Assistance or Customer Service Assistance. (See "Foreword".)
NOTICE Do not crank for more than 30 seconds at a time. This may overheat the starter and wiring systems.
213
IN CASE OF AN EMERGENCY
(c) Jump starting
To avoid serious personal injury and damage to your vehicle which might result from battery explosion, acid burns, electrical burns, or damaged electronic components, these instructions must be followed precisely.
If you are unsure about how to follow this procedure, we strongly recommend that you seek help from your Lexus dealer, Roadside Assistance or Customer Service Assistance. (See "Foreword".).
CAUTION
-
Batteries contain sulfuric acid which is poisonous and corrosive. Wear protective safety glasses when jump starting, and avoid spilling acid on your skin, clothing, or vehicle.
-
If you should accidentally get acid on yourself or in your eyes, remove any contaminated clothing and flush the affected area with water immediately. Then get immediate medical attention. If possible, continue to apply water with a sponge or cloth while en route to the medical office.
-
The gas normally produced by a battery will explode if a flame or spark is brought near. Use only standardized jumper cables and do not smoke or light a match while jump starting.
-
Warning: Battery posts, terminals and related accessories contain lead and lead compounds, chemicals known to the State of California to cause cancer and reproductive harm. Wash hands after handling.
NOTICE
The battery used for boosting must be 12 V. Do not jump start unless you are sure that the booster battery is correct.
214
IN CASE OF AN EMERGENCY
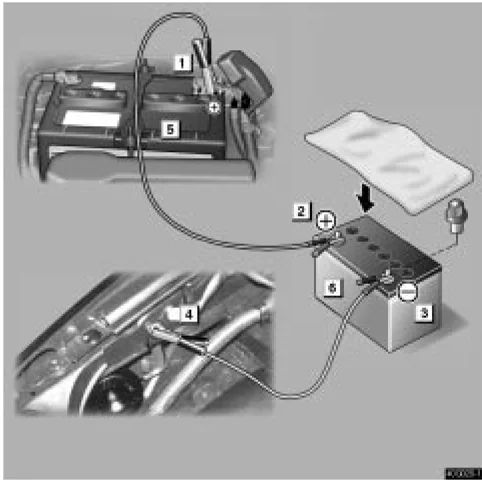
►GS430 5 Discharged battery 6 Booster battery
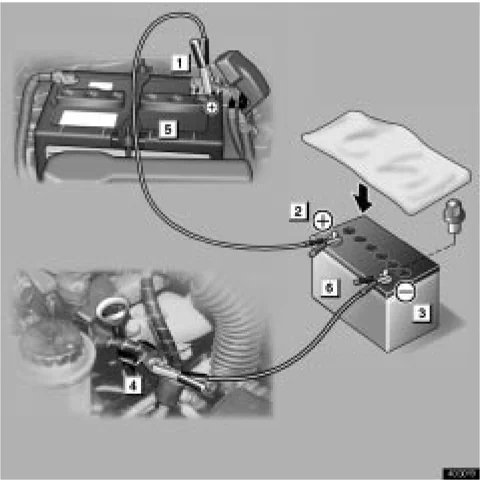
►GS300 5 Discharged battery 6 Booster battery JUMP STARTING PROCEDURE
- If the booster battery is installed in another vehicle, make sure the vehicles are not touching. Turn off all unnecessary lights and accessories.
215
IN CASE OF AN EMERGENCY
- If required, remove all the vent plugs from the booster battery. Lay a cloth over the open vents on the booster battery. (This helps reduce the explosion hazard, personal injuries and burns.)
If the booster battery is an extended maintenance interval battery, it is not necessary to remove the vent plugs.
-
If the engine in the vehicle with the booster battery is not running, start it and let it run for about 5 minutes. During jump starting, run the engine at about 2000 rpm with the accelerator pedal lightly depressed.
-
Locate positive (+) and negative (-) terminals of each battery. Connect the jumper cables in the exact order ( 1 2 3 4 ) shown in the illustration.
1 Connect a positive (red) jumper cable clamp to the positive (+) terminal of the discharged battery.
2 Connect the clamp at the other end of the positive (red) cable to the positive (+) terminal of the booster battery.
3 Connect a negative (black) cable clamp to the negative (-) terminal of the booster battery.
4 Connect the clamp at the other end of the negative (black) cable to a solid, stationary, unpainted metallic point (such as shown in the illustration) away from the battery. Do not connect it to or near any part that moves when the engine is cranked.

CAUTION When making the connections, to avoid serious injury, do not lean over the battery or accidentally let the jumper cables or clamps touch anything except the correct battery terminals or the ground.
-
Start your engine in the normal way. After starting, run it at about 2000 rpm for several minutes with the accelerator pedal lightly depressed.
-
Carefully disconnect the cables in the exact reverse order: the negative cable and then the positive cable.
-
Carefully dispose of the battery cover cloths which may now contain sulfuric acid.
-
If removed, replace all the battery vent plugs.
If the cause of your battery discharging is not apparent (for example, lights left on), you should have it checked at your Lexus dealer.
216
IN CASE OF AN EMERGENCY
IF YOU CANNOT INCREASE THE ENGINE SPEED
If the engine speed does not increase when the accelerator pedal is depressed, the electronic throttle control system may be faulty. Move the vehicle to a safe place by means of creeping and call a Lexus dealer for assistance:
- Depress the brake pedal and shift to the “D” position.
- Gradually release the brake pedal, and the vehicle starts to move by creeping. After arriving at a safe place, stop the vehicle and call a Lexus dealer for assistance.
CAUTION
- The above method of moving the vehicle is for emergency. Use it only for moving minimum distances to a safe place.
- Be especially careful to prevent erroneous pedal operation.
IF YOUR VEHICLE OVERHEATS
If your engine coolant temperature gauge indicates overheating, if you experience a loss of power, or if you hear a loud knocking or pinging noise, the engine has probably overheated.
When the engine overheats
Pull safely off the road, stop the vehicle and turn on your emergency flashers. Put the transmission in "P" and apply the parking brake.
A: If steam is coming from your engine:
Turn off the engine. Leave the hood closed until there is no sign of steam or coolant. Your engine could have been seriously damaged already. Call your Lexus dealer for assistance.
CAUTION
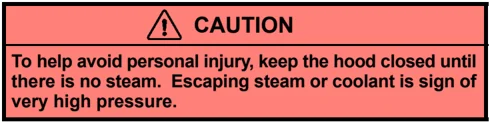
To help avoid personal injury, keep the hood closed until there is no steam. Escaping steam or coolant is sign of very high pressure.
217
IN CASE OF AN EMERGENCY
B: If no steam is coming from your engine: Leave the engine running and turn off the air conditioning. Check the following.
- Is the cooling fan operating?
- Is the coolant in the acceptable range?
- Is the engine drive belt O.K.?
CAUTION
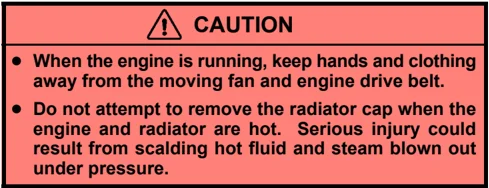
- When the engine is running, keep hands and clothing away from the moving fan and engine drive belt.
- Do not attempt to remove the radiator cap when the engine and radiator are hot. Serious injury could result from scalding hot fluid and steam blown out under pressure.
If the cooling fan is not operating or the coolant is not in the acceptable range, turn off the engine and call your Lexus dealer.
If both conditions are O.K., after the engine coolant temperature has cooled to normal, continue driving your vehicle.
If the engine coolant temperature does not cool down, or your vehicle overheats again, have it checked as soon as possible by your Lexus dealer.
218
IF YOU HAVE A FLAT TIRE
- Reduce your speed gradually, keeping a straight line. Move cautiously off the road to a safe place – well away from the traffic. Avoid stopping on the center divider of a highway. Park on a level spot with firm ground.
- Stop the engine and turn on your emergency flashers.
- Firmly set the parking brake and put the transmission in "P".
- Have everyone get out of the vehicle on the side away from traffic.
- Read the following instructions thoroughly.
CAUTION
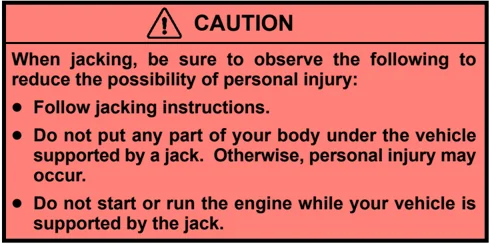
When jacking, be sure to observe the following to reduce the possibility of personal injury:
- Follow jacking instructions.
- Do not put any part of your body under the vehicle supported by a jack. Otherwise, personal injury may occur.
- Do not start or run the engine while your vehicle is supported by the jack.
IN CASE OF AN EMERGENCY
- Stop the vehicle on a level firm ground, firmly set the parking brake and put the transmission in "P". Block the wheel diagonally opposite to the one being changed if necessary.
- Make sure to set the jack properly in the jack point. Raising the vehicle with jack improperly positioned will damage the vehicle or may allow the vehicle to fall off the jack and cause personal injury.
- Never get under the vehicle when the vehicle is supported by the jack alone.
- Use the jack only for lifting your vehicle during wheel changing.
- Do not raise the vehicle with someone in the vehicle.
- When raising the vehicle, do not put an object on or under the jack.
- Raise the vehicle only high enough to remove and change the tire.
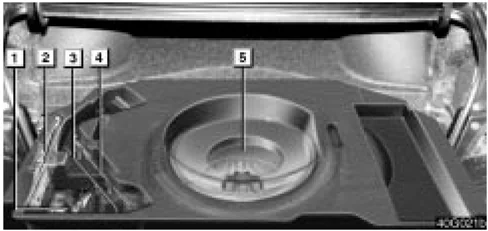
1 Tool bag 2 Jack 3 Wrench 4 Jack handle 5 Spare tire
- Get the jack, wrench and spare tire.
To prepare yourself for an emergency, you should familiarize yourself with the use of the jack and each tool, and their storage locations.
NOTICE Do not continue driving with a deflated tire. Driving even a short distance can damage a tire and wheel beyond repair.
219