GAUGES, METERS AND SERVICE REMINDER INDICATORS
CALIBRATING THE COMPASS
The direction display on the compass deviates from the true direction determined by the earth’s magnetic field. The amount of deviation varies according to the geographic position of the vehicle.
To adjust for this deviation, stop the vehicle and with the ignition on, push the “ODO/TRIP” button together with the “RESET” button for longer than 3 seconds until the number (1–15) appears on the display. Then push the “RESET” button, referring to the following map to select the number of the zone where the vehicle is.
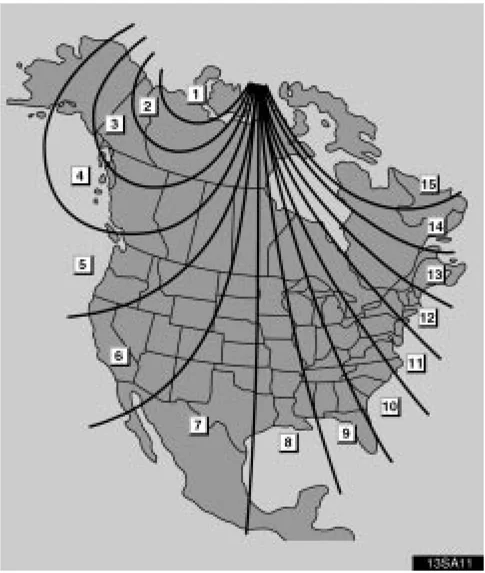
►Zone number
56
GAUGES, METERS AND SERVICE REMINDER INDICATORS
| Other Areas | Zone Number |
|---|---|
| A. Samoa | 7 |
| Hawaii | 7 |
| Guam | 9 |
| Saipan | 9 |
| Puerto Rico | 11 |

CAUTION
Do not adjust the display while the vehicle is moving.
Be sure to adjust the display only when the vehicle is stopped.
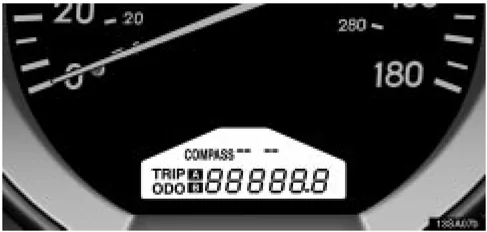
After you select the zone number, push the “ODO/TRIP” button. “—” blinks on the display. Then perform the circling calibration according to the following procedure.
2003 SC430 from May ’03 Prod. (OM24449U)
57
GAUGES, METERS AND SERVICE REMINDER INDICATORS
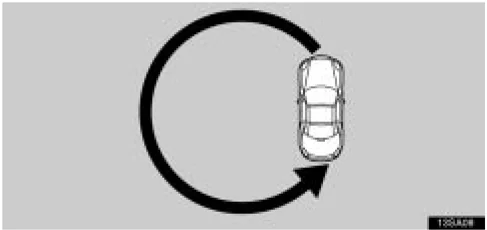
Drive the vehicle slowly (at 8 km/h (5 mph) or lower) in a circle until the direction is displayed. If there is not enough space to drive in a circle, drive around the block until the direction is displayed.
After driving in 1 to 3 circles in the above method, calibration is complete with the direction shown on the display.
If calibration cannot be performed because of the vehicle is magnetized, take your vehicle to a Lexus dealer.
If you want to cancel the calibration before it is complete, push the “ODO/TRIP” button while “—” is blinking on the display.
- Do not perform circling calibration of the compass in a place where the earth’s magnetic field is subject to interference by artificial magnetic fields (underground parking, under a steel tower, between buildings, roof parking, near a crossing, near a large vehicle, etc.).
- During calibration, do not operate electric systems (retractable hardtop, power windows, etc.) as they may interfere with the calibration.
CAUTION
- When doing the circling calibration, be sure to secure a wide space, and watch out for people and vehicles in the neighborhood. Do not violate any local traffic rules while performing circling calibration.
- Do not adjust the display while the vehicle is moving. Be sure to adjust the display only when the vehicle is stopped.
58
GAUGES, METERS AND SERVICE REMINDER INDICATORS
INSTRUMENT PANEL LIGHT CONTROL
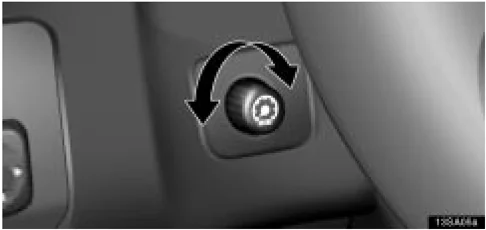
To adjust the brightness of the instrument panel lights, turn the knob.
When the headlight switch is in the first or second click stop, you can also adjust the brightness of the displays on the audio and air conditioning systems using this knob.
59
60
SECTION 1 – 4
INSTRUMENTS AND CONTROLS
Interior equipment
- Vanity mirrors . . . . . . . . . . . . . . . . . . . . . . . . . . . . . . . . . . . . . . . . . . . . . . . . . . . . . . . . . . . . . . . . . . . . . . . . . . . . . . . . . . . . . . . . . . . . . . . . . . . . . . . . . . . . . . . . . . . . . . . . . . . . . . . . . . . . . . . . . . . . . . . . . . . . . . . . . . . . . . . . . . . . . . . . . . . . . . . . . . . . . . . . . . . . . . . . . . . . . . . . . . . . . . . . . . . . . . . . ........ 62
- Interior light . . . . . . . . . . . . . . . . . . . . . . . . . . . . . . . . . . . . . . . . . . . . . . . . . . . . . . . . . . . . . . . . . . . . . . . . . . . . . . . . . . . . . . . . . . . . . . . . . . . . . . . . . . . . . . . . . . . . . . ........ 63
- Personal lights . . . . . . . . . . . . . . . . . . . . . . . . . . . . . . . . . . . . . . . . . . . . . . . . . . . . . . . . . . . . . . . . . . . . . . . . . . . . . . . . . . . . . . . . . . . . . . . . . . . . . . . . . . . . . . . . . . . . . . ........

INTERIOR EQUIPMENT
VANITY MIRRORS
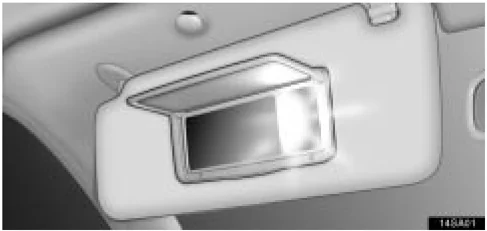
To use the vanity mirrors, swing the sun visor down and open the cover.
The vanity light comes on when you open the cover.
Sun visors
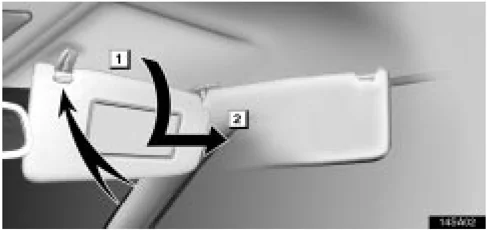
[1] To block out glare from the front, swing the sun visor down.
[2] To block out glare from the side, remove the sun visor from the hook and swing it to the side.
At this position, the vanity light may not come on.
INTERIOR EQUIPMENT
INTERIOR LIGHT
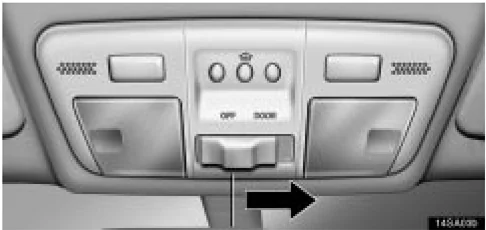
To turn on the interior light, slide the switch.
With the switch in the "DOOR" position, the light comes on when either of the side doors is opened. After both doors are closed, the light remains on for about 15 seconds and then goes out.
However, in the following cases, the light goes out immediately:
- Both doors are closed when the ignition switch is in "ACC" or "ON" position.
- The ignition switch is turned to "ACC" or "ON" when the light is still on.
- Both doors are locked when the light is still on.
- One door is closed with the lock button pushed in while the other door is locked.
PERSONAL LIGHTS
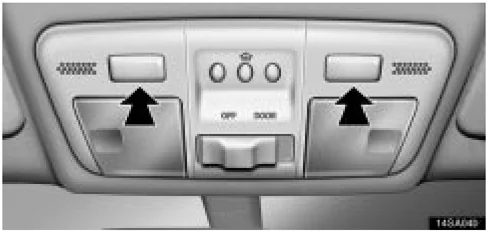
To turn on the personal light, push the switch. To turn it off, push the switch again.
INTERIOR EQUIPMENT
IGNITION SWITCH LIGHT
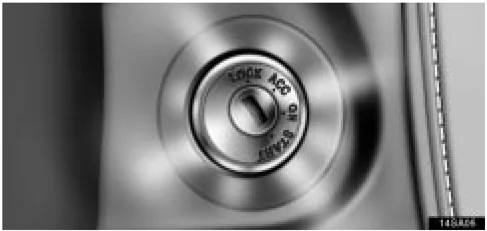
For easy access to the ignition switch, the ignition switch light comes on when either of the side doors is opened.
The light remains on for about 15 seconds and goes out after both side doors are closed. However, the light goes out immediately when both doors are locked or the ignition switch is in the "ACC" or "ON" position.
CLOCK
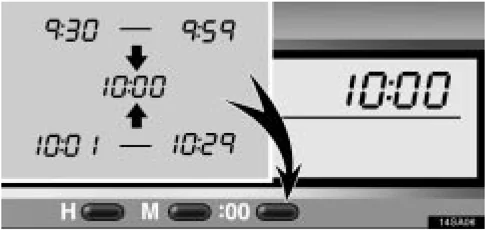
The digital clock indicates the time on the automatic air conditioning control panel. To reset the hour, press the "H" button. To reset the minutes, press the "M" button. To adjust the time to the nearest hour, press the ":00" button.
For example, if the ":00" button is pressed when the time is between 9:30 – 9:59 or between 10:01 – 10:29, the time will change to 10:00.
With the tail lights on, the background brightness of the time indication will be reduced.
If the electrical power source has been disconnected from the clock, the time display will automatically be set to 1:00 (one o’clock).
64
INTERIOR EQUIPMENT
CIGARETTE LIGHTER AND ASHTRAY
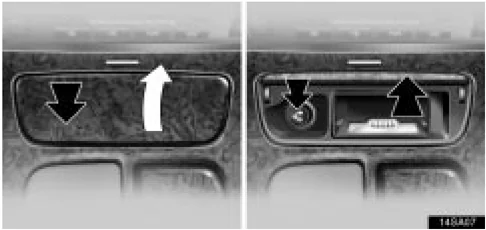
To use the cigarette lighter and ashtray, first push against the ashtray cover. Then when the ashtray opens out, press in the cigarette lighter. After it finishes heating up, it automatically pops out ready for use.
Do not hold the cigarette lighter pressed in.
If the engine is not running, the ignition switch must be in the "ACC" position to use the lighter.
When finished with your cigarette, thoroughly extinguish it in the ashtray to prevent other cigarette butts from catching fire. After using the ashtray, push it back in completely.
To remove the ashtray, pull it out.
Use a Lexus genuine cigarette lighter or equivalent for replacement.
CAUTION To reduce the chance of injury in case of an accident or sudden stop while driving, always close the ashtray completely after use.
65

INTERIOR EQUIPMENT
REAR CONSOLE BOX
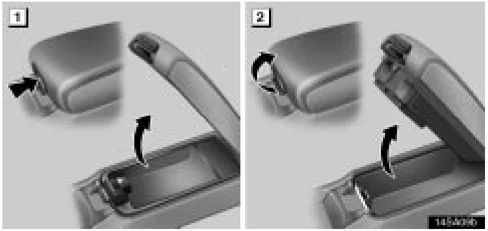
► 1 For upper tray 2 For lower box To use the rear console box, open as shown in the illustration.
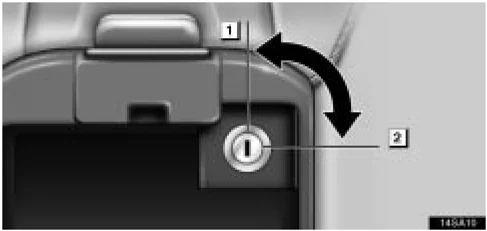
► 1 Unlock 2 Lock To lock the lower box, insert the master key and turn it clockwise.
A loop of wire for unlocking the trunk lid is located in the lower box. When keeping items in the trunk, be sure to turn off the trunk lid opener main switch and lock the glove box and rear console box.
To turn off the trunk lid opener main switch, see page 86. For locking the glove box, see page 68.
⚠ CAUTION To reduce the chance of injury in case of an accident or a sudden stop, always keep the console box lid closed while driving.
66
INTERIOR EQUIPMENT
POWER OUTLET
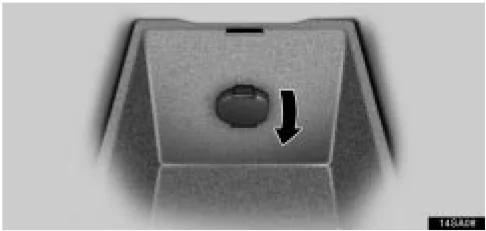
The power outlet located in the lower box contained in the rear console box is designed for power supply for car accessories.
The ignition switch must be in the "ACC" or "ON" position for the power outlet to be used.
- Close the power outlet lid when the power outlet is not in use. Inserting a foreign object other than the appropriate plug that fits the outlet, or allowing any liquid into the outlet may cause electrical failure or short circuits.
NOTICE
- To prevent the fuse from being blown, do not use the electricity over the total vehicle capacity of 12V 10A.
- To prevent the battery from being discharged, do not use the power outlet longer than necessary when the engine is not running.
67
INTERIOR EQUIPMENT
AUXILIARY BOX
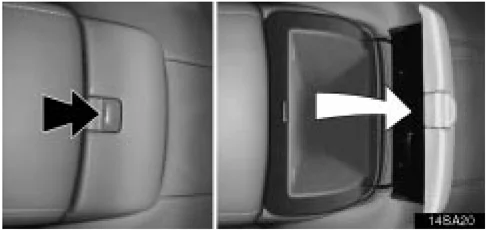
The auxiliary box is located behind the rear console box. To use the box, open the cover.
Do not keep the valuables in this box as it cannot be locked.
CAUTION To reduce the chance of injury in case of an accident or a sudden stop, always keep the auxiliary box closed while driving.
GLOVE BOX

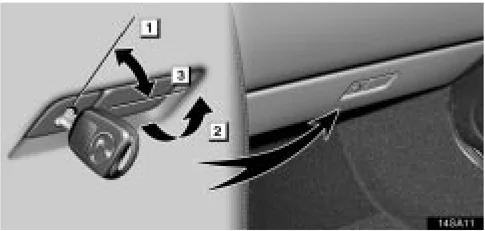
► 1 Unlock 2 Open 3 Lock
To open the glove box door, pull the lever. To lock the glove box door, insert the master key and turn it clockwise.
With the tail lights on, the glove box light will come on when the glove box door is open.
CAUTION To reduce the chance of injury in case of an accident or a sudden stop, always keep the glove box door closed while driving.
68
INTERIOR EQUIPMENT
The trunk lid opener main switch is located in the glove box. When keeping items in the trunk, be sure to turn off the main switch and lock the glove box and rear console box in which a loop of wire for unlocking the trunk lid is located. To turn off the trunk lid opener main switch, see page 86. For locking the rear console box, see page 66.
GARAGE DOOR OPENER
The garage door opener (HomeLink® Universal Transceiver) is manufactured under license from HomeLink® and can be programmed to operate garage doors, gates, entry doors, door locks, home lighting systems, and security systems, etc.
(a) Programming the HomeLink®
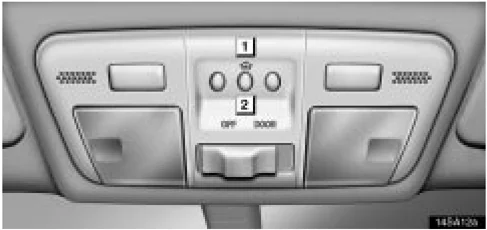
1 Indicator light 2 Buttons
The HomeLink® in your vehicle has 3 buttons and you can store one program for each button.
To ensure correct programming into the HomeLink®, install a new battery in the hand-held transmitter prior to programming.
69
INTERIOR EQUIPMENT
The battery side of the hand-held transmitter must be pointed away from the HomeLink® during the programming process. For Canadian users, follow the procedure in “Programming an entrance gate/Programming all devices in the Canadian market”.
- Decide which of 3 HomeLink® buttons you want to program.
- Place your hand-held garage transmitter 25 to 75 mm (1 to 3 in.) away from the surface of the HomeLink®. Keep the indicator light on the HomeLink® in view while programming.
- Simultaneously press and hold the hand-held garage transmitter button along with the selected HomeLink® button.
- When the indicator light on the HomeLink® changes from a slow to a rapid flash after 20 seconds, you can release both buttons.
- Test the operation of the HomeLink® by pressing the newly programmed button. If programming a garage door opener, check to see if the garage door opens and closes.
If the garage door does not operate, identify if your garage transmitter is of the “Rolling Code” type. Press and hold the programmed HomeLink® button. The garage door has the rolling code feature if the indicator light (on the HomeLink®) flashes rapidly and then remains lit after 2 seconds. If your garage transmitter is the “Rolling Code” type, proceed to the heading “Programming a rolling code system”. 6. Repeat steps 2 through 5 for each remaining HomeLink® button to program another device.
Programming a rolling code system If your device is “Rolling Code” equipped, it is necessary to follow steps 1 through 4 under the heading “Programming the HomeLink®” before proceeding with the steps listed below.
- Locate the “training” button on the ceiling mounted garage door opener motor. The exact location and color of the button may vary by brand of garage door opener. Refer to the owner’s guide supplied by the garage door opener manufacturer for the location of this “training” button.
- Press the “training” button on the ceiling mounted garage door opener motor. Following this step, you have 30 seconds in which to initiate step 3 below.
70
INTERIOR EQUIPMENT
- Press and release the vehicle’s programmed HomeLink® button twice. The garage door may open. If the door does open, the programming process is complete. If the door does not open, press and release the button a third time. This third press and release will complete the programming process by opening the garage door.
The ceiling mounted garage door opener motor should now recognize the HomeLink® unit and be able to activate the garage door up/down.
- Repeat steps 1 through 3 for each remaining HomeLink® button to program another rolling code system.
INFORMATION If you register a program in the HomeLink® using a “Rolling Code” type transmitter, the transmitter must be reprogrammed to use it again.
Programming an entrance gate / Programming all devices in the Canadian market
-
Decide which of the 3 HomeLink® buttons you want to program.
-
Place your hand-held gate/device transmitter 25 to 75 mm (1 to 3 in.) away from the surface of the HomeLink®. Keep the indicator light on the HomeLink® in view while programming.
-
Press and hold the selected HomeLink® button.
-
Continuously press and release (cycle) the hand-held gate/device transmitter button every two seconds until step 5 is complete.
-
When the indicator light on the HomeLink® changes from a slow to a rapid flash after 20 seconds, you can release both buttons.
-
Test the operation of the HomeLink® by pressing the newly programmed button. Check to see if the gate/device operates correctly.
-
Repeat steps 1 through 6 for each remaining HomeLink® button to program another device.
71
INTERIOR EQUIPMENT
Programming other devices To program other devices such as home security systems, home door locks or lighting, contact your authorized Lexus dealer for assistance.
Reprogramming a button Individual HomeLink® buttons cannot be erased, however, to reprogram a single button, follow the procedure “Programming the HomeLink®”.
INFORMATION Keep your hand-held garage transmitter even after programming. The hand-held garage transmitter will be required if reprogramming is necessary.
(b) Operating the HomeLink® To operate the HomeLink®, press the appropriate HomeLink® button to activate the programmed device. The HomeLink® indicator light should come on. If the “Rolling Code” type program is registered, the HomeLink® indicator light flashes several times, then remains on. The HomeLink® continues to send the signal for up to 20 seconds as long as the button is pressed.
INFORMATION The transmitting range from the HomeLink® may differ from that from your hand-held garage transmitter.
72
INTERIOR EQUIPMENT
(c) Erasing the entire HomeLink® memory (all three programs)
To erase all previously programmed codes at one time, press and hold down the 2 outside buttons for 20 seconds until the indicator light flashes.
If you sell your vehicle, be sure to erase the programs stored in the HomeLink® memory.
CAUTION
- When programming the HomeLink® Universal Transceiver, you may be operating a garage door or other device. Make sure people and objects are out of the way of the garage door or other device to prevent potential harm or damage.
- Do not use this HomeLink® Universal Transceiver with any garage door opener that lacks the safety stop and reverse feature as required by federal safety standards. (This includes any garage door opener model manufactured before April 1, 1982.) A garage door opener which cannot detect an object (signaling the door to stop and reverse), does not meet current federal safety standards. Using a garage door opener without these features increases risk of serious injury or death.
This device complies with Part 15 of the FCC Rules and with RSS-210 of the Industry Canada. Operation is subject to the following two conditions: (1) This device may not cause harmful interference, and (2) this device must accept any interference received, including interference that may cause undesired operation.
WARNING: This transmitter has been tested and complies with FCC and Industry Canada DOC/MPAC rules. Changes or modifications not expressly approved by the party responsible for compliance could void the user's authority to operate the device.
73
INTERIOR EQUIPMENT
CUP HOLDER
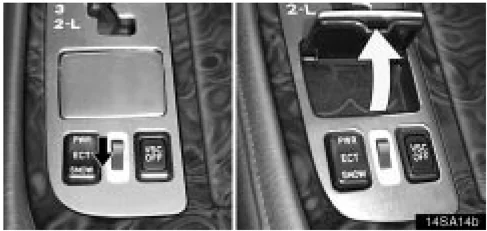
 To use the cup holder, push the cup holder lid.
 To close the cup holder, push in the cup holder in the arrow direction 1 and close the lid in the arrow direction 2.
⚠ CAUTION
- Do not place anything else other than cups or drink-cans in the cup holder, as such items may be thrown about in the compartment and possibly injure people in the vehicle during sudden braking or in an accident.
- To reduce the chance of injury in case of an accident or sudden stop while driving, keep the cup holder closed when not in use.
74
INTERIOR EQUIPMENT
COIN BOX
To use the coin box, slide the switch backward.
CAUTION Keep the coin box closed when not in use.
FIRST-AID KIT SPACE
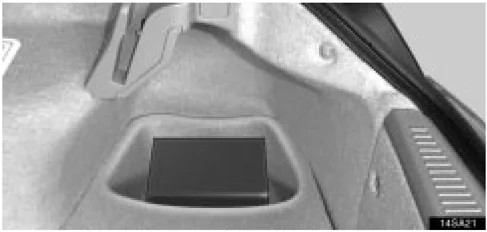
This space is provided on the right side of the trunk to accommodate the first-aid kit.
75

INTERIOR EQUIPMENT
FLOOR MAT
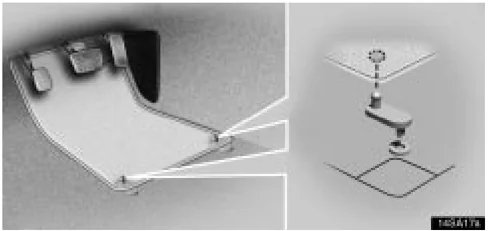
Use a floor mat of the correct size. If the floor carpet and floor mat have 2 holes, then they are designed for use with locking clips. Fix the floor mat with locking clips into the holes in the floor carpet.
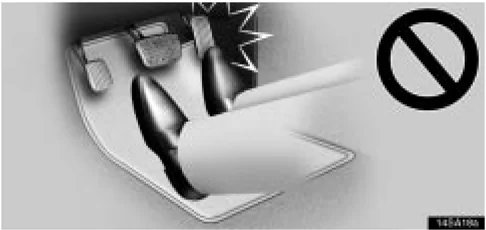
CAUTION Make sure the floor mat is properly placed on the floor carpet. If the floor mat slips and interferes with the movement of the pedals during driving, it may cause an accident.
76
INTERIOR EQUIPMENT
LUGGAGE COVER
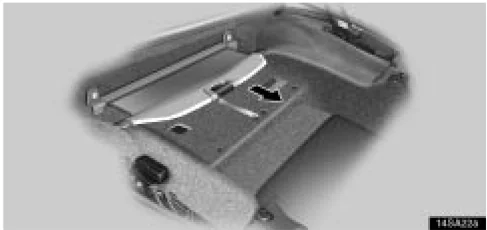
To use the luggage cover,
- Pull the luggage cover out of the retractor.
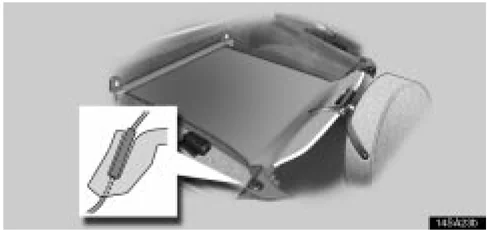
- Hook the luggage cover on the anchors and secure the strap on the magnet on the tire or luggage cover.
See “Luggage stowage precautions” on page 78 for precautions in loading luggage.
The retractable hardtop cannot be opened if the luggage cover is not set.
NOTICE
- Do not place anything on the luggage cover. Doing so could interfere with the retractable hardtop opening and damage its mechanism.
- The luggage should be loaded with the cover closed securely. Otherwise the retractable hardtop opening could be interfered and its mechanism could be damaged.
77
INTERIOR EQUIPMENT
TIE-DOWN HOOKS
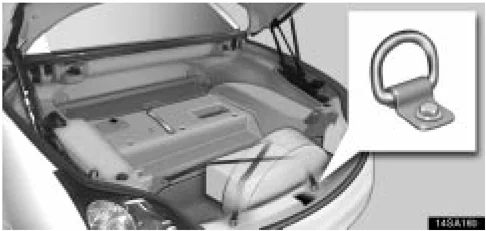
To secure your luggage, use the tie-down hooks as shown above.
See “Luggage stowage precautions” on page 78 for precautions in loading luggage.
LUGGAGE STOWAGE PRECAUTIONS
When stowing luggage or cargo in the vehicle, observe the following:
- Put luggage or cargo in the trunk when at all possible. Be sure all items are secured in place.
- Be careful to keep the vehicle level. Placing the weight as far forward as possible helps maintain vehicle balance.
- For better fuel economy, do not carry unnecessary weight.
CAUTION
- Do not place anything on the package tray behind the rear seatback. Such items may be thrown about and possibly injure people in the vehicle during sudden braking or an accident.
- Do not drive with objects left on top of the instrument panel. They may interfere with the driver’s field of view. Or they may move during sharp vehicle acceleration or turning, and impair the driver’s control of the vehicle. In an accident they may injure the vehicle occupants.
NOTICE
Do not load the vehicle beyond the vehicle capacity weight specified on the tire pressure label.
78
SECTION 1 – 5
INSTRUMENTS AND CONTROLS
Exterior equipment
- Retractable hardtop ........ 80
- Hood ........ 84
- Trunk lid ........ 85
- Fuel tank cap ........ 88
2003 SC430 from May '03 Prod. (OM24449U) 79
