Control system
▼ Control system
The control system is activated as soon as the SmartKey in the starter switch is turned to position 1. The control system enables you to
- call up information about your vehicle
- change vehicle settings
For example, you can use the control system to find out when your vehicle is next due for service, to set the language for messages in the instrument cluster display, and much more.
i The displays for the audio systems (radio, CD player) will appear in English, regardless of the language selected.
Warning!
A driver’s attention to the road and traffic conditions must always be his/her primary focus when driving.
For your safety and the safety of others, selecting features through the multifunction steering wheel should only be done by the driver when traffic and road conditions permit it to be done safely.
Bear in mind that at a speed of just 30 mph (approximately 50 km/h), your vehicle is covering a distance of 44 feet (approximately 14 m) every second.
The control system relays information to the multifunction display.
Multifunction display
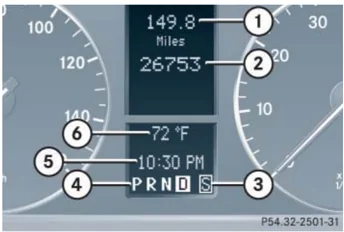
P54.32-2501-31
① Trip odometer ② Main odometer ③ Current program mode ④ Current gear selector lever position/gear range ⑤ Digital clock ⑥ Status indicator (outside temperature/digital speedometer)
129
Control system
Multifunction steering wheel
The displays in the multifunction display and the settings in the control system are controlled by the buttons on the multifunction steering wheel.
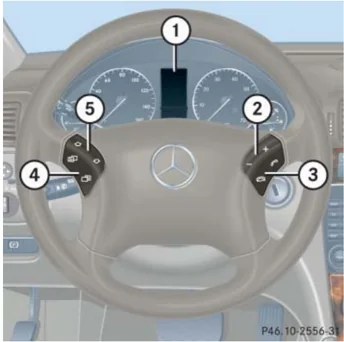
| ① | Multifunction display |
|---|---|
| ② | Operating the control systemSelecting the submenu or setting the volume:Press button+ up/to increase– down/to decrease |
| ③ | Telephone*:Press button📞 to take a call📞 to end a call |
| ④ | Menu systems:Press button📋 for next menu📋 for previous menu |
| ⑤ | Moving within a menu:Press button↑ for next display↓ for previous display |
Pressing any of the buttons on the multifunction steering wheel will alter what is shown in the multifunction display.
The information available in the multifunction display is arranged in menus, each containing a number of functions or submenus.
The individual functions are then found within the relevant menu (radio or CD operations under AUDIO, for example). These functions serve to call up relevant information or to customize the settings for your vehicle.
i
C 230 Kompressor Sport, and C 320 Sport:
Steering wheel in these vehicles will vary from steering wheel shown.
However, multifunction steering wheel symbols and feature description apply to Sport models as well.
130
Control system
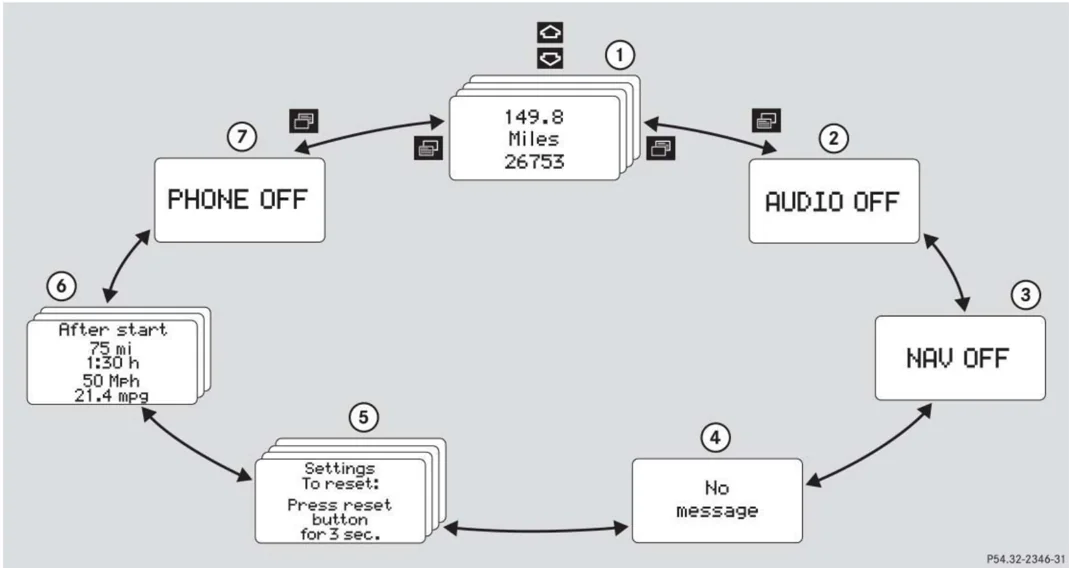
It is helpful to think of the menus, and the functions within each menu, as being arranged in a circular pattern.
- If you press button or repeatedly, you will pass through each menu one after the other.
- If you press button or repeatedly, you will pass through each function display, one after the other, in the current menu.
In the Settings menu, instead of functions you will find a number of submenus for calling up and changing settings. For instructions on using these submenus, see "Submenus in the Settings menu" (▷ page 141).
The number of menus available in the system depends on which optional equipment is installed in your vehicle.
The menus are described on the following pages.
131
Control system
Menus
This is what you will see when you scroll through the menus.
The table on the next page provides an overview of the individual menus.
132
Control system
Menus, submenus and functions
| Commands/submenus | Menu ① Standard display (▷ page 134) | Menu ② AUDIO (▷ page 135) | Menu ③ NAV* (▷ page 138) | Menu ④ Vehicle status message memory (▷ page 138) | Menu ⑤ Settings (▷ page 140) | Menu ⑥ Trip computer (▷ page 156) | Menu ⑦ Telephone* (▷ page 158) |
|---|---|---|---|---|---|---|---|
| Digital speedometer or outside temperature | Select radio station | Activate route guidance | Call up vehicle malfunction, warning and system status messages stored in memory | Reset to factory settings | Fuel consumption statistics after start | Load phone book | |
| Call up maintenance service display | Select satellite radio station* (USA only) | Instrument cluster submenu | Fuel consumption statistics since the last reset | Search for name in phone book | |||
| Check engine oil level | Operate the CD player* | Time/Date submenu | Call up range | ||||
| Lighting submenu | |||||||
| Vehicle submenu | |||||||
| Convenience submenu |
133
Control system
The headings used in the menus table are designed to facilitate navigation within the system and are not necessarily identical to those shown in the control system displays.
The first function displayed in each menu will automatically show you which part of the system you are in.
Standard display menu
In the standard display, the main odometer and the trip odometer are shown in the multifunction display.
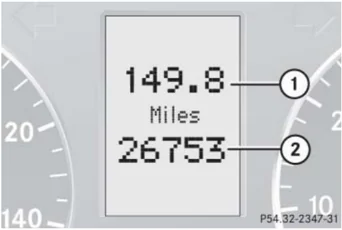
① Trip odometer ② Main odometer
If you see another display, press button or repeatedly until the standard display appears.
You can select the functions in the standard display menu with button or .
The following functions are available:
Control system
Display digital speedometer or outside temperature
- Press button [up arrow icon] or [down arrow icon] repeatedly until the digital speedometer appears in the multifunction display.
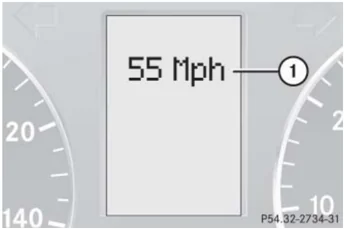
The current vehicle speed is shown in the multifunction display.

① Digital speedometer
i You can have the outside temperature displayed instead of the digital speedometer. You can select the setting in the submenu Instr.Cl. via the function Status line display (▷ page 144).
AUDIO menu
The functions in the AUDIO menu operate the audio equipment which you currently have turned on.
If no audio equipment is currently turned on, the message AUDIO OFF appears in the multifunction display.
The following functions are available:
135
Control system
Select radio station
- Turn on the radio (▷ page 204). Vehicles with COMAND*: Refer to separate operating instructions.
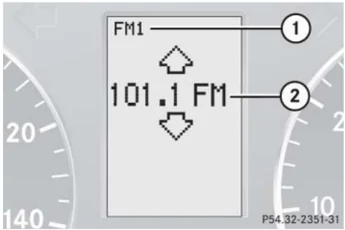
- Press button or repeatedly until the currently tuned station appears in the multifunction display.

① Waveband setting ② Station frequency
- Press button or repeatedly until the desired station is found.
You can only store new stations using the corresponding feature on the radio (▷ page 212).
Vehicles with COMAND*: Refer to separate operating instructions.
You can also operate the radio in the usual manner.
Select satellite radio station* (USA only)
The satellite radio is treated as a radio application.
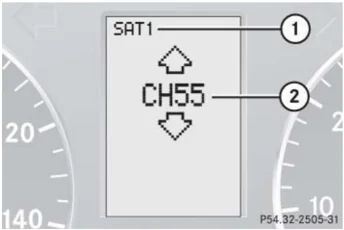
- Select satellite radio with the corresponding soft key (SAT) in the radio menu.

① SAT mode and preset number ② Channel name or number
136
Control system
- Press button or repeatedly until the desired channel is found.
For more information on satellite radio operation, see “Introduction to satellite radio* (USA only)” (▷ page 214).
Vehicles with COMAND*: Refer to separate operating instructions.
Operate the CD player*
-
Turn on the radio and select the CD player (▷ page 219). Vehicles with COMAND*: Refer to separate operating instructions.
-
Press button or repeatedly until the settings for the CD currently being played appear in the multifunction display.
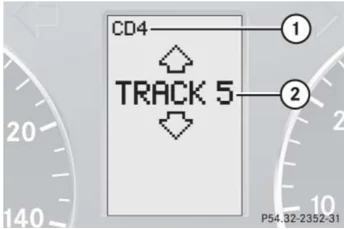
① Current CD (for CD changer*) ② Current track
- Press button or repeatedly until the desired track is selected.
To select a CD from the magazine, press a number on the audio system or the COMAND* system key pad located in the center dashboard.
137
Control system
NAV* menu
The NAV menu contains the functions needed to operate your navigation system.
- Press button [icon] or [icon] repeatedly until the message NAV appears in the multifunction display.
- If the navigation system is switched off, the message NAV OFF appears in the multifunction display.
- If the navigation system is on, different messages, depending on the current state of the navigation system, appear in the multifunction display.
Please refer to the COMAND* manual for instructions on how to activate the route guidance system*.
Vehicle status message memory menu
Use the vehicle status message memory menu to scan malfunction and warning messages that may be stored in the system. Such messages appear in the multifunction display and are based on conditions or system status the vehicle's system has recorded.
Warning!
Malfunction and warning messages are only indicated for certain systems and are intentionally not very detailed. The malfunction and warning messages are simply a reminder with respect to the operation of certain systems and do not replace the owner's and/or driver's responsibility to maintain the vehicle's operating safety by having all required maintenance and safety checks performed on the vehicle and by bringing the vehicle to an authorized Mercedes-Benz Center to address the malfunction and warning messages (▷ page 352).
- Press button [icon] or [icon] repeatedly until the vehicle status message memory appears in the multifunction display.
138
Control system
No vehicle status messages
If no conditions are recorded in memory, the message in the multifunction display is: No message
Vehicle status messages have been recorded
If conditions have occured causing status messages to be recorded, the number of messages appears in the multifunction display:
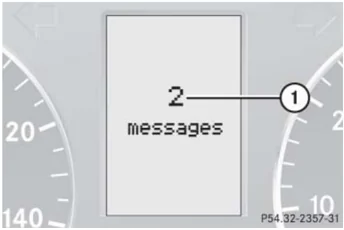
① Number of messages
▶ Press button or .
The stored messages will now be displayed in the order in which they have occured. For malfunction and warning messages, see “Vehicle status messages in the multifunction display” (▷ page 352).
Should the vehicle’s system record any conditions while driving, the number of messages will reappear in the multifunction display when the SmartKey in the starter switch is turned to position 0 or removed from the starter switch.
The vehicle status message memory will be cleared when you turn the SmartKey in the starter switch to position 1 or 2. You will then only see high-priority messages in the multi-function display (▷ page 352).
139
Control system
Settings menu
In the Settings menu there are two functions:
- The function Reset to factory settings, with which you can reset all the settings to the original factory settings.
- A collection of submenus with which you can make individual settings for your vehicle.
▶ Press button [icon] or [icon] repeatedly until the Settings menu appears in the multifunction display.
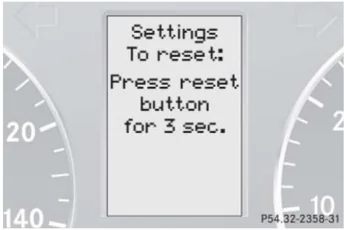
P54.32-2358-31
Resetting all settings
You can reset all the functions of all submenus to the factory settings.
▶ Press the reset button in the instrument cluster (▷ page 126) for approximately three seconds.
The request to press the reset button once more to confirm appears in the multifunction display.
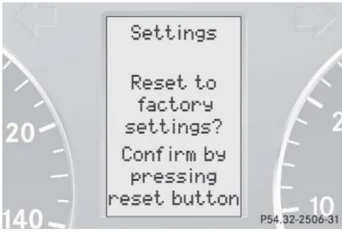
P54.32-2506-31
▶ Press the reset button once more.
The functions of all the submenus will reset to factory settings.
i The settings you have changed will not be reset unless you confirm the action by pressing the reset button a second time. After approximately five seconds, the Settings menu reappears in the multifunction display.
For safety reasons, the following functions are not reset while driving:
- the Hdlamp mode function in the Lighting submenu
- the Key dependency function in the Convenience submenu
140
Control system
Submenus in the Settings menu
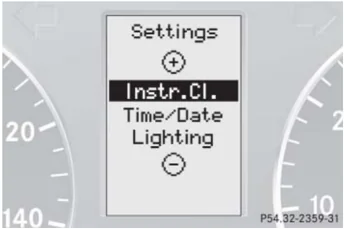
► Press button or . The collection of the submenus appears in the multifunction display.

► Press button . The selection marker moves to the next submenu.
The submenus are arranged by hierarchy. Scroll down with button , scroll up with button .
Move within the submenus with button or to the individual functions.
The settings themselves are made with button or .
Resetting the functions of a submenu
For each submenu you can reset all the functions to the factory settings.
► Move to a function in the submenu.
► Press the reset button (▷ page 126) in the instrument cluster for approximately three seconds.
The request to press the reset button once more to confirm appears in the multifunction display.
► Press the reset button once more.
All functions of the submenu will reset to factory settings.
i The settings you have changed will not be reset unless you confirm the action by pressing the reset button a second time. After approximately five seconds, the Settings menu reappears in the multifunction display.
141
Control system
The table below shows what settings can be changed within the various menus. Detailed instructions on making individual settings can be found on the following pages.
| Instrument cluster | Time/Date | Lighting | Vehicle | Convenience |
|---|---|---|---|---|
| Selecting temperature display mode | Time synchronization with head unit* | Setting daytime running lamp mode (USA only) | Setting automatic locking | Activating easy-entry/exit feature |
| Selecting speedometer display mode | Setting the time (hours) | Setting locator lighting | Setting key-dependency | |
| Selecting language | Setting the time (minutes) | Setting night security illumination | Setting parking position for exterior rear view mirror | |
| Selecting display (speed display or outside temperature) for status indicator | Selecting time display mode | Setting interior lighting delayed shut-off | ||
| Selecting automatic time change (Daylight Saving Time (DST) summer/Standard time winter) | ||||
| Setting the date (month) | ||||
| Setting the date (day) | ||||
| Setting the date (year) |
142
Control system
Instrument cluster submenu
Access the Instr.Cl. submenu via the Settings menu. Use the Instr.Cl. submenu to change the instrument cluster display settings.
The following functions are available:
| Function | Page |
|---|---|
| Selecting temperature display mode | 143 |
| Selecting speedometer display mode | 143 |
| Selecting language | 144 |
| Selecting display (speed display or outside temperature) for status indicator | 144 |
Selecting temperature display mode
- Move the selection marker with button + or – to the Instr.Cl. submenu.
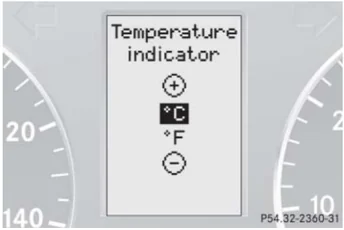
- Press button ↑ or ↓ repeatedly until the message Temperature indicator appears in the multifunction display.
The selection marker is on the current setting.

- Press button + or – to set temperature unit to °C (degrees Celsius) or °F (degrees Fahrenheit).
Selecting speedometer display mode
- Move the selection marker with button + or – to the Instr.Cl. submenu.
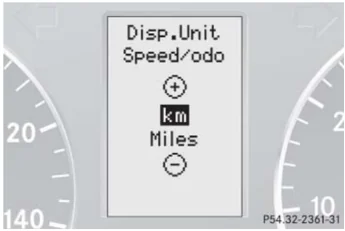
- Press button ↑ or ↓ repeatedly until the message Disp.Unit Speed/odo appears in the multifunction display.
The selection marker is on the current setting.

- Press button + or – to set speedometer unit to km or Miles.
143
Control system
Selecting language
- Move the selection marker with button $+$ or $-$ to the Instr.Cl. submenu.
- Press button \triangle or \nabla repeatedly until the message Language appears in the multifunction display.
The selection marker is on the current setting.
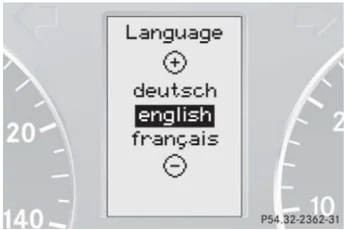
- Press button $+$ or $-$ to select the language to be used for the multifunction display messages.
Available languages:
- German
- English
- French
- Italian
- Spanish
Selecting display (digital speedometer or outside temperature) for status indicator
- Move the selection marker with button $+$ or $-$ to the Instr.Cl. submenu.
- Press button \triangle or \nabla repeatedly until the message Status line display appears in the multifunction display.
The selection marker is on the current setting.
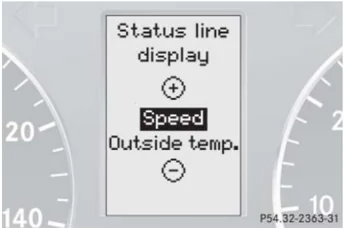
- Press button $+$ or $-$ to select the desired setting.
The selected display is then shown continuously in the lower display.
The other display now appears in the menu of the standard display:
- Digital speedometer or
- Outside temperature
144
Control system
Time/Date submenu
Access the Time/Date submenu via the Settings menu. Use the Time/Date submenu to change the instrument cluster display settings.
The following functions are available:
| Function | Page |
|---|---|
| Time synchronization with head unit* | 145 |
| Setting the time (hours) | 145 |
| Setting the time (minutes) | 146 |
| Selecting time display mode | 147 |
| Selecting automatic time change (Daylight Saving Time (DST) summer/Standard time winter) | 147 |
| Setting the date (month) | 147 |
| Setting the date (day) | 148 |
| Setting the date (year) | 149 |
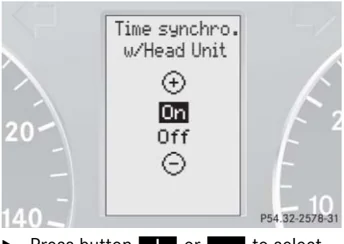
Time synchronization with head unit*
This function can only be seen on vehicles with COMAND* and navigation module*.
- Move the selection marker with button + or – to the Time/Date submenu.
- Press button ↑ or ↓ repeatedly until the message Time synchro. w/Head Unit appears in the multifunction display.
The selection marker is on the current setting.

- Press button + or – to select the desired setting.
Setting the time (hours)
This function can only be seen with audio system.
i
Vehicles with COMAND*:
For information on setting the time, refer to the separate COMAND operating instructions.
- Move the selection marker with button + or – to the Time/Date submenu.
- Press button ↑ or ↓ repeatedly until the message Time Hours appears in the multifunction display.
145
Control system
The selection marker is on the hour setting.
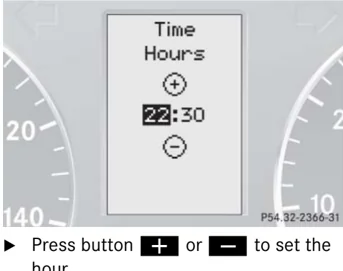
\blacktriangleright Press button \boldsymbol+ or \boldsymbol- to set the hour.
Setting the time (minutes)
This function can only be seen with audio system.
Vehicles with COMAND*: For information on setting the time, refer to the separate COMAND operating instructions.
\blacktriangleright Move the selection marker with button \boldsymbol+ or \boldsymbol- to the Time/Date submenu.
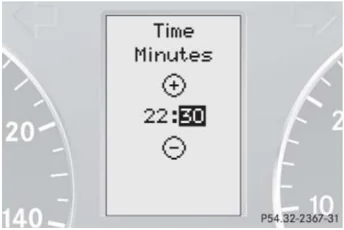
\blacktriangleright Press button \boldsymbol\triangle or \boldsymbol\nabla repeatedly until the message Time Minutes appears in the multifunction display.
The selection marker is on the minute setting.

\blacktriangleright Press button \boldsymbol+ or \boldsymbol- to set the minutes.
Control system
Selecting time display mode
- Move the selection marker with button ➕ or ➖ to the Time/Date submenu.
- Press button ◬ or ◭ repeatedly until the message Clock display appears in the multifunction display.
The selection marker is on the current setting.
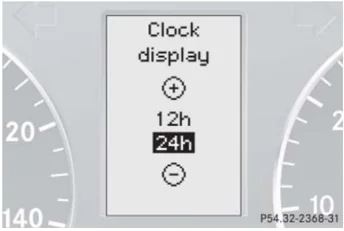
- Press button ➕ or ➖ to set the 12h or 24h time display mode.
Selecting automatic time change (Daylight Saving Time (DST) summer/Standard time winter)
- Move the selection marker with button ➕ or to the Time/Date submenu.
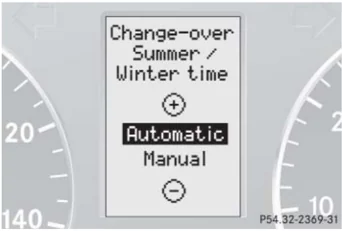
- Press button ◬ or ◭ repeatedly until the message Change-over Summer / Winter time appears in the multifunction display.
The selection marker is on the current setting.

- Press button ➕ or to select if the changeover between summer and winter time should be automatic or manual.
Setting the date (month)
This function can only be seen with audio system.
Vehicles with COMAND*: For information on setting the date, refer to the separate COMAND operating instructions.
- Move the selection marker with button ➕ or ➖ to the Time/Date submenu.
- Press button ◬ or ◭ repeatedly until the message Date Set MM appears in the multifunction display. ▷▷
147
Control system
The selection marker is on the month setting.
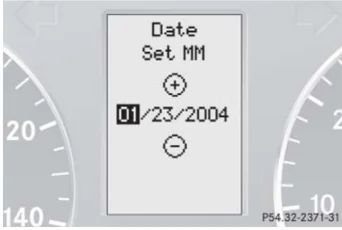
▶ Press button or to set the month.
Setting the date (day)
This function can only be seen with audio system.
Vehicles with COMAND*: For information on setting the date, refer to the separate COMAND operating instructions.
▶ Move the selection marker with button or to the Time/Date submenu.
▶ Press button or repeatedly until the message Date Set day appears in the multifunction display.
The selection marker is on the day setting.
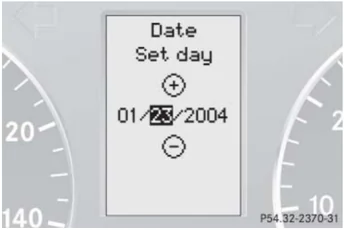
▶ Press button or to set the day.
148
Control system
Setting the date (year)
This function can only be seen with audio system.
Vehicles with COMAND*: For information on setting the date, refer to the separate COMAND operating instructions.
- Move the selection marker with button ➕ or ➖ to the Time/Date submenu.
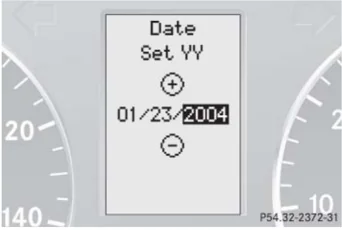
- Press button ⬆ or ⬇ repeatedly until the message Date Set YY appears in the multifunction display.
The selection marker is on the year setting.

- Press button ➕ or ➖ to set the year.
Lighting submenu
Access the Lighting submenu via the Settings menu. Use the Lighting submenu to change the lamp and lighting settings on your vehicle.
The following functions are available:
149
Control system
Setting daytime running lamp mode (USA only)
This function is not available in countries where the daytime running lamp mode is mandatory and therefore in a constant mode.
- Move the selection marker with button ➕ or ➖ to the Lighting submenu.
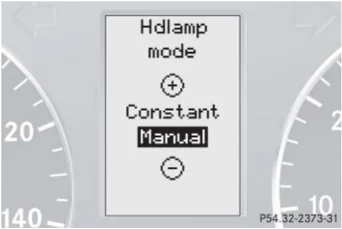
- Press button ⏏ or ⏎ repeatedly until the message Hdlamp mode appears in the multifunction display.
The selection marker is on the current setting.

- Press button ➕ or ➖ to select manual operation (Manual) or daytime running lamp mode (Constant) activated.
With daytime running lamp mode activated and the exterior lamp switch in position 0 or AUTO, the low beam headlamps are switched on when the engine is running.
In low ambient light conditions the following lamps will switch on additionally:
- Parking lamps
- Tail lamps
- License plate lamps
- Side marker lamps
For more information on the daytime running lamp mode, see “Lighting” (▷ page 117).
For safety reasons, resetting the Lighting submenu to factory settings (▷ page 141) while driving will not deactivate the daytime running lamp mode.
The following message appears in the multifunction display:
Lighting - Cannot be completely reset to factory sets. while driving.
150
Control system
Setting locator lighting
With the locator lighting feature activated and the exterior lamp switch in position AUTO, the following lamps will switch on when the vehicle is unlocked with the SmartKey during darkness:
- Parking lamps
- Tail lamps
- License plate lamps
- Side marker lamps
- Front fog lamps
The locator lighting switches off when the driver's door is opened.
If you do not open a door after unlocking with the SmartKey the lamps will switch off automatically after approximately 40 seconds.
▶ Move the selection marker with button + or – to the Lighting submenu.
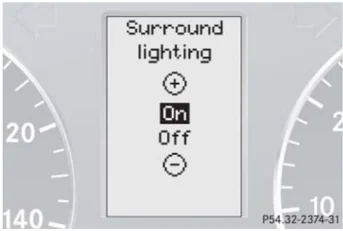
▶ Press button ◀ or ▶ repeatedly until the message Surround lighting appears in the multifunction display.
The selection marker is on the current setting.

▶ Press button + or – to switch the locator lighting function On.
▶ Turn the exterior lamp switch to position AUTO when exiting the vehicle (▷ page 117).
The locator lighting feature is activated.
Setting night security illumination (Headlamps delayed shut-off)
Use this function to set whether and how long you would like the exterior lamps to illuminate during darkness after exiting the vehicle and all doors closed.
With the delayed shut-off feature activated and the exterior lamp switch in position AUTO before the engine is turned off, the following lamps will switch on after you have removed the SmartKey from the starter switch:
- Parking lamps
- Tail lamps
- License plate lamps
- Side marker lamps
- Front fog lamps
If you do not open a door after removing the SmartKey from the starter switch, the lamps will switch off automatically after approximately 60 seconds.
151
Control system
i You can reactivate this function within ten minutes by opening a door.
- Move the selection marker with button + or - to the Lighting submenu.
- Press button **** or **** repeatedly until the message
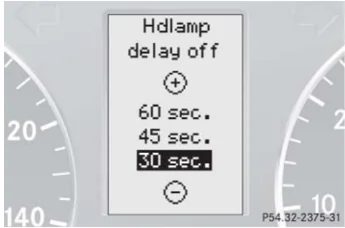
Hdlamp delay offappears in the multifunction display.
The selection marker is on the current setting.

- Press button + or - to select the desired lamp-on period.
You can select:
-
0 sec., the delayed shut-off feature is deactivated.
-
15 sec., 30 sec., 45 sec. or 60 sec., select the desired lamp-on period.
-
Turn the exterior lamp switch to position AUTO before turning off the engine (▷ page 117).
The headlamps delayed shut-off feature is activated.
You can temporarily deactivate the delayed shut-off feature:
- Before exiting the vehicle, turn the SmartKey in the starter switch to position 0.
- Then turn it to position 2 and back to position 0.
The delayed shut-off feature is deactivated. It will reactivate as soon as you reinsert the SmartKey in the starter switch.
152
Control system
Setting interior lighting delayed shut-off
Use this function to set whether and how long you would like the interior lighting to remain lit during darkness after you have removed the SmartKey from the starter switch.
- Move the selection marker with button + or – to the Lighting submenu.
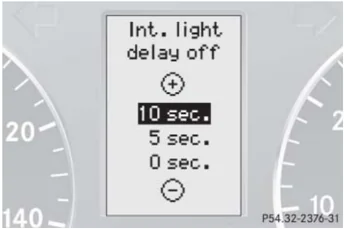
- Press button ↑ or ↓ repeatedly until the message Int. light delay off appears in the multifunction display.
The selection marker is on the current setting.

- Press button + or – to select the desired lamp-on period.
You can select:
- 0 sec., the delayed shut-off feature is deactivated.
- 5 sec., 10 sec., 15 sec. or 20 sec., the interior lighting delayed shut-off feature is activated with the desired lamp-on period.
Vehicle submenu
Access the Vehicle submenu via the Settings menu. Use the Vehicle submenu to make general vehicle settings.
The following function is available:
| Function | Page |
|---|---|
| Setting automatic locking | 153 |
Setting automatic locking
Use this function to activate or deactivate the automatic central locking. With the automatic central locking system activated, the vehicle is centrally locked at vehicle speeds of approximately 9 mph (15 km/h).
- Move the selection marker with button + or – to the Vehicle submenu.
- Press button ↑ or ↓ repeatedly until the message Automatic door lk. appears in the multifunction display. ▷▷
153
Control system
▷▷ The selection marker is on the current setting.
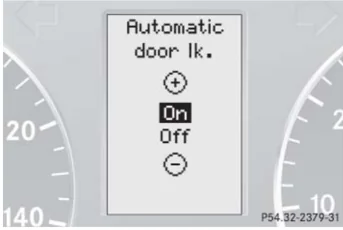
► Press button $+$ or $-$ to switch the automatic central locking On or Off.
Convenience submenu
Access the Convenience submenu via the Settings menu. Use the Convenience submenu to change the settings for a number of convenience features.
The following functions are available:
Activating easy-entry/exit feature*
Use this function to activate and deactivate the easy-entry/exit feature (▷ page 106).
Warning!
You must make sure no one can become trapped or injured by the moving steering wheel and driver's seat when the easy-entry/exit feature is activated.
To cancel seat/steering wheel movement, do one of the following:
- Press seat adjustment switch* (▷ page 30).
- Move steering column stalk* (▷ page 40).
- Press memory position switch* (▷ page 115).
Control system
Do not leave children unattended in the vehicle, or with access to an unlocked vehicle. Children could open the driver’s door and unintentionally activate the easy-entry/exit feature, which could result in an accident and/or serious personal injury.
- Move the selection marker with button + or – to the Convenience submenu.
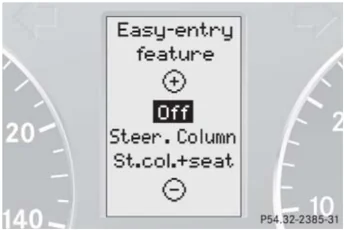
- Press button ↑ or ↓ repeatedly until the message Easy-entry feature appears in the multifunction display.
The selection marker is on the current setting.

- Press button + or – to change the easy-entry/exit setting.
The following settings are available for the easy-entry/exit feature:
| Setting | Description |
|---|---|
| Off | The easy-entry/exit feature is deactivated |
| Steer. Column | Only the steering column is moved |
| St.col.+seat | Both the steering column and the seat are moved |
Setting key-dependency
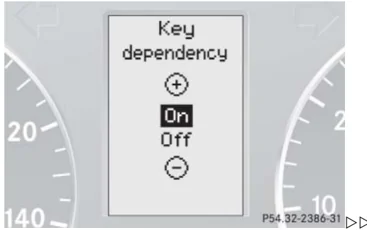
Use this function to set whether the memory settings for the seats, the steering wheel and the mirrors should be stored separately for each SmartKey (▷ page 114).
- Move the selection marker with button + or – to the Convenience submenu.
- Press button ↑ or ↓ repeatedly until the message Key dependency appears in the multifunction display.
The selection marker is on the current setting.

155
Control system
▷▷▷ Press button + or − to set key-dependency On or Off.
Setting parking position for exterior rear view mirror*
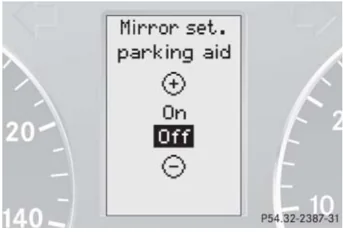
Use the Mirror set. parking aid function to select whether the passenger-side exterior rear view mirror should be turned downward during parking maneuvers when reverse gear R is engaged. For additional information, see “Activating exterior rear view mirror parking position*” (▷ page 174).
▶ Move the selection marker with button + or − to the Convenience submenu.
▶ Press button ◁ or ▷ repeatedly until the message Mirror set. parking aid appears in the multifunction display.
The selection marker is on the current setting.

P54.32-2387-31
▶ Press button + or − to switch function On or Off.
Trip computer menu
Use the trip computer menu to call up statistical data on your vehicle.
The following information is available:
Control system
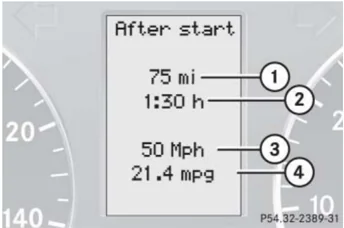
Fuel consumption statistics after start
- Press button or repeatedly until the first function of the Trip computer menu appears in the multifunction display.
- Press button or repeatedly until the message After start appears in the multifunction display.

① Distance driven since start ② Time elapsed since start ③ Average speed since start ④ Average fuel consumption since start
i All statistics stored since the last engine start will be reset approximately four hours after the SmartKey in the starter switch is turned to position 0 or removed from the starter switch.
Resetting will not occur if you turn the SmartKey back to position 1 or 2 within this time period.
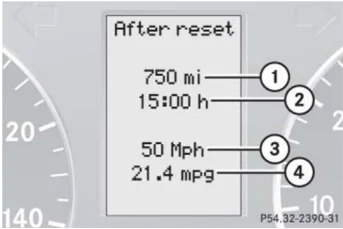
Fuel consumption since last reset
- Press button or repeatedly until the first function of the Trip computer menu appears in the multifunction display.
- Press button or repeatedly until the message After reset appears in the multifunction display.

① Distance driven since last reset ② Time elapsed since last reset ③ Average speed since last reset ④ Average fuel consumption since last reset
157
Control system
Resetting fuel consumption statistics
- Press button [icon] or [icon] repeatedly until the first function of the Trip computer menu appears in the multifunction display.
- Press button [icon] or [icon] repeatedly until the reading that you want to reset appears in the multifunction display.
- Press and hold the reset button in the instrument cluster (▷ page 126) until the value is reset to 0.
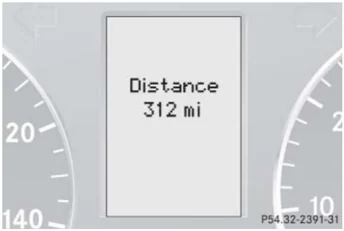
Calling up range (distance to empty)
- Press button [icon] or [icon] repeatedly until the first function of the Trip computer menu appears in the multifunction display.
- Press button [icon] or [icon] repeatedly until the message Distance appears in the multifunction display.
The calculated range based on the current fuel tank level appears in the multifunction display.

TEL menu*
Warning!
A driver’s attention to the road must always be his/her primary focus when driving. For your safety and the safety of others, we recommend that you pull over to a safe location and stop before placing or taking a telephone call. If you choose to use the telephone while driving, please use the hands-free device and only use the telephone when weather, road and traffic conditions permit.
Some jurisdictions prohibit the driver from using a cellular telephone while driving a vehicle.
Bear in mind that at a speed of just 30 mph (approximately 50 km/h), your vehicle is covering a distance of 44 feet (approximately 14 m) every second.
158
Control system
Never operate radio transmitters equipped with a built-in or attached antenna (i.e. without being connected to an external antenna) from inside the vehicle while the engine is running. Doing so could lead to a malfunction of the vehicle's electronic system, possibly resulting in an accident and personal injury.
You can use the functions in the TEL menu to operate your telephone, provided it is connected to a hands-free system and switched on.
▶ Switch on the telephone and Audio or COMAND*.
▶ Press button [icon] or [icon] on the steering wheel repeatedly until the message TEL appears in the multifunction display.
Which messages will appear in the multifunction display depends on whether your telephone is switched on or off:
- If the telephone is off, the message PHONE OFF appears in the multifunction display.
- If the telephone is on:
The telephone will then search for a network. During this time the multifunction display is empty.
As soon as the telephone has found a network, the message READY appears in the multifunction display.
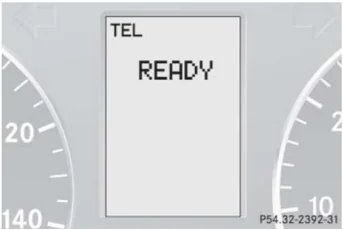
This standby message indicates that your telephone is ready for use and you can operate it using the control system.
Answering a call
When your telephone is ready to receive calls, you can answer a call at any time. In the multifunction display you will then see the message:
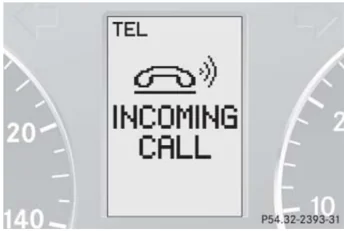
▶ Press button [icon].
You have answered the call. The duration of the call appears in the multifunction display.
159
Control system
Ending a call
- Press button [phone icon].
You have ended the call. The standby message appears in the multifunction display.
Dialing a number from the phone book
If your telephone is ready to receive calls, you may select and dial a number from the phone book at any time.
-
Press button [button icon] or [button icon] repeatedly until the message TEL appears in the multifunction display.
-
Press button [up arrow icon] or [down arrow icon].
The control system reads the phone book which is stored in the telephone. This may take up to 30 seconds. The message Please wait appears in the multifunction display.
When the message Please wait disappears, the phone book has been loaded.
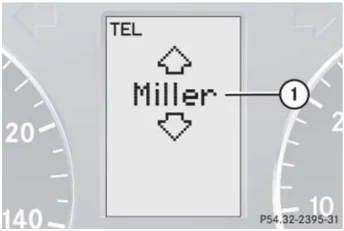
- Press button [up arrow icon] or [down arrow icon] repeatedly until the desired name appears in the multifunction display.
The stored names are displayed in ascending or descending alphabetical order.

① Name from the phone book
160
Control system
i If you press and hold button or for longer than one second, the system scrolls rapidly through the list of names until you release the button again.
Cancel the quick search mode by pressing button .
► Press button . The system dials the selected phone number.
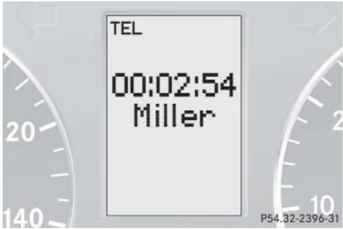
- If the connection is successful, the name of the party you called and the duration of the call will appear in the multifunction display.
- If no connection is made, the control system stores the dialed number in the redial memory.
Redialing
The control system stores the most recently dialed phone numbers. This eliminates the need to search through your entire phone book.
► Press button or repeatedly until the message TEL appears in the multifunction display.
► Press button . The first number in the redial memory appears in the multifunction display.
► Press button or repeatedly until the desired name appears in the multifunction display.
► Press button . The control system dials the selected phone number.
161