SECTION 1 – 4
INSTRUMENTS AND CONTROLS
Interior equipment
- Vanity mirrors . . . . . . . . . . . . . . . . . . . . . . . . . . . . . . . . . . . . . . . . . . . . . . . . . . . . . . . . . . . . . . . . . . . . . . . . . . . . . . . . . . . . . . . . . . . . . . . . . . . . . . . . . . . . . . . . . . . . . . . . . . . . . . . . . . . . . . . . . . . . . . . . . . . . . . . . . . . . . . . . . . . . . . . . . . . . . . . . . . . . . . . . . . . . . . . . . . . . . . . . . . . . . . . . . . . . . . . . ........ 64
- Interior lights . . . . . . . . . . . . . . . . . . . . . . . . . . . . . . . . . . . . . . . . . . . . . . . . . . . . . . . . . . . . . . . . . . . . . . . . . . . . . . . . . . . . . . . . . . . . . . . . . . . . . . . . . . . . . . . . . . . . . . ........ 65
- Personal lights . . . . . . . . . . . . . . . . . . . . . . . . . . . . . . . . . . . . . . . . . . . . . . . . . . . . . . . . . . . . . . . . . . . . . . . . . . . . . . . . . . . . . . . . . . . . . . . . . . . . . . . . . . . . . . . . . . . . . . ........

INTERIOR EQUIPMENT
VANITY MIRRORS
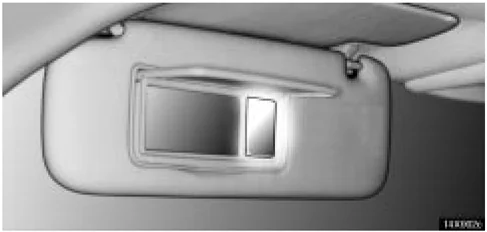
To use the vanity mirrors, swing the sun visor down and open the cover. The vanity light comes on when you open the cover.
Sun visors
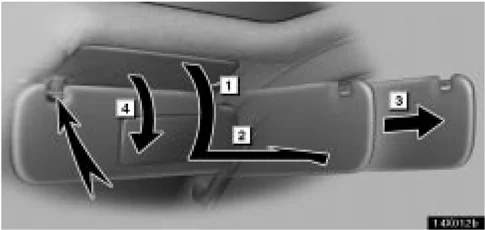
1 To block out glare from the front , swing the sun visor down. 2 To block out glare from the side, remove the sun visor from the hook and swing it to the side. 3 To block out glare coming obliquely from behind you, slide the visor backwards. At this position, the vanity light does not come on. 4 To block out glare from the front with the sun visor in the position 2 or 3, swing the other sun visor down.
64
INTERIOR EQUIPMENT
INTERIOR LIGHTS
Front
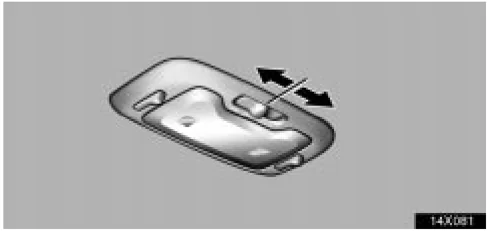
To turn on the interior light, slide the switch.
With the switch in the "DOOR" position, the light comes on when any door is opened or when the ignition key is turned to "LOCK". After all the doors are closed, the light remains on for about 15 seconds and then goes out.*
However, in the following cases, the light goes out immediately:
- All the doors are closed when the ignition key is in "ACC" or "ON" position.
- The ignition key is turned to "ACC" or "ON" when the light is still on.
- All the doors are locked when the light is still on.
- One door is closed with the lock button pushed in while the other doors are locked.
NOTE: * The interior lights can be set not to come on or the duration of lighting can be changed. Ask your Lexus dealer for details.
Rear
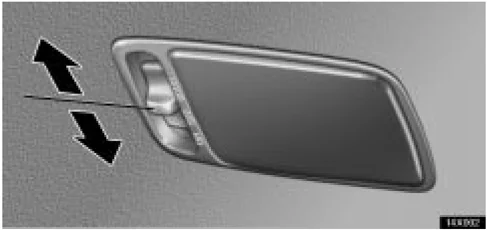
To turn on the interior light, slide the switch.
With the switch in the "DOOR"position, the light comes on when the rear door or back door is opened. The light goes out immediately when the rear door and back door are closed.
65
INTERIOR EQUIPMENT
PERSONAL LIGHTS
Front
 14X083a
Rear
 14X083i
To turn on the personal light, push the switch. To turn it off, push the switch on the opposite side.
66
INTERIOR EQUIPMENT
IGNITION SWITCH LIGHT
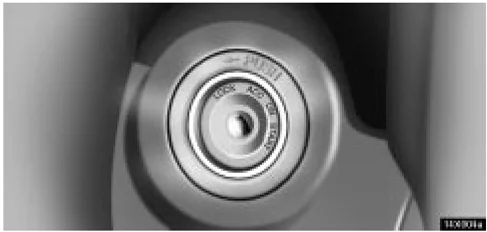
For easy access to the ignition switch, the ignition switch light comes on when any of the doors are opened.
The light remains on for about 15 seconds and goes out after all the doors are closed. However, the light goes out immediately when all the doors are locked or the ignition key is in the "ACC" or "ON" position.
CLOCK
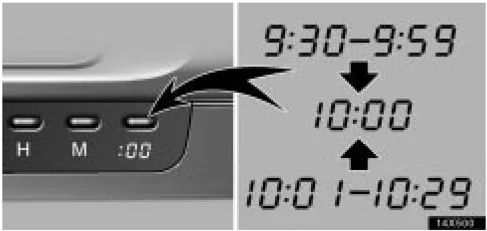
The digital clock indicates the time when the ignition key is at the "ACC" or "ON" position. To reset the hour, press the "H" button. To reset the minutes, press the "M" button. To adjust the time to the nearest hour, press the ":00" button.
For example, if the ":00" button is pressed when the time is between 9:30 – 9:59 or between 10:01 – 10:29, the time will change to 10:00.
If the electrical power source has been disconnected from the clock, the time display will automatically be set to 1:00 (one o’clock).
When the headlight switch is in the first or second click stop, you can also adjust the brightness of the display using the instrument panel light control dial.
67
INTERIOR EQUIPMENT
OUTSIDE TEMPERATURE DISPLAY
 This display shows the outside temperature when the ignition switch is on.
The displayed temperature ranges from –30°C (–22°F) up to 50°C (122°F). If the temperature does not appear on the display or it shows "– –", take your vehicle to your Lexus dealer.
When the headlight switch is in the first or second click stop, you can also adjust the brightness of the display using the instrument panel light control dial.
The unit shown on the display can be changed. For details, see “Trip information display” on page 59.
CIGARETTE LIGHTER AND ASHTRAY
Front
 To use the cigarette lighter, press in the cigarette lighter. After it finishes heating up, it automatically pops out ready for use.
Do not hold the cigarette lighter pressed in.
If the engine is not running, the ignition key must be in the "ACC" position to use the lighter.
When finished with your cigarette, thoroughly extinguish it in the ashtray to prevent other cigarette butts from catching fire. After using the ashtray, push it back in completely.
To remove the ashtray, press down on the lock spring plate and pull out.
Use a Lexus genuine cigarette lighter or equivalent for replacement.
INTERIOR EQUIPMENT
CAUTION To reduce the chance of injury in case of an accident or sudden stop while driving, always close the ashtray completely after use.
Rear
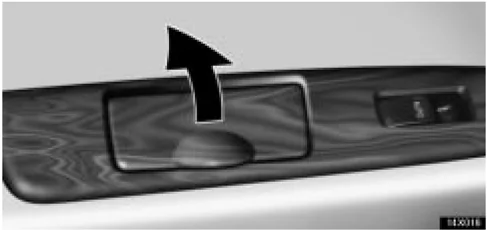
To use the ashtray, pull on the lid.
When finished with your cigarette, thoroughly extinguish it in the ashtray to prevent other cigarette butts from catching fire. After using the ashtray, close the lid completely.
To remove the ashtray, just pull it up.
CAUTION To reduce the chance of injury in case of an accident or sudden stop while driving, always close the ashtray completely after use.
69
INTERIOR EQUIPMENT
 1 Snuffer bridge
To use the ashtray, pull on the lid.
When finished with your cigarette, thoroughly extinguish it in the ashtray to prevent other cigarette butts from catching fire. After using the ashtray, close the lid completely.
To remove the ashtray, pull it out while pressing on the snuffer bridge to release the catch.
⚠ CAUTION To reduce the chance of injury in case of an accident or sudden stop while driving, always close the ashtray completely after use.
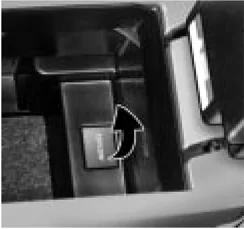
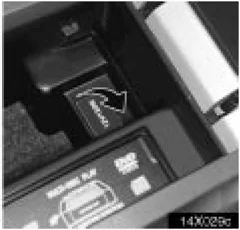
POWER OUTLETS
Front
 Vehicles without Navigation System
 Vehicles with Navigation System
70
INTERIOR EQUIPMENT
Rear
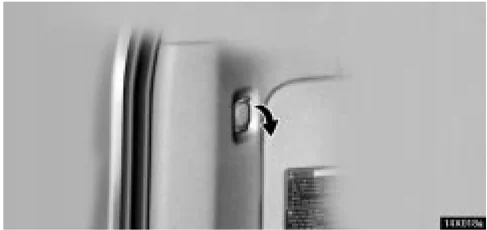
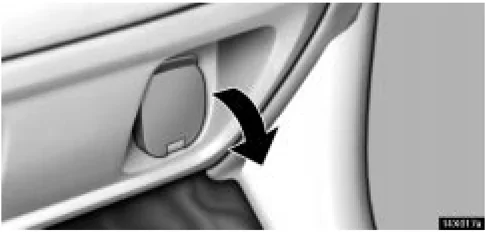
The power outlets are designed for power supply for car accessories. The ignition key must be in the "ACC" or "ON" position for the power outlets to be used.
NOTICE
-
To prevent the fuse from being blown, do not use the electricity over the total vehicle capacity of 12V/120W (front and rear outlets together).
-
To prevent the battery from being discharged, do not use the power outlets longer than necessary when the engine is not running.
-
Close the power outlet lids when the power outlets are not in use. Inserting a foreign object other than the appropriate plug that fits the outlet, or allowing any liquid into the outlet may cause electrical failure or short circuits.
REAR CONSOLE BOX
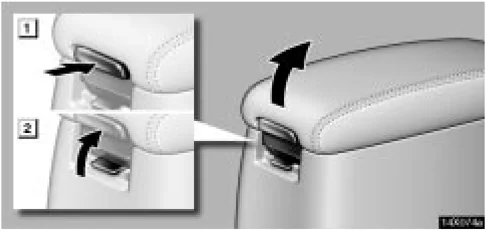
▶ 1 For upper box 2 For lower box To use the rear console box, open as shown in the illustration.
71
INTERIOR EQUIPMENT
GLOVE BOX
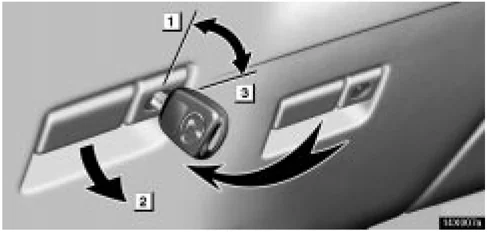
► 1 Unlock 2 Open 3 Lock
To open the glove box door, pull the lever. To lock the glove box door, insert the master key and turn it clockwise.
With the tail lights on, the glove box light will come on when the glove box door is open.
CAUTION To reduce the chance of injury in case of an accident or a sudden stop, always keep the glove box door closed while driving.
GARAGE DOOR OPENER
The garage door opener (HomeLink® Universal Transceiver) is manufactured under license from HomeLink® and can be programmed to operate garage doors, gates, entry doors, door locks, home lighting systems, and security systems, etc.
(a) Programming the HomeLink®
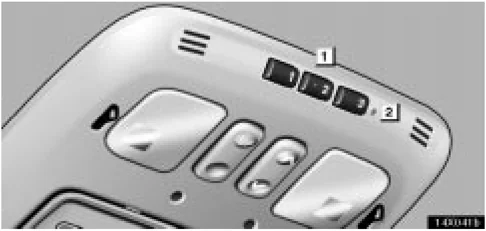
► 1 Buttons 2 Indicator light
The HomeLink® in your vehicle has 3 buttons and you can store one program for each button.
To ensure correct programming into the HomeLink®, install a new battery in the hand-held transmitter prior to programming.
72
The battery side of the hand-held transmitter must be pointed away from the HomeLink® during the programming process.
For Canadian users, follow the procedure in “Programming an entrance gate/Programming all devices in the Canadian market”.
- Decide which of 3 HomeLink® buttons you want to program.
- Place your hand-held garage transmitter 25 to 75 mm (1 to 3 in.) away from the surface of the HomeLink®.
Keep the indicator light on the HomeLink® in view while programming.
- Simultaneously press and hold the hand-held garage transmitter button along with the selected HomeLink® button.
- When the indicator light on the HomeLink® changes from a slow to a rapid flash after 20 seconds, you can release both buttons.
- Test the operation of the HomeLink® by pressing the newly programmed button. If programming a garage door opener, check to see if the garage door opens and closes.
If the garage door does not operate, identify if your garage transmitter is of the “Rolling Code” type. Press and hold the programmed HomeLink® button. The garage door has the rolling code feature if the indicator light (on the HomeLink®) flashes rapidly and then remains lit after 2 seconds. If your garage transmitter is the “Rolling Code” type, proceed to the heading “Programming a rolling code system”.
- Repeat steps 2 through 5 for each remaining HomeLink® button to program another device.
Programming a rolling code system
If your device is “Rolling Code” equipped, it is necessary to follow steps 1 through 4 under the heading “Programming the HomeLink®” before proceeding with the steps listed below.
-
Locate the “training” button on the ceiling mounted garage door opener motor. The exact location and color of the button may vary by brand of garage door opener. Refer to the owner’s guide supplied by the garage door opener manufacturer for the location of this “training” button.
-
Press the “training” button on the ceiling mounted garage door opener motor.
Following this step, you have 30 seconds in which to initiate step 3 below.
INTERIOR EQUIPMENT
- Press and release the vehicle’s programmed HomeLink® button twice. The garage door may open. If the door does open, the programming process is complete. If the door does not open, press and release the button a third time. This third press and release will complete the programming process by opening the garage door.
The ceiling mounted garage door opener motor should now recognize the HomeLink® unit and be able to activate the garage door up/down.
- Repeat steps 1 through 3 for each remaining HomeLink® button to program another rolling code system.
Programming an entrance gate / Programming all devices in the Canadian market
-
Decide which of the 3 HomeLink® buttons you want to program.
-
Place your hand-held gate/device transmitter 25 to 75 mm (1 to 3 in.) away from the surface of the HomeLink®.
Keep the indicator light on the HomeLink® in view while programming.
-
Press and hold the selected HomeLink® button.
-
Continuously press and release (cycle) the hand-held gate/device transmitter button every two seconds until step 5 is complete.
-
When the indicator light on the HomeLink® changes from a slow to a rapid flash after 20 seconds, you can release both buttons.
-
Test the operation of the HomeLink® by pressing the newly programmed button. Check to see if the gate/device operates correctly.
-
Repeat steps 1 through 6 for each remaining HomeLink® button to program another device.
Programming other devices
To program other devices such as home security systems, home door locks or lighting, contact your authorized Lexus dealer for assistance.
Reprogramming a button
Individual HomeLink® buttons cannot be erased, however, to reprogram a single button, follow the procedure “Programming the HomeLink®”.
(b) Operating the HomeLink®
To operate the HomeLink®, press the appropriate HomeLink® button to activate the programmed device. The HomeLink® indicator light should come on. The HomeLink® continues to send the signal for up to 20 seconds as long as the button is pressed.
74
INTERIOR EQUIPMENT
(c) Erasing the entire HomeLink® memory (all three programs)
To erase all previously programmed codes at one time, press and hold down the 2 outside buttons for 20 seconds until the indicator light flashes.
If you sell your vehicle, be sure to erase the programs stored in the HomeLink® memory.
CAUTION
- When programming the HomeLink® Universal Transceiver, you may be operating a garage door or other device. Make sure people and objects are out of the way of the garage door or other device to prevent potential harm or damage.
- Do not use this HomeLink® Universal Transceiver with any garage door opener that lacks the safety stop and reverse feature as required by federal safety standards. (This includes any garage door opener model manufactured before April 1, 1982.) A garage door opener which cannot detect an object (signaling the door to stop and reverse), does not meet current federal safety standards. Using a garage door opener without these features increases risk of serious injury or death.
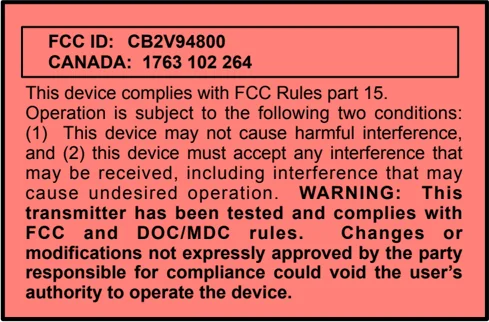
FCC ID: CB2V94800 CANADA: 1763 102 264
This device complies with FCC Rules part 15. Operation is subject to the following two conditions: (1) This device may not cause harmful interference, and (2) this device must accept any interference that may be received, including interference that may cause undesired operation. WARNING: This transmitter has been tested and complies with FCC and DOC/MDC rules. Changes or modifications not expressly approved by the party responsible for compliance could void the user's authority to operate the device.
75
INTERIOR EQUIPMENT
CUP HOLDERS
Front
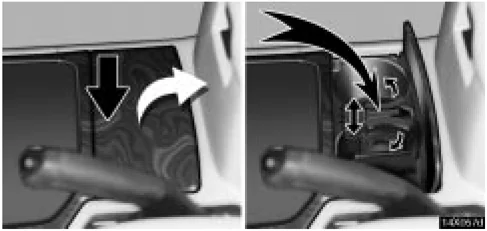
►Separator To use a cup holder, push the cup holder lid. The cup holder can be adjusted to the size of the cups by changing the separator position or moving the separator arms. You can use it as an accessory box by removing the separator inside.
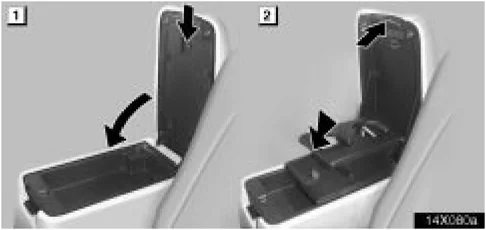
To use a cup holder in the console box,
- Open the console box lid. Pull down the knob so that the cup holder swings down.
- While holding the console box lid with your hand, push down the cup holder to be secured.
NOTICE
- When you use the cup holder in the console box, make sure it is securely locked.
- Do not rest your arm on the cup holder in the console box.
- Wipe up spilt drink at once.
76
INTERIOR EQUIPMENT
Rear
 ►Rear end of the rear console
 ►Left side body panel near the third seat
To use the cup holder, push or pull out the cup holder lid.
 ►Right side body panel near the third seat
⚠ CAUTION
- Do not place anything else other than cups or drink-cans in the cup holder, as such items may be thrown about in the compartment and possibly injure people in the vehicle during sudden braking or in an accident.
- To reduce the chance of injury in case of an accident or sudden stop while driving, keep the cup holder closed when not in use.
77
INTERIOR EQUIPMENT
AUXILIARY BOXES
Your vehicle has several types of auxiliary box. To use them, open as shown in the following illustrations.
CAUTION To reduce the chance of injury in case of an accident or a sudden stop, always keep the auxiliary box closed while driving.
NOTICE During hot weather, the interior of the vehicle becomes very hot. Do not leave anything flammable or deformable such as a lighter, glasses, etc. inside.
 ►Rear right side
 ►Rear right side
78
INTERIOR EQUIPMENT
CARD HOLDER
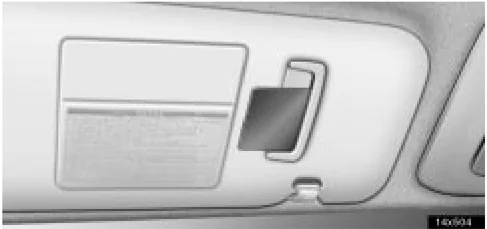
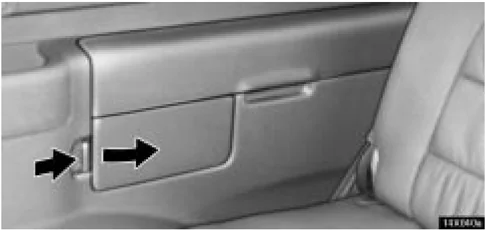
You can store a card in the slot as shown in the illustration.
FLOOR MAT
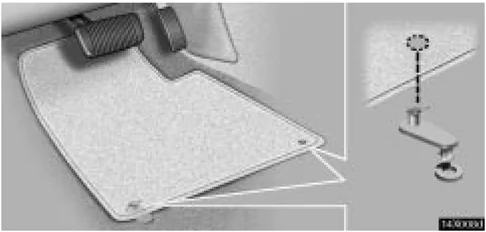
Use a floor mat of the correct size. If the floor carpet and floor mat have 2 holes, then they are designed for use with locking clips. Fix the floor mat with locking clips into the holes in the floor carpet.
79
INTERIOR EQUIPMENT
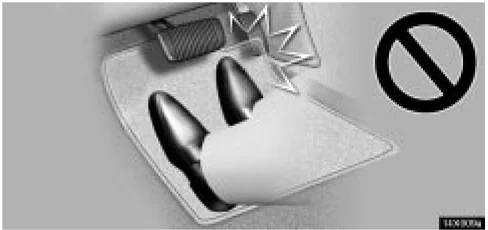
CAUTION Make sure the floor mat is properly placed on the floor carpet. If the floor mat slips and interferes with the movement of the pedals during driving, it may cause an accident.
COAT HOOKS
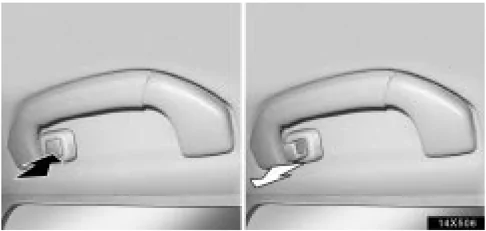
To use the coat hook, push the hook.
CAUTION Do not hook a hanger, heavy or sharp pointed object on the coat hook. If the curtain shield airbag inflates, those items will be hurled away with great force or the curtain shield airbag may not activate correctly. When you hang clothes, hang them on the coat hook directly.
80
INTERIOR EQUIPMENT
WARNING REFLECTOR HOLDER
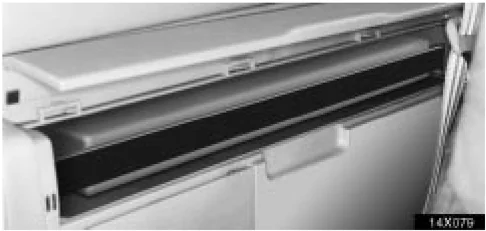
This auxiliary box is equipped with a band to hold the warning reflector.
Although the warning reflector itself is not included as original equipment, this auxiliary box can be used to store the warning reflector.
Hold the warning reflector with a band.
Make sure the warning reflector is securely held.
TIE-DOWN HOOKS
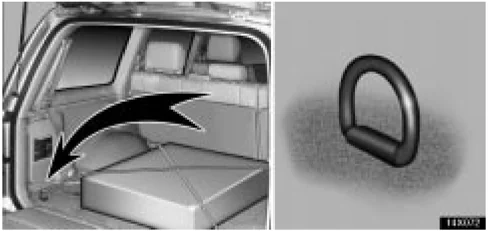
To secure your luggage, use the tie-down hooks as shown above.
See "Luggage stowage precautions" for precautions to observe in loading luggage.
81
INTERIOR EQUIPMENT
FIRST-AID KIT HOLDER
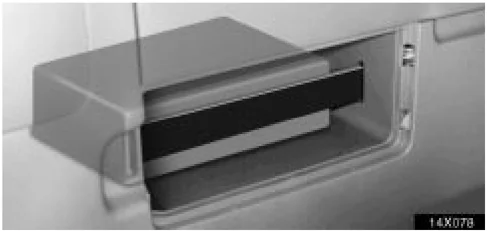
This auxiliary box is equipped with a band to hold the first-aid kit.
Although the first-aid kit itself is not included as original equipment, this auxiliary box can be used to store the first aid kit.
Hold the first-aid kit with a band.
Make sure the first-aid kit is securely held.
LUGGAGE STOWAGE PRECAUTIONS
When stowing luggage or cargo in or on the vehicle, observe the following:
- Put luggage or cargo in the luggage compartment when at all possible. Be sure all items are secured in place.
- Be careful to keep the vehicle level. Placing the weight as far forward as possible helps maintain vehicle balance.
- For better fuel economy, do not carry unnecessary weight.
! CAUTION
- To prevent luggage or packages from sliding forward during braking, do not stack anything in the luggage compartment higher than the seatbacks. Keep luggage or packages low, as close to the floor as possible.
- Never allow anyone to ride in the luggage compartment. It is not designed for passengers. They should ride in their seats with their seat belts properly fastened. Otherwise, they are much more likely to suffer serious bodily injury, in the event of sudden braking or a collision.
82
INTERIOR EQUIPMENT
- Do not drive with objects left on top of the instrument panel. They may interfere with the driver’s field of view. Or they may move during sharp vehicle acceleration or turning, and impair the driver’s control of the vehicle. In an accident they may injure the vehicle occupants.
NOTICE Do not load the vehicle beyond the vehicle capacity weight specified on the tire pressure label.
ROOF LUGGAGE CARRIER
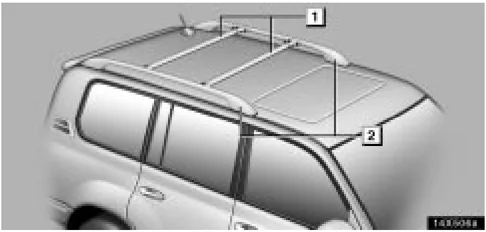
► 1 Cross rails 2 Roof rails The roof luggage carrier consists of roof rails and sliding cross rails.
83
INTERIOR EQUIPMENT
Adjusting the position of cross rails
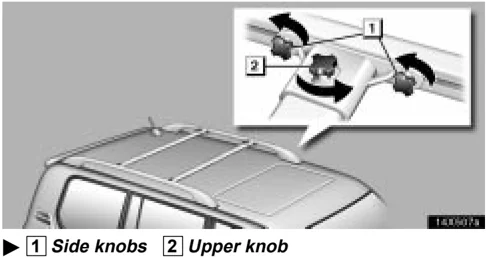
1 Side knobs 2 Upper knob
- Turn the upper and side knobs counterclockwise to loosen the cross rails.
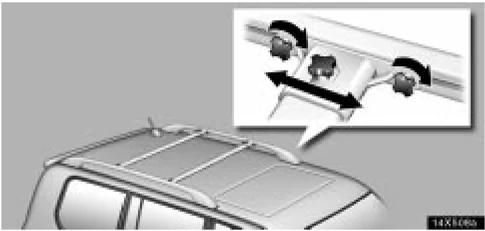
- Slide the cross rails to the appropriate position for loading the luggages and turn the side knobs clockwise to tighten the cross rails securely.
There are cross rail stoppers on the roof rails which help you prevent the cross rails being touched with the tilted-up moon roof.
NOTICE Do not remove the cross rail stoppers, or the moon roof may be damaged when it is tilted.
84
INTERIOR EQUIPMENT
 3. In order to fix the cross rails to the appropriate length, turn the upper knobs clockwise after tightening all the side knobs.
CAUTION Make sure the cross rails are fixed securely by pushing forward and rearward them. Failure to do so may cause an unexpected accident or severe injury in the event of emergency braking or a collision.
Follow the manufacturer's instructions and precautions when installing the attachments or their equivalent.
CAUTION When you load cargo on the roof luggage carrier, observe the following:
- Place the cargo so that its weight is distributed evenly between the front and rear axles.
- If loading long or wide cargo, never exceed the vehicle overall length or width. (See "Specifications" on page 391 for information on your vehicle overall length and width.)
- Before driving, make sure the cargo is securely fastened on the roof luggage carrier.
- Loading cargo on the roof luggage carrier will make the center of the vehicle gravity higher. Avoid high speeds, sudden starts, sharp turns, sudden braking or abrupt maneuvers, otherwise it may result in loss of control or vehicle rollover due to failure to operate this vehicle correctly.
- If driving for a long distance, on rough roads, or at high speeds, stop the vehicle now and then during the trip to make sure the cargo remains in its place.
- Do not exceed 70 kg (143 lb.) cargo weight on the roof luggage carrier.
NOTICE When loading the luggages, be careful not to scratch the surface of the moon roof.
85

86
SECTION 1 – 5
INSTRUMENTS AND CONTROLS
Exterior equipment
-
Hood . . . . . . . . . . . . . . . . . . . . . . . . . . . . . . . . . . . . . . . . . . . . . . . . . . . . . . . . . . . . . . . . . . . . . . . . . . . . . . . . . . . . . . . . . . . . . . . . . . . . . . . . . . . . . . . . . . . . . . . . . . . . . . . . . . . . . . . . . . . . . . . . . . . . . . . . . . . . . . . . . . . . . . . . . . . . . . . . . . . . . . . . . . . . . . . . . . . . . . . . . . . . . . . . . . . . . . . . . . . . . ........ 88
-
Fuel tank cap . . . . . . . . . . . . . . . . . . . . . . . . . . . . . . . . . . . . . . . . . . . . . . . . . . . . . . . . . . . . . . . . . . . . . . . . . . . . . . . . . . . . . . . . . . . . . . . . . . . . . . . . . . . . . . . . . . . . . . . ........ 89
-
Moon roof . . . . . . . . . . . . . . . . . . . . . . . . . . . . . . . . . . . . . . . . . . . . . . . . . . . . . . . . . . . . . . . . . . . . . . . . . . . . . . . . . . . . . . . . . . . . . . . . . . . . . . . . . . . . . . . . . . . . . . ........

EXTERIOR EQUIPMENT
HOOD
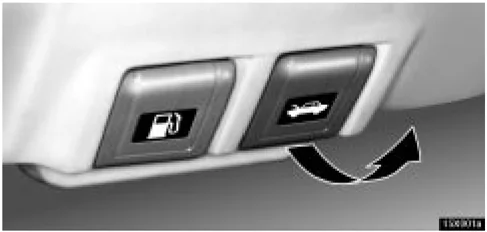
- To open the hood, pull the hood lock release lever under the instrument panel. The hood will spring up slightly.
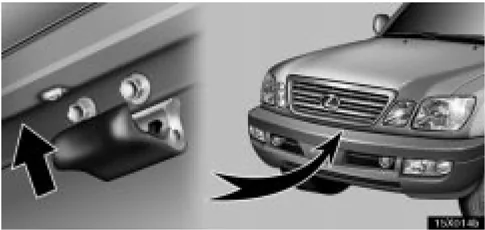
- Insert your fingers under the hood, push up the auxiliary catch lever and lift the hood.
Before closing the hood, check to see that you have not forgotten any tools, rags, etc. Then lower the hood and make sure it locks.
CAUTION Before driving, be sure that the hood is closed and securely locked. Otherwise, the hood may open unexpectedly while driving and an accident may occur.
88