Cargo Compartment
Your motorcycle comes with a lockable travel trunk and dual saddlebags, plus two trunk side pockets and front fairing pockets. Instructions on how to open, close, and lock these compartments follow.
Travel Trunk & Saddlebags
The travel trunk and saddlebags are for lightweight items. Cargo in the travel trunk and both saddlebags should not exceed: 20.0 lbs (9.0 kg) each However, regardless of compartment capacity, be sure you do not exceed the maximum load and cargo weight limits (page 44).
To Lock & Unlock the Travel Trunk & Saddlebags
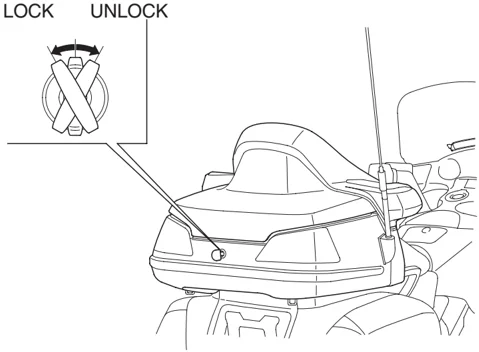
The travel trunk and saddlebags can be locked and unlocked with the ignition key or remote transmitter. To use the remote transmitter, see page 49.
To unlock: Insert the ignition key and turn it clockwise.
To lock: Insert the ignition key and turn it counterclockwise.
Before Riding 45
Cargo Compartment
To Open & Shut the Travel Trunk & Saddlebags
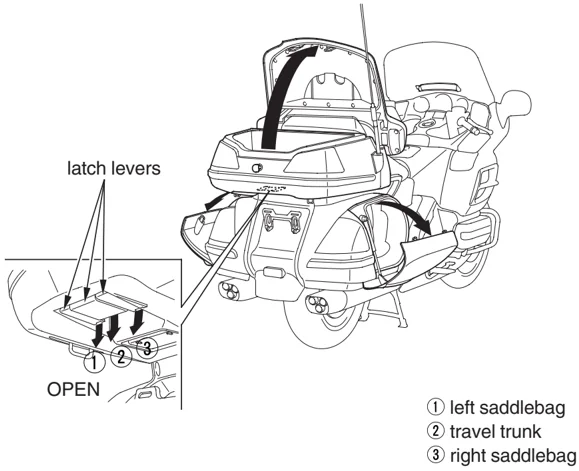
latch levers
OPEN
① left saddlebag ② travel trunk ③ right saddlebag
To open the travel trunk, pull the middle latch lever down.
To open the right or left saddlebag, pull the right or left latch lever down.
TO CLOSE:
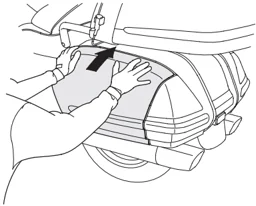
To shut each compartment, place your hands flat on the edges of its lid and press down until it is firmly closed and check the travel trunk & saddlebags open indicator is not displayed.
To lock the all compartments, use the ignition key or transmitter.
46 Before Riding
Cargo Compartment
I f a Saddlebag Won’t Open
REAR
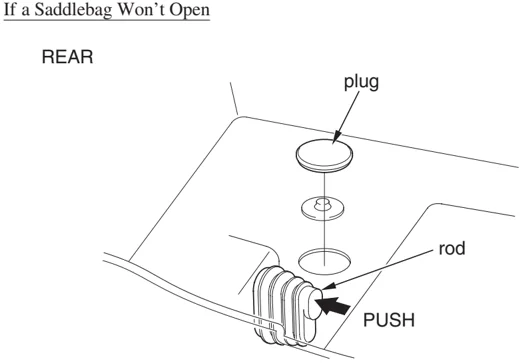
- Open the travel trunk and remove the plug from the right or left access hole in the floor of the trunk.
- Put your finger through the access hole and push the rod. The saddlebag should open.
Cargo Compartment
Storage Box
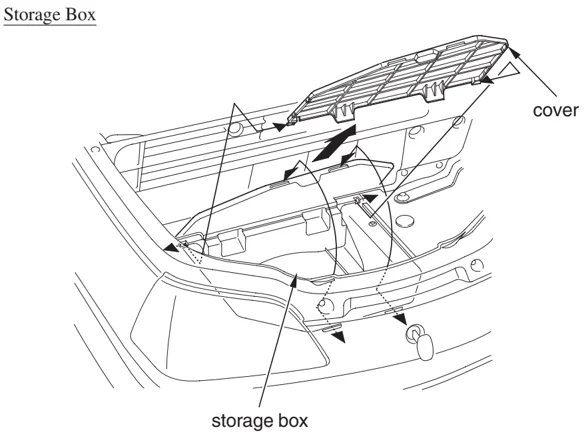
Your motorcycle has a storage box in the travel trunk. To open the storage box, push forward on the cover and raise it.
48 Before Riding
Cargo Compartment
Remote Transmitter
You can lock and unlock your motorcycle’s trunk and saddlebags with the remote transmitter.
If the ignition switch is left off for more than one month, the remote transmitter will no longer operate the remote control system. To reset the system, turn the ignition switch ON.
• To lock the compartments — push the lock button. (The front and rear turn signal lights will blink once.)
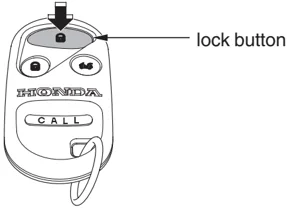
lock button
• To unlock the compartments — push the unlock button. (The front and rear turn signal lights will blink two times.)
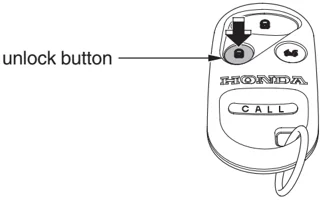
unlock button
If you unlock the compartments with the transmitter, but do not open any of the compartments within thirty seconds, the compartments automatically relock.
You cannot lock the compartments with the remote transmitter if any compartment is not fully closed. (The front and rear turn signal lights will blink ten times.)
Cargo Compartment
• To open the trunk, push and hold the trunk release button for approximately one second.
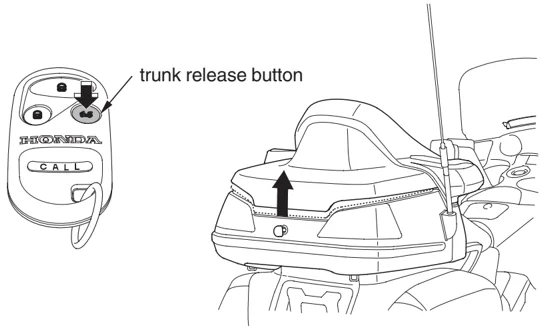
trunk release button
Call Mode
The call mode is provided to let you locate your motorcycle when it is parked in a large lot.
Push and hold the CALL button, the horn will sound and the turn signal lights will blink two times.
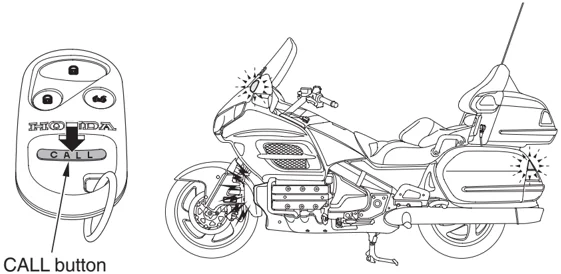
CALL button
When the ignition switch is in the ON or ACC position: • You can lock and unlock the compartments. • The trunk release button will not operate. • The call mode will not operate.
50 Before Riding
Cargo Compartment
Replacing the Battery
When the remote transmitter’s battery begins to get weak, it may take several pushes on the button to lock or unlock the compartments, and the LED will get dim. Replace the battery as soon as possible.
Battery type: CR2025
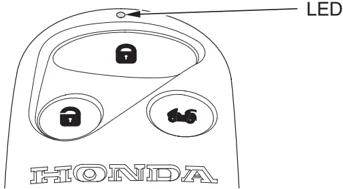
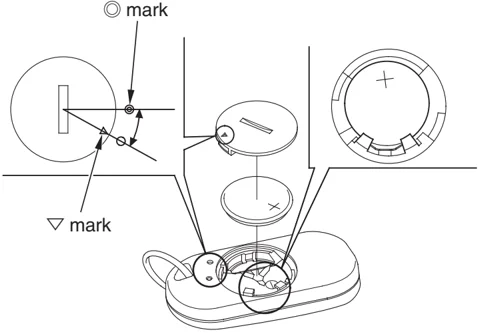
- Use a coin to turn the round cover on the back of the transmitter counterclockwise.
- Remove the old battery and note the polarity. Make sure the polarity of the new battery is the same (+ side facing up), then insert it in the transmitter.
- Align the ▽ mark on the cover with the ◎ mark on the transmitter, then set the cover in place and turn it clockwise.
Before Riding 51
Cargo Compartment
Transmitter Care
Avoid severe shock to the transmitter, such as dropping or throwing it. Also, protect it from extreme hot or cold temperatures.
Clean the transmitter case with a soft cloth. Do not use strong cleaners or solvents that could harm the case. Immersing the transmitter in any liquid will harm the transmitter and cause it to not function properly.
If you lose a transmitter, you will need to have the replacement programmed to your motorcycle’s system by your Honda dealer. Any other transmitters you have will also need to be reprogrammed.
As required by the FCC:
This device complies with Part 15 of the FCC rules. Operation is subject to the following two conditions: (1) This device may not cause harmful interference, and (2) this device must accept any interference received, including interference that may cause undesired operation.
Changes or modifications not expressly approved by the party responsible for compliance could void the user’s authority to operate the equipment.
This device complies with Industry Canada Standard RSS-210. Operation is subject to the following two conditions: (1) this device may not cause interference, and (2) this device must accept any interference that may cause undesired operation of the device.
52 Before Riding
Cargo Compartment
Fairing Pockets
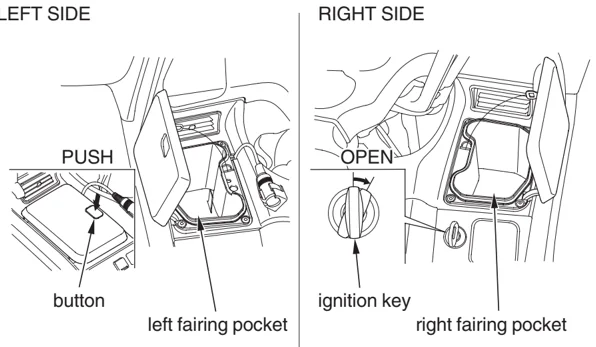
The fairing pockets are for lightweight items. Cargo in each fairing pocket should not exceed: 4.5 lbs (2.0 kg)
To open the left fairing pocket, push the button. To open the right fairing pocket, insert the ignition key, turn it clockwise.
To shut each fairing pocket, place your hands flat on the edges of its lid and press down until it is firmly closed.
Make sure the fairing pockets are closed before riding.
Be careful not to flood this area when washing your motorcycle.
Take care to keep gasoline, brake fluid, or other chemical solvents off the pocket covers. They will damage the surface of the pocket covers. Do not store valuables in the fairing pockets.
Before Riding 53
Cargo Compartment
Trunk Side Pockets
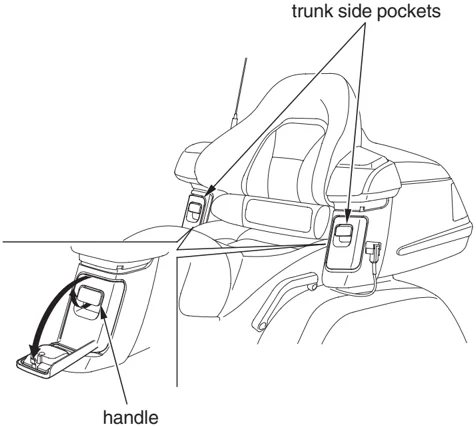
The trunk side pockets are for soft, lightweight items. Cargo in each trunk side pocket should not exceed: 1.0 lbs (0.5 kg) Do not put sharp or hard objects in the trunk side pockets. Such objects could interfere with opening the lids or damage the pockets.
To open or shut the lid, pull the handle up.
Make sure the trunk side pockets are closed before riding.
Be careful not to flood this area when washing your motorcycle.
54 Before Riding
Comfort & Convenience Adjustment
Your motorcycle has many features you can adjust to suit your personal preference and increase your comfort and convenience, and your passenger’s as well.
We recommend that you take time to check the following items and make any desired adjustments before each ride:
Suspension
The rear suspension (page 143) can be adjusted for a softer or firmer ride. You may want to adjust your suspension whenever you change your normal load.
Windshield Height
Your windshield height can be adjusted slightly higher or lower (page 56).
Mirrors
Always check your mirrors for maximum visibility before each ride.
Audio Programming
Make any presets or changes in your audio programming before you get on the road (page 89).
Ventilation Louvers
If you need to adjust the ventilation louvers (page 57), do it before you ride.
Before Riding 55
Comfort & Convenience Adjustment
Windshield Height Adjustment
The windshield adjuster has 6 positions. You can adjust your windshield height slightly higher or lower. If possible, we recommend you adjust your windshield height to below eye level for better visibility.
To Adjust Windshield Height
FRONT
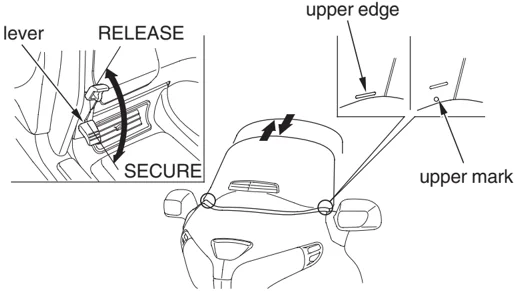
- Pull both levers up to release the windshield.
- To raise: Move the windshield up to the desired position.
- To lower: Move the windshield up to the upper mark ( ○ ), lower it all the way (to reset the ratchet mechanism), then raise it to the desired position.
- On both sides, align the mark on the windshield with the upper edge of the instrument panel.
- Push the levers down to secure the windshield.
56 Before Riding
Comfort & Convenience Adjustment
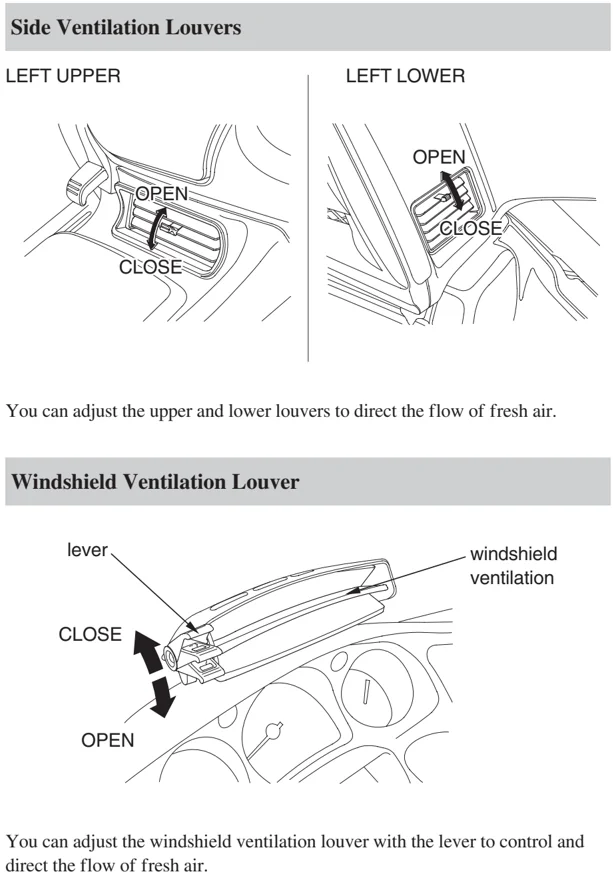
Side Ventilation Louvers
LEFT UPPER
OPEN CLOSE
LEFT LOWER
OPEN CLOSE
You can adjust the upper and lower louvers to direct the flow of fresh air.
Windshield Ventilation Louver
lever windshield ventilation CLOSE OPEN
You can adjust the windshield ventilation louver with the lever to control and direct the flow of fresh air.
Before Riding 57
Accessories
Accessory (ACC) Terminal
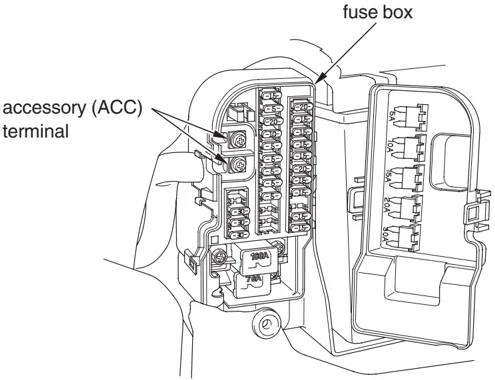
For your convenience, your motorcycle is equipped with an accessory terminal, located in the fuse box. The terminal provides 12V DC power for electrical accessories. A maximum of 60 watts (5 amps) may be connected to the terminal. Before installing any accessories, read Accessories and Modifications, page 4.
If you install any accessories, check the battery frequently to determine the state of charge. Higher current demands may blow a fuse or discharge the battery. For more information, see Battery, page 158, and If a Fuse Blows, page 193.
Connect accessory electrical leads securely, and keep them insulated, away from hot parts and sharp edges.
58 Before Riding
Basic Operation & Riding
This section gives basic riding instructions, including how to start and stop your engine, and how to use the throttle, clutch, and brakes. It also provides important information on riding with a passenger or cargo, and operating your cruise control.
To protect your new engine and enjoy optimum performance and service life, refer to Break-in Guidelines (page 208 ).
- Safe Riding Precautions ........ 60
- Starting & Stopping the Engine ........ 61
- Preparation ........ 61
- Starting Procedure ........ 62
- Flooded Engine ........ 62
- Bank Angle Sensor Ignition Cut-off System ........ 63
- How to Stop the Engine ........ 63
- Shifting Gears ........ 64
Safe Riding Precautions
Before riding your motorcycle for the first time, please review the Motorcycle Safety section beginning on page 1, and the Before Riding section beginning on page 37.
Even if you have ridden other motorcycles, take time to become familiar with how this motorcycle works and handles. Practice in a safe area until you build your skills and get accustomed to the motorcycle’s size and weight.
Make sure flammable materials such as dry grass or leaves do not come in contact with the exhaust system when riding, idling, or parking your motorcycle.
60 Basic Operation & Riding