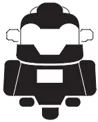
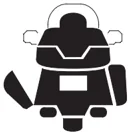
Component Locations
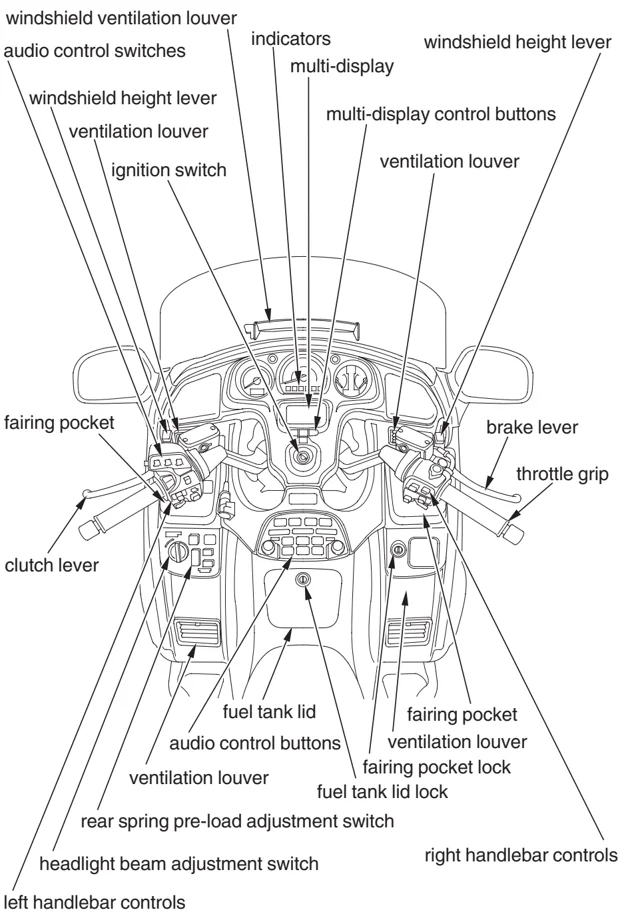
windshield ventilation louver audio control switches windshield height lever ventilation louver ignition switch indicators multi-display multi-display control buttons windshield height lever ventilation louver fairing pocket brake lever throttle grip clutch lever fuel tank lid fairing pocket ventilation louver fairing pocket lock fuel tank lid lock audio control buttons ventilation louver rear spring pre-load adjustment switch headlight beam adjustment switch right handlebar controls left handlebar controls
12 Instruments & Controls
Component Locations
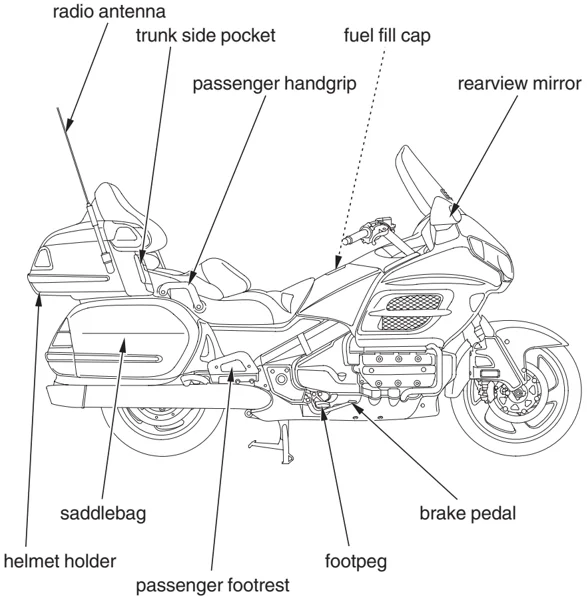
radio antenna trunk side pocket fuel fill cap passenger handgrip rearview mirror saddlebag brake pedal helmet holder footpeg passenger footrest
Instruments & Controls 13
Component Locations
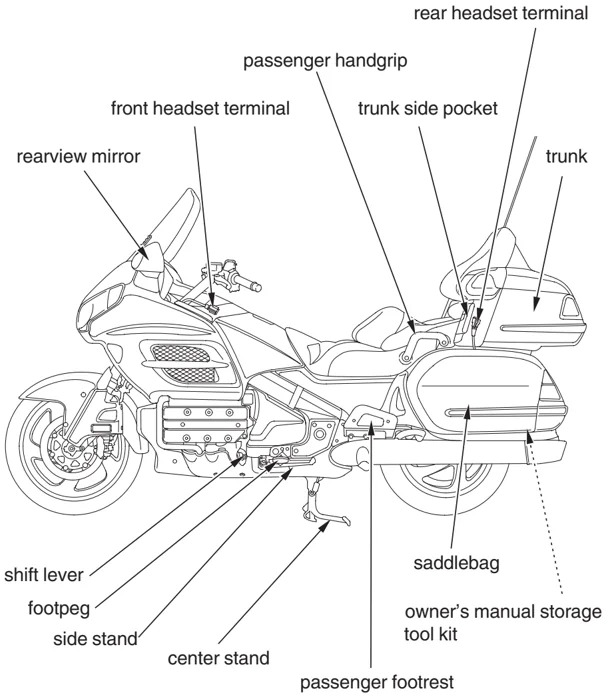
rear headset terminal passenger handgrip front headset terminal trunk side pocket trunk rearview mirror shift lever footpeg side stand center stand saddlebag owner's manual storage tool kit passenger footrest
14 Instruments & Controls
Gauges & Indicators
The gauges and indicators on your motorcycle keep you informed, alert you to possible problems, and make your riding safer and more enjoyable. Refer to the gauges and indicators frequently. Their functions are described on the following pages.
USA: Speedometer, odometer & tripmeter read in miles.
Canada: Speedometer, odometer & tripmeter read in kilometers.
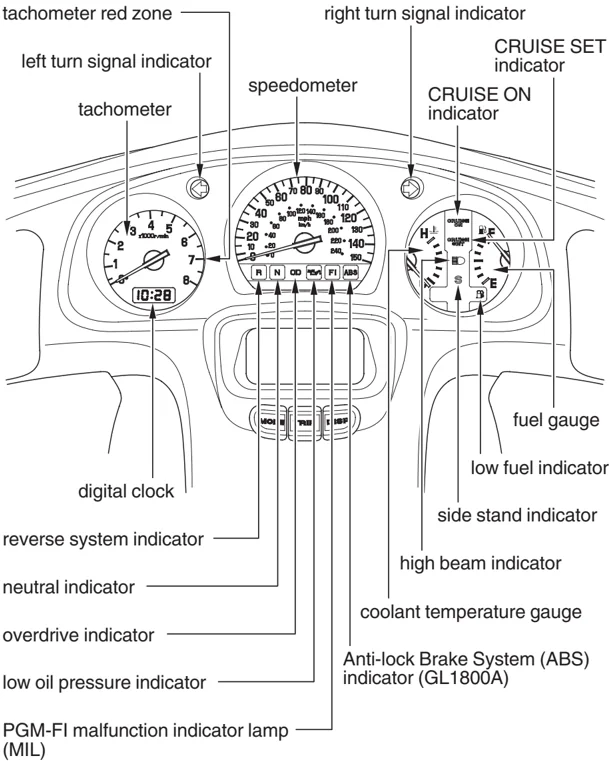
tachometer red zone right turn signal indicator left turn signal indicator CRUISE SET indicator speedometer tachometer CRUISE ON indicator digital clock fuel gauge low fuel indicator side stand indicator reverse system indicator high beam indicator neutral indicator coolant temperature gauge overdrive indicator Anti-lock Brake System (ABS) indicator (GL1800A) low oil pressure indicator PGM-FI malfunction indicator lamp (MIL)
Instruments & Controls 15
Gauges & Indicators
Lamp Check
Most of the indicator lights come on when you turn the ignition switch ON so you can check that they are working. Some indicators turn off after a few seconds; other remain on until or after the engine is started. The ABS indicator remains on until your motorcycle begins moving. All indicators are identified on the following pages with the words: Lamp Check.
If one of these indicators does not come on when it should, have your Honda dealer check for burned-out bulbs or other problems.
16 Instruments & Controls
Gauges & Indicators
speedometer
Shows riding speed in miles (USA) or kilometers (Canada) per hour.
tachometer
Shows engine speed in revolutions per minute (rpm).
tachometer red zone
Shows excessive engine rpm range (indicated from the beginning of the tachometer red zone) in which operation may damage the engine. Do not let the tachometer needle enter the red zone.
turn signal indicator (amber)
Flashes when either turn signal operates.
reverse system indicator
Lights when the reverse system is engaged.
Instruments & Controls 17


Gauges & Indicators
| N | neutral indicator (green) |
|---|---|
| Lights when the transmission is in neutral. |
| OD | overdrive indicator |
|---|---|
| Lights when the transmission is in overdrive (5th gear). |
| low oil pressure indicator (red) | |
|---|---|
| Lights when engine oil pressure is low enough to cause engine damage. If the low oil pressure indicator lights during operation, pull safely to the side of the road. See page 192 for instructions and cautions. Lamp Check. |
| FI | PGM-FI malfunction indicator lamp (MIL) (red) |
|---|---|
| Lights when there is any abnormality in the PGM-FI (Programmed Fuel Injection) system. Should also light for a few seconds and then go off when the ignition switch is turned ON and the engine stop switch is at RUN. If the indicator comes on at any other time, reduce speed and take your motorcycle to a Honda dealer as soon as possible. Lamp Check. |
18 Instruments & Controls


Gauges & Indicators
(GL1800A)
| anti-lock brake system (ABS) indicator (red) |
If there is a problem with the Anti-lock Brake System, this light comes on and remains on or blinks. Also lights and stays on during initial lamp check, until the motorcycle begins moving. For information about ABS, see page 70 . Lamp Check.
CRUISE ON CRUISE ON Indicator
Lights when the cruise control master switch is on.
CRUISE SET CRUISE SET Indicator
Lights when the cruise control set/decel switch is on.
high beam indicator (blue)
Lights when the headlight is on high beam.
S side stand indicator (amber)
Lights when the side stand is put down — to indicate that the side stand ignition cut-off system (page 61 ) is activated.
Instruments & Controls 19




Gauges & Indicators
low fuel indicator
Lights as a reminder to refuel soon. The indicator comes on when there is about 1.16 US gal (4.4 liters) left in the fuel tank. Lamp Check.
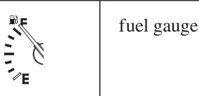
fuel gauge
Shows the approximate fuel supply available, if your motorcycle is on a level surface. At F (Full) there are 6.7 US gal (25.5 liters), including reserve supply. When the gauge needle enters the red band, fuel will be low and you should refill the tank as soon as possible. The amount of fuel left in the tank when the needle enters the red band is approximately 0.79 US gal (3.0 liters).
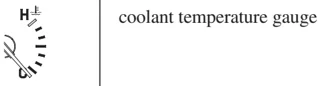
coolant temperature gauge
Shows engine coolant temperature. When the needle moves above the C (cold) mark, the engine is warm enough to start riding. If the needle approaches the H (hot) mark, pull safely to the side of the road. See page 190 for instructions and cautions.
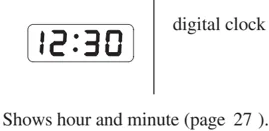
12:30 digital clock
Shows hour and minute (page 27 ).
20 Instruments & Controls

Multi-display
Your motorcycle is equipped with a Multi-display that presents various displays. This section explains display functions and operations.
Opening/Ending Ceremony
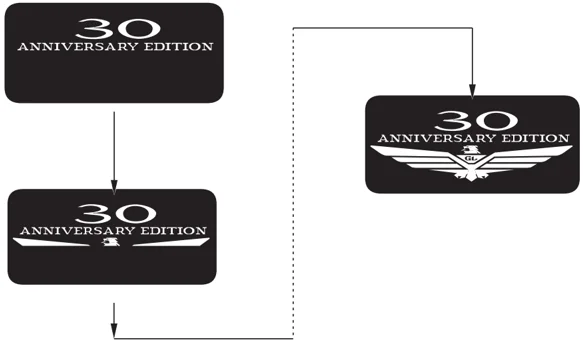
When the ignition switch is turned ON or ACC, the display presents an "opening ceremony."
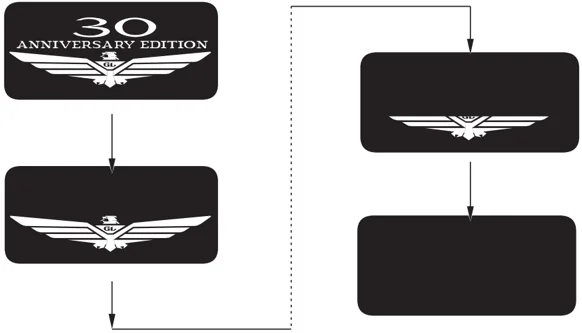
When the ignition switch is turned OFF, the display presents an "ending ceremony."
Instruments & Controls 21
Multi-display
On/Off-Opening/Ending Ceremony
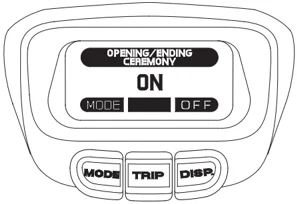
The opening/ending ceremony can be turned off.
- Push the MODE button to cycle to the “OPENING/ENDING CEREMONY” screen.
- Push the DISP. button to cycle between on/off of the display.
- Push the MODE button to select the “SET” function. Selecting the “SET” function locks in the on/off option for future use.
ceremony display ON
ceremony display OFF
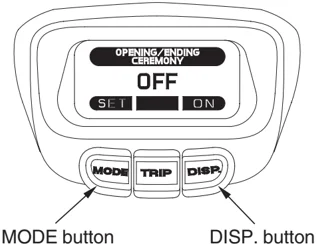
MODE button
DISP. button
22 Instruments & Controls
Multi-display
Special Message for Opening/Ending Ceremony
- Push the MODE button to cycle to the “OPENING/ENDING CEREMONY” screen.
- Push the TRIP button then the DISP. button, hold both buttons down.
MODE button
- The “MODE” on the display will change to “SET”. The display should now show “STANDARD” in the middle line.
- Use the DISP. button to select the “SPL” function. The display should now show “SPECIAL!” in the middle line.
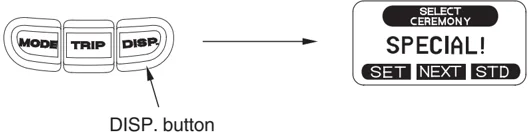
DISP. button
- Push the TRIP button to select the “NEXT” function. The display should now show “CHANGE OK?” in the middle line.
- Push the MODE button to select the “YES” function.
MODE button
Instruments & Controls 23

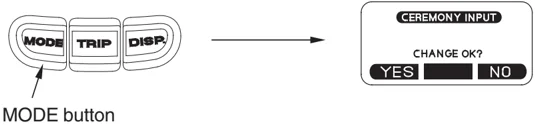
Multi-display
- Use the TRIP button to cycle through the alphabet, number and symbol selection.
Capital Letters A B C D E F G H I J K L M N O P Q R S T U V W X Y Z
Numbers 0 1 2 3 4 5 6 7 8 9
Symbols ! " # $ % & ' ( ) * + , - . / > = < ?
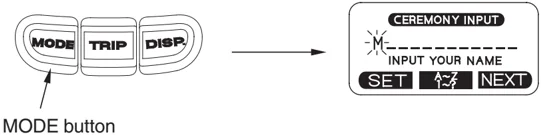
MODE button
- When you have completed your message, push the MODE button to select the “SET” function which will lock in your special message to be used for the opening and ending ceremony.
24 Instruments & Controls
Multi-display
Odometer/Tripmeter
If the ceremony display is turned OFF, the initial display is odometer/tripmeter.
• ODO (Odometer) — shows the total miles (USA) or kilometer (CANADA) ridden.
• TRIP (Tripmeter) — shows the number of miles (USA) or kilometer (CANADA) ridden since you last reset the meter.
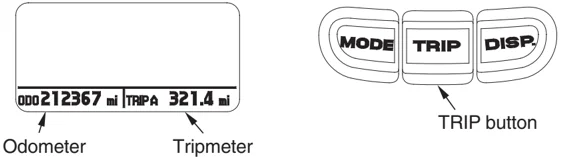
The tripmeter will show mileage in two sub modes, “TRIP A” and “TRIP B.” Push the TRIP button to select the “TRIP A” or “TRIP B” mode.
To reset the tripmeter, push and hold the TRIP button with the display in the “TRIP A” or “TRIP B” mode.
Instruments & Controls 25


Multi-display
Display Illumination Adjustment
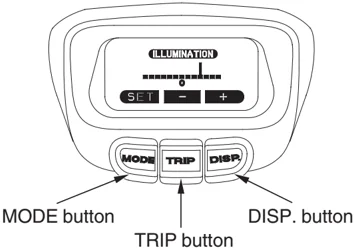
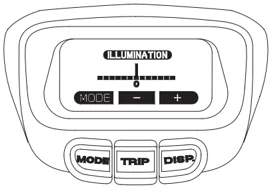
To adjust the brightness of the display:
Push the MODE button once. 'ILLUMINATION' will display.
• To brighten the display — push the DISP. button (+).
• To darken the display — push the TRIP button (−).
(The brighter and darker ranges each have six steps.)
• To set the selected step — push the MODE button.
Before Adjustment
After Adjustment
26 Instruments & Controls
Multi-display
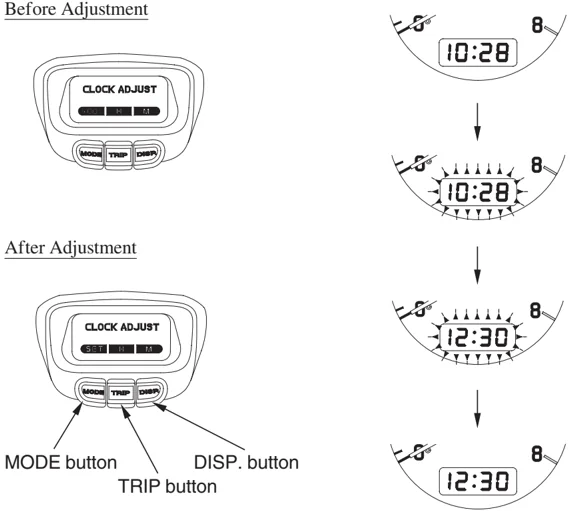
Digital Clock
The display shows the hour and minute.
To adjust the time:
- Turn the ignition switch to ON or ACC.
- Push the MODE button two times. "CLOCK ADJUSTMENT" will display and the time on the digital clock will blink.
- To set the hour, press and release the TRIP button until the desired hour appears.
- Quick setting — push and hold the TRIP button until the desired hour appears.
- To set the minute, press and release the DISP. button until the desired minute appears.
- Quick setting — push and hold the DISP. button until the desired minute appears.
- Once the time is selected, push the mode button to enter the time.
Before Adjustment
After Adjustment
MODE button TRIP button DISP. button
Instruments & Controls 27
Multi-display
Air Temperature Meter
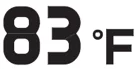
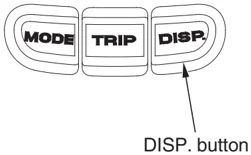
Push the DISP. button once to display the air temperature.
USA : Fahrenheit (°F), Canada : Centigrade (°C).
Temperature Display
The temperature sensor is located in the upper fairing. Therefore, the temperature reading can be affected by heat reflection from the road surface, engine heat, and the exhaust from the surrounding traffic. This can cause on error in the temperature reading when your speed is under 19 mph (30 km/h).
《For USA》
83°F
《For CANADA》
23°C
DISP. button
28 Instruments & Controls

Multi-display
Travel Trunk & Saddlebags Open Indicator
This indicator turns on when the ignition switch is ON and your motorcycle’s travel trunk or saddlebags are open.
If all compartments are not fully closed, the display will blink OPEN and indicate the open compartment(s).
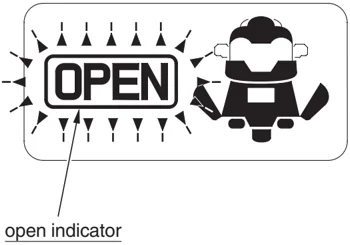
open indicator
Travel Trunk open
Saddlebag open
Instruments & Controls 29