SECTION 1 - 4
OPERATION OF INSTRUMENTS AND CONTROLS
Steering wheel and Mirrors
- Tilt steering wheel ........ 90
- Outside rear view mirrors ........ 90
- Anti- glare inside rear view mirror ........ 92
- Auto anti- glare inside rear view mirror ........ 93
- Sun visors ........ 94
89

Tilt steering wheel
X13641
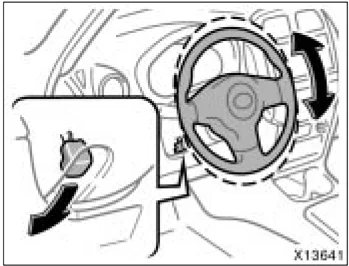
To change the steering wheel angle, hold the steering wheel, push down the lock release lever, tilt the steering wheel to the desired angle and return the lever to its original position.
CAUTION
- Do not adjust the steering wheel while the vehicle is moving. Doing so may cause the driver to mishandle the vehicle and an accident may occur resulting in death or serious injuries.
- After adjusting the steering wheel, try moving it up and down to make sure it is locked in position.
Outside rear view mirrors—
X13204
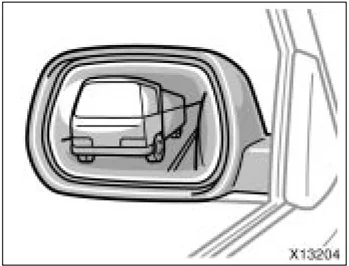
Adjust the mirror so that you can just see the side of your vehicle in the mirror.
Be careful when judging the size or distance of any object seen in the outside rear view mirror on the passenger's side because it is a convex mirror. Any object seen in a convex mirror will look smaller and farther away than when seen in a flat mirror.
On some models, when you push the rear window defogger switch, the heater panels in the outside rear view mirrors will quickly clear the mirror surface. (See “Rear window and outside rear view mirror defoggers” on page 104 in Section 1-5.)
90
—Power rear view mirror control
CAUTION
- Do not adjust the mirror while the vehicle is moving. Doing so may cause the driver to mishandle the vehicle and an accident may occur resulting in death or serious injuries.
- Since the mirror surfaces can get hot, do not touch them when the defogger switch is on.
NOTICE If ice should jam the mirror, do not operate the control or scrape the mirror face. Use a spray de-icer to free the mirror.
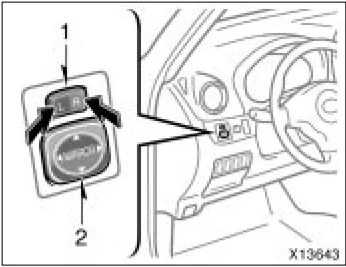
To adjust a mirror, use the switches.
- Master switch—To select the mirror to be adjusted Push the switch to “L” (left) or “R” (right).
- Control switch—To move the mirror Push the switch in the desired direction.
Mirrors can be adjusted when the key is in the “ACC” or “ON” position.
91
—Folding rear view mirrors
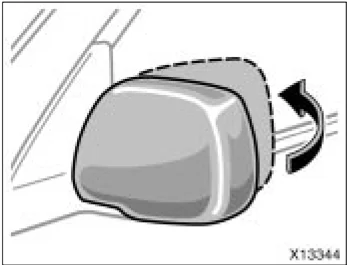
The rear view mirrors can be folded backward for parking in compact areas. To fold the rear view mirror, push backward.
CAUTION Do not drive with the mirrors folded backward. Both the driver and passenger side rear view mirrors must be extended and properly adjusted before driving.
Anti-glare inside rear view mirror

Adjust the mirror so that you can just see the rear of your vehicle in the mirror.
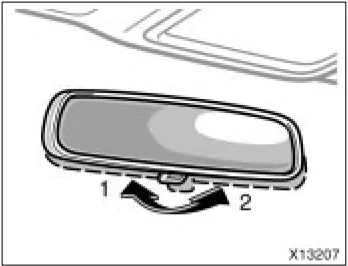
To reduce glare from the headlights of the vehicle behind you during night driving, operate the lever on the lower edge of the mirror.
Daylight driving—Lever at position 1 The reflection in the mirror has greater clarity at this position.
Night driving—Lever at position 2 Remember that by reducing glare you also lose some rear view clarity.
CAUTION Do not adjust the mirror while the vehicle is moving. Doing so may cause the driver to mishandle the vehicle and an accident may occur resulting in death or serious injuries.
92
Auto anti-glare inside rear view mirror
X13680
Adjust the mirror so that you can just see the rear of your vehicle in the mirror.
This mirror is equipped with auto anti-glare function. The function is designed to reduce glare from the headlights of the vehicle behind you during night driving.
When the ignition key is inserted and turned on, the inside rear view mirror always turns on in the automatic function mode.
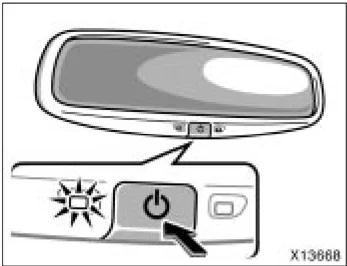
The indicator illuminates to show you that the function is on.
In automatic function mode, if the mirror detects light from the headlights of the vehicle behind you, the mirror surface darkens slightly to reduce the reflected light.
To turn off the automatic function, push the “” switch.
To turn on the automatic function again, push the “” switch.
Adjust it before driving so that the rear view is in the best condition.
When the inside air temperature is low, it may take a little longer for the mirror to darken in response to the detection of headlights.
CAUTION
Do not adjust the mirror while the vehicle is moving. Doing so may cause the driver to mishandle the vehicle and an accident may occur resulting in death or serious injuries.
X13679
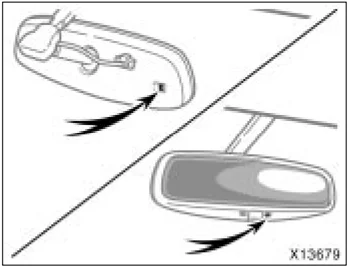
To ensure correct functioning of anti-glare mirror sensors located on both sides of the mirror, do not touch or cover the sensors with your finger or a piece of cloth, etc.
93
Sun visors—
 X13649
Type A
 X13413
Type B
To block out glare, move the sun visor. To block out glare from the front—Swing down the main sun visor (position 1). To block out glare from the side—Swing down the main sun visor, remove it from the hook and swing it to the lateral side (position 2). Type A—If glare comes from obliquely behind you, slide the visor backward (to position 3). Type B—If glare comes from obliquely behind you, extend the plate at the end of the visor (to position 3).
CAUTION
- Type A—Slide the sun visor only when it is swung down to the lateral side. It can cover the anti-glare inside rear view mirror and obstruct the rear view.
- Type B—Do not extend the plate at the end of the sun visor when the visor is in the position 1. It can cover the anti-glare inside rear view mirror and obstruct the rear view.
—Vanity mirrors
 X13650
Type A
 X13651
Type B
94
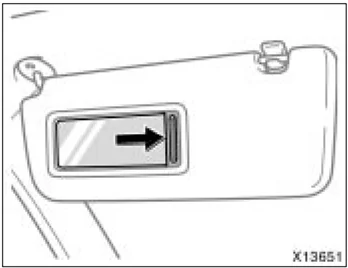
To use the vanity mirrors, swing down the main sun visor and slide the cover. Type A only— The vanity light comes on when you slide the cover.
95
96
SECTION 1 - 5
OPERATION OF INSTRUMENTS AND CONTROLS
Lights, Wipers and Defogger
- Headlights and turn signals ........ 98
- Emergency flashers ........ 99
- Instrument panel light control ........ 100
- Front fog lights ........ 100
- Interior lights ........ 100
- Personal light ........ 101
- Ignition switch light ........ 102
- Windshield wipers and washer ........ 102
- Rear window wiper and washer ........ 103
- Rear window and outside rear view mirror defoggers ........ 104
97

Headlights and turn signals
 X14042
HEADLIGHTS To turn on the following lights: Twist the headlight/turn signal lever knob. Position 1—Parking, tail, license plate, side marker and instrument panel lights Position 2—Headlights and all of the above
Light reminder buzzer A buzzer will remind you to turn the lights off when the driver’s door is opened if you remove the key with the headlight switch on.
NOTICE To prevent the battery from being discharged, do not leave the lights on for a long period when the engine is not running.
Daytime running light system (on some models) The headlights turn on at reduced intensity when the parking brake is released with the engine started, even with the light switch in the “OFF” position. They will not go off until the ignition switch is turned off. To turn on the other exterior lights and instrument panel lights, twist the knob to the position 1. Twist the knob to the position 2 to turn to full intensity for driving at night.
 X14043
High-Low beams—For high beams, turn the headlights on and push the lever away from you (position 1). Pull the lever toward you (position 2) for low beams. The headlight high beam indicator light (blue light) on the instrument panel will tell you that the high beams are on. Flashing the high beam headlights (position 3)—Pull the lever all the way back. The high beam headlights turn off when you release the lever. You can flash the high beam headlights with the knob turned to “OFF”.
98
 X14044
TURN SIGNALS
To signal a turn, push the headlight/turn signal lever up or down to position 1.
The key must be in the "ON" position.
The lever automatically returns after you make a turn, but you may have to return it by hand after you change lanes.
To signal a lane change, move the lever up or down to the pressure point (position 2) and hold it.
If the turn signal indicator lights (green lights) on the instrument panel flash faster than normal, a front or rear turn signal bulb is burned out. See "Replacing light bulbs" on page 304 in Section 7-3.
Emergency flashers
 X14001
To turn on the emergency flashers, push the switch.
All the turn signal lights will flash. To turn them off, push the switch once again.
Turn on the emergency flashers to warn other drivers if your vehicle must be stopped where it might be a traffic hazard. Always pull as far off the road as possible.
The turn signal light switch will not work when the emergency flashers are operating.
NOTICE To prevent the battery from being discharged, do not leave the switch on longer than necessary when the engine is not running.
99
Instrument panel light control
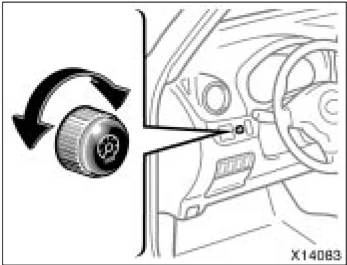
To adjust the brightness of the instrument panel lights, turn the knob.
X14083
Front fog lights
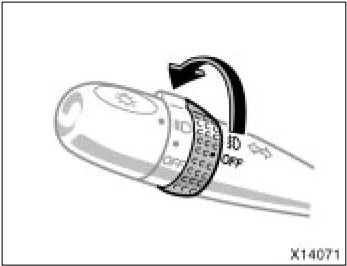
To turn on the front fog lights, twist the band of the headlight and turn signal switch lever. They will come on only when the headlights are on low beam.
X14071
Interior lights
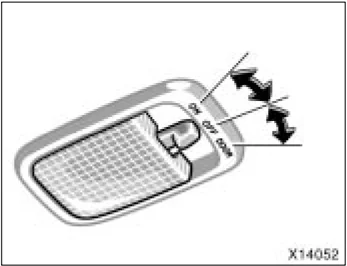
To turn on the interior light, slide the switch.
The interior light switch has the following positions: “ON”—Keeps the light on all the time. “OFF”—Turns the light off. “DOOR”—Turns the light on when any of the side doors and back door are opened. The light goes off when all the side doors and back door are closed.
X14052
100
ILLUMINATED ENTRY SYSTEM (vehicles with the power door lock system)
When the switch is in the “DOOR” position and any of the side doors and back door are opened, the lights will come on. After all the side doors and back door are closed, the lights remain on for about 15 seconds before fading out.
However, in the following cases, the light fades out immediately:
- All the side doors and back door are closed when the ignition key is in “ACC” or “ON” position.
- All the side doors and back door are locked when the light is still on.
When all the side doors and back door are unlocked simultaneously using either the key or the wireless remote control transmitter, the interior lights will come on and remain on for about 15 seconds before fading out.
INTERIOR LIGHT CUT OFF OPERATION To prevent the battery being discharged, the light will automatically turn off when the ignition switch is in the “LOCK” position and the door is left opened with the switch at “DOOR” position for 20 minutes or more.
Personal light
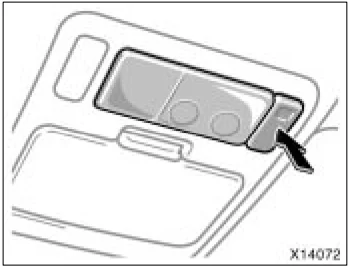
With moon roof
X14072
To turn on the personal light, push the switch. To turn the light off, push the switch once again.
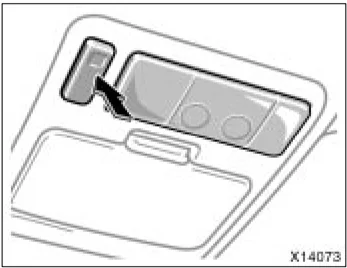
Without moon roof
X14073
101
Ignition switch light
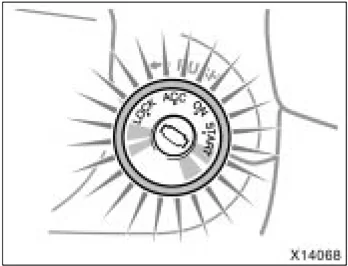
For easy access to the ignition switch, the ignition switch light comes on when any of the doors are opened. Vehicles with the power door lock system—
- When any door is unlocked using either the key or the wireless remote control key, the light will come on and remain on for about 15 seconds before fading out.
To prevent the battery being discharged, the light will automatically turn off when the ignition switch is in the “LOCK” position and the door is left opened for 20 minutes or more.
- The light remains on for about 15 seconds after all the side doors and back door are closed.
- When all the doors are locked, or when the ignition switch is turned to “ACC” or “ON” after all the side doors and back door are closed, the light fades out.
Windshield wipers and washer
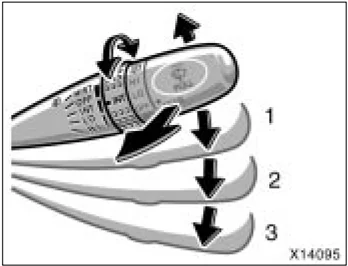
To turn on the windshield wipers, move the lever to the desired setting. The key must be in the “ON” position.
For a single sweep of the windshield, push the lever up and release it.
102
Rear window wiper and washer
The “INT” band lets you adjust the wiping time interval when the wiper lever is in the intermittent position (position 1). Twist the band upward to increase the time between sweeps, and downward to decrease it.
To squirt washer fluid, pull the lever toward you.
If the windshield wipers are off, they will operate a couple of times after the washer squirts.
For instructions on adding washer fluid, see “Adding washer fluid” on page □□□ in Section 7-3.
In freezing weather, warm the windshield with the defroster before using the washer. This will help prevent the washer fluid from freezing on your windshield, which can block your vision.
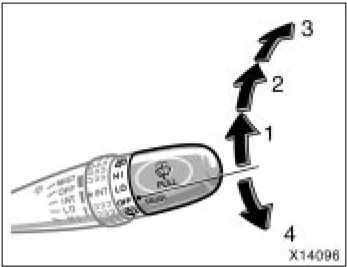
To turn on the rear window wiper, twist the lever knob upward.
The key must be in the “ON” position.
| Lever position | Speed setting |
|---|---|
| Position 1 | Intermittent |
| Position 2 | Normal |
To squirt washer fluid on the rear window, twist the knob upward or downward as far as it will go (position 3 or 4). The knob automatically returns from these positions after you release it. The rear window wiper operates while the washer squirts.
For instructions on adding washer fluid, see “Adding washer fluid” on page 303 in Section 7-3.
NOTICE
Do not operate the wipers if the windshield is dry. It may scratch the glass.
NOTICE
Do not operate the rear wiper if the rear window is dry. It may scratch the glass.
103
2005 RAV4 from Sep. ’04 Prod. (OM42570U)
Rear window and outside rear view mirror defoggers
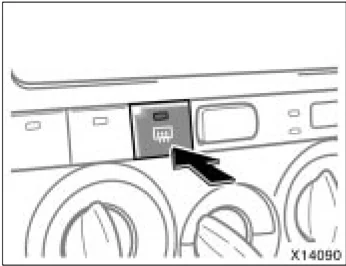
To defog or defrost the rear window, push the switch.
The key must be in the “ON” position.
The thin heater wires on the inside of the rear window will quickly clear the window surface. An indicator light will illuminate to indicate the defogger is operating.
On some models, the heater panels in the outside rear view mirrors will also quickly clear the surfaces.
Push the switch once again to turn the defoggers off.
The system will automatically shut off after the defoggers have operated about 15 minutes.
CAUTION
Since the mirror surfaces can get hot, do not touch them when the switch is on.
Make sure you turn the defoggers off when the surfaces are clear. Leaving the defoggers on for a long time could cause the battery to discharge, especially during stop-and-go driving. The defoggers are not designed for drying rain water or for melting snow.
If the outside rear view mirrors are heavily coated with ice, use a spray de-icer before operating the switch.
NOTICE
When cleaning the inside of the rear window, be careful not to scratch or damage the heater wires or connectors.
104