SECTION 1 - 6
OPERATION OF INSTRUMENTS AND CONTROLS
Gauges, Meters and Service reminder indicators
- Fuel gauge ........ 106
- Engine coolant temperature gauge ........ 106
- Tachometer ........ 107
- Odometer and two trip meters ........ 108 Service reminder indicators and warning buzzers .. 109
105

Fuel gauge
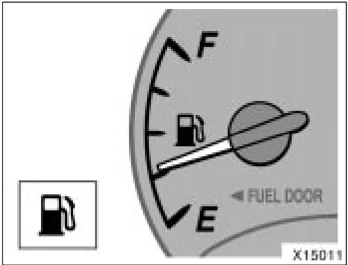
The gauge indicates the approximate quantity of fuel remaining in the tank when the ignition switch is on. Nearly full—Needle at “F” Nearly empty—Needle at “E” It is a good idea to keep the tank over 1/4 full. The needle moves when braking, accelerating or making turns. This is caused by the movement of the fuel in the tank. If the fuel level approaches “E” or the low fuel level warning light comes on, fill the fuel tank as soon as possible.
On inclines or curves, due to the movement of fuel in the tank, the fuel gauge needle may fluctuate or the low fuel level warning light may come on earlier than usual. If the fuel tank is completely empty, the malfunction indicator lamp comes on. Fill the fuel tank immediately. The indicator lamp goes off after driving several times. If the indicator lamp does not go off, contact your Toyota dealer as soon as possible. It is not a malfunction even if the needle of the fuel gauge returns to “E” when the ignition switch is turned to the “START” position.
Engine coolant temperature gauge
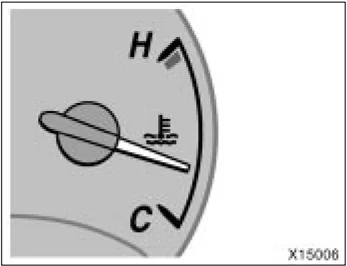
The gauge indicates the engine coolant temperature when the ignition switch is on. The engine operating temperature will vary with changes in weather and engine load. If the needle moves into the red zone, your engine is too hot. If your vehicle overheats, stop your vehicle and allow the engine to cool. Your vehicle may overheat during severe operating conditions, such as: ● Driving up a long hill on a hot day. ● Reducing speed or stopping after high speed driving.
106
● Idling for a long period with the air conditioning on in stop-and-go traffic. ● Towing a trailer.
It is not a malfunction even if the needle of the engine coolant temperature gauge returns to “C” when the ignition switch is turned to the “START” position.
NOTICE
◆Do not remove the thermostat in the engine cooling system as this may cause the engine to overheat. The thermostat is designed to control the flow of coolant to keep the temperature of the engine within the specified operating range.
◆Do not continue driving with an overheated engine. See “If your vehicle overheats” on page 246 in Section 4.
Tachometer
X15007
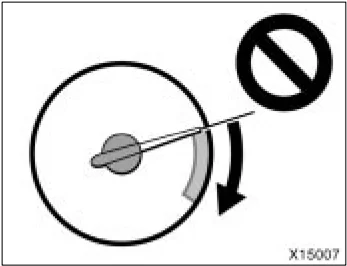
The tachometer indicates engine speed in thousands of rpm (revolutions per minute). Use it while driving to select correct shift points and to prevent engine lugging and over-revving.
Driving with the engine running too fast causes excessive engine wear and poor fuel economy. Remember, in most cases the slower the engine speed, the greater the fuel economy.
It is not a malfunction even if the needle of the tachometer returns to the bottom position when the ignition switch is turned to the “START” position.
NOTICE
Do not let the indicator needle get into the red zone. This may cause severe engine damage.
107
Odometer and two trip meters
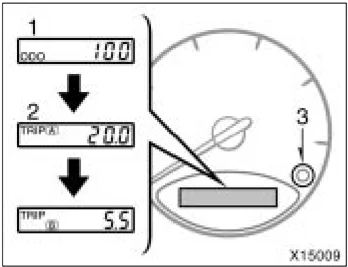
This meter displays the odometer and two trip meters.
- Odometer—Shows the total distance the vehicle has been driven.
- Two trip meters—Show two different distances independently driven since the last time each trip meter was set to zero.
You can use one trip meter to calculate the fuel economy and the other to measure the distance on each trip. All trip meter data is cancelled if the electrical power source is disconnected.
- Trip meter reset knob—Resets the two trip meters to zero, and also change the meter display.
To change the meter display, quickly push and release the knob. The meter display changes in the order from the odometer to trip meter A to trip meter B, then back to the odometer each time you push.
To reset the trip meter A to zero, display the meter A reading, then push and hold the knob until the meter is set to zero. The same process can be applied for resetting the trip meter B.
108
Service reminder indicators and warning buzzers
| If the indicator or buzzer comes on... | Do this. | |
|---|---|---|
| (a) | BRAKE or (!) | If parking brake is off, stop immediately and contact Toyota dealer. |
| (b) | (indicator and buzzer) | Fasten driver’s seat belt. |
| (c) | PASSENGER | Fasten front passenger’s seat belt. |
| (d) | Stop and check. | |
| (e) | Stop and check. | |
| (f) | CHECK or | Take vehicle to Toyota dealer. |
| (g) | Fill up tank. |
109
| If the indicator or buzzer comes on... | Do this. | |
|---|---|---|
| (h) | ABS or | Take vehicle to Toyota dealer.If brake system warning light is also on, stop immediately and contact Toyota dealer. |
| (i) | Close all side doors and back door. | |
| (j) | Take vehicle to Toyota dealer immediately. | |
| (k) | A/T OILTEMP | Stop and check. |
| (l) | VSCTRAC | Take vehicle to Toyota dealer. |
| (m) | Adjust tire inflation pressure and turn off warning light by pushing reset switch for a few seconds. If warning light remains, contact Toyota dealer. | |
| (n) | Add washer fluid. | |
| (o) | MAINTREQD | Replace engine oil. |
110
| If the indicator or buzzer comes on... | Do this. | |
|---|---|---|
| (p) | Key reminder buzzer | Remove key. |
| (q) | Light reminder buzzer | Turn off lights. |
111
(a) Brake System Warning Light This light comes on in the following cases when the ignition key is in the “ON” position.
-
When the parking brake is applied... Vehicles with anti-lock brake system— This light comes on for a few seconds when the ignition key is turned to the “ON” position even after the parking brake is released.
-
When the brake fluid level is low...
CAUTION It is dangerous to continue driving normally when the brake fluid level is low.
Have your vehicle checked at your Toyota dealer in the following cases:
-
The light does not come on even if the parking brake is applied when the ignition key is in the “ON” position. Vehicles with anti-lock brake system—
-
The light does not come on even if the ignition key is turned on with the parking brake released.
A warning light turning on briefly during operation does not indicate a problem.
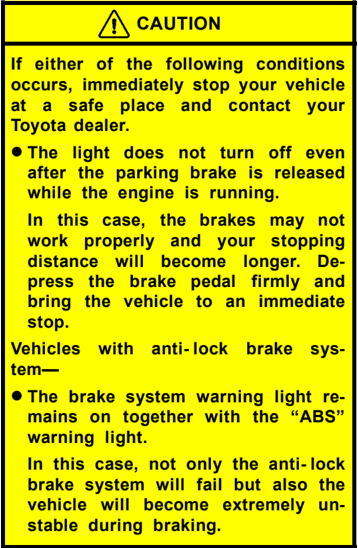
CAUTION If either of the following conditions occurs, immediately stop your vehicle at a safe place and contact your Toyota dealer.
-
The light does not turn off even after the parking brake is released while the engine is running. In this case, the brakes may not work properly and your stopping distance will become longer. Depress the brake pedal firmly and bring the vehicle to an immediate stop. Vehicles with anti-lock brake system—
-
The brake system warning light remains on together with the “ABS” warning light. In this case, not only the anti-lock brake system will fail but also the vehicle will become extremely unstable during braking.
(b) Driver’s Seat Belt Reminder Light and Buzzer The light and buzzer act as a reminder to buckle up the driver’s seat belt.
Once the ignition key is turned to “ON” or “START”, the reminder light flashes and buzzer sounds if the driver’s seat belt is not fastened. Unless the driver fastens the belt, the light continues flashing and the buzzer stops after about 4 to 8 seconds.
(c) Front Passenger’s Seat Belt Reminder Light The light acts as a reminder to have the front passenger buckle up the seat belt.
Once the ignition key is turned to “ON” or “START”, the reminder light flashes if a passenger sits in the front passenger seat and does not fasten the seat belt. However, if a front passenger uses an additional seat cushion, the light may not flash even when the seat belt is not buckled up.
If luggage or other load is placed on the front passenger seat, depending on its weight and how it is placed on the seat, built-in sensors in the seat cushion may detect the pressure, causing the reminder light to keep flashing.
112
(d) Discharge Warning Light This light warns that the battery is being discharged. If it comes on while you are driving, there is a problem somewhere in the charging system. The engine ignition will continue to operate, however, until the battery is discharged. Turn off the air conditioning, blower, radio,etc., and drive directly to the nearest Toyota dealer or repair shop.
NOTICE Do not continue driving if the engine drive belt is broken or loose.
(e) Low Engine Oil Pressure Warning Light This light warns that the engine oil pressure is too low. If it flickers or stays on while you are driving, pull off the road to a safe place and stop the engine immediately. Call a Toyota dealer or qualified repair shop for assistance.
The light may occasionally flicker when the engine is idling or it may come on briefly after a hard stop. There is no cause for concern if it then goes out when the engine is accelerated slightly. The light may come on when the oil level is extremely low. It is not designed to indicate low oil level, and the oil level must be checked using the level dipstick.
NOTICE Do not drive the vehicle with the warning light on—even for one block. It may ruin the engine.
(f) Malfunction Indicator Lamp This lamp comes on when the ignition key is turned to the “ON” position and goes off after the engine starts. This means that the warning light system is operating properly. If the lamp remains on, or the lamp comes on while driving, first check the followings. ● Empty fuel tank If the fuel tank is empty, refuel immediately. ● Loose fuel tank cap If the fuel tank cap is loose, securely tighten it.
These cases are temporary malfunctions. The malfunction indicator lamp will go off after taking several driving trips. If the lamp does not go off even after several trips, contact your Toyota dealer as soon as possible. If the fuel tank is not empty or the fuel tank cap is not loose... ● There is a problem somewhere in the engine, emission control system, electronic throttle control system, automatic transmission electrical system or warning light system itself. Contact your Toyota dealer as soon as possible to service the vehicle. If engine speed does not increase when the accelerator pedal is depressed, there may be a problem somewhere in the electronic throttle control system. At this time, vibration may occur. However, if you depress the accelerator pedal more firmly and slowly, you can drive your vehicle at low speeds. Have your vehicle checked by your Toyota dealer as soon as possible.
113
Even if the abnormality of the electronic throttle control system is corrected during low speed driving, the system may not be recovered until the engine is stopped and the ignition key is turned to the “ACC” or “LOCK” position.
CAUTION Be especially careful to prevent erroneous pedal operation.
Emissions Inspection and Maintenance (I/M) programs
Your vehicle may not pass a state emission inspection if the malfunction indicator lamp remains on. Contact your Toyota dealer to check your vehicle’s emission control system and OBD (On-Board Diagnostics) system before taking your vehicle for the inspection.
For details, see “Emissions Inspection and Maintenance (I/M) programs” on page 276 in Section 6.
(g) Low Fuel Level Warning Light This light comes on when the fuel level in the tank becomes nearly empty. Fill up the tank as soon as possible.
On inclines or curves, due to the movement of fuel in the tank, the low fuel level warning light may come on earlier than usual.
(h) “ABS” Warning Light Vehicles without vehicle stability control system—
The light comes on when the ignition key is turned to the “ON” position. If the anti-lock brake system works properly, the light turns off after a few seconds. Thereafter, if the system malfunctions, the light comes on again.
When the “ABS” warning light is on (and the brake system warning light is off), the anti-lock brake system does not operate, but the brake system still operates conventionally.
When the “ABS” warning light is on (and the brake system warning light is off), the anti-lock brake system does not operate so that the wheels could lock up during a sudden braking or braking on slippery road surfaces.
If either of the following conditions occurs, this indicates a malfunction somewhere in the components monitored by the warning light system. Contact your Toyota dealer as soon as possible to service the vehicle.
- The light does not come on when the ignition key is turned to the “ON” position, or remains on.
- The light comes on while you are driving.
A warning light turning on briefly during operation does not indicate a problem.
CAUTION If the “ABS” warning light remains on together with the brake system warning light, immediately stop your vehicle at a safe place and contact your Toyota dealer.
In this case, not only the anti-lock brake system will fail but also the vehicle will become extremely unstable during braking.
114
Vehicles with vehicle stability control system— The light comes on when the ignition key is turned to the “ON” position. If the anti-lock brake system and the brake assist system work properly, the light turns off after a few seconds. Thereafter, if either of the systems malfunctions, the light comes on again.
When the “ABS” warning light is on (and the brake system warning light is off), the anti-lock brake system, the brake assist system, the traction control system and the vehicle stability control system do not operate, but the brake system still operates conventionally.
When the “ABS” warning light is on (and the brake system warning light is off), the anti-lock brake system does not operate so that the wheels could lock up during a sudden braking or braking on slippery road surfaces.
If either of the following conditions occurs, this indicates a malfunction somewhere in the components monitored by the warning light. Contact your Toyota dealer as soon as possible to service the vehicle.
- The light does not come on when the ignition key is turned to the “ON” position, or remains on.
- The light comes on while you are driving.
A warning light turning on briefly during operation does not indicate a problem.
CAUTION If the “ABS” warning light remains on together with the brake system warning light, immediately stop your vehicle at a safe place and contact your Toyota dealer.
In this case, not only the anti-lock brake system will fail but also the vehicle will become extremely unstable during braking.
(i) Open Door Warning Light This light remains on until all the side doors and back door are completely closed.
(j) SRS Warning Light This light will come on when the ignition key is turned to the “ON” position. After about 6 seconds, the light will go off. This means the systems of the airbag and front seat belt pretensioners are operating properly.
The warning light system monitors the airbag sensor assembly, front airbag sensors, side and curtain shield airbag sensors, curtain shield airbag sensors, driver’s seat position sensor, driver’s seat belt buckle switch, front seat belt pretensioner assemblies, inflators, warning light, interconnecting wiring and power sources.
If either of the following conditions occurs, this indicates a malfunction somewhere in the parts monitored by the warning light system. Contact your Toyota dealer as soon as possible to service the vehicle.
- The light does not come on when the ignition key is turned to the “ON” position or remains on for more than 6 seconds.
- The light comes on while driving.
115
(k) Automatic Transmission Fluid Temperature Warning Light (four-wheel drive models) This light warns that the automatic transmission fluid temperature is too high. If this light comes on while you are driving, slow down and pull off the road. Stop the vehicle at a safe place and put the selector lever in “P”. With the engine idling, wait until the light goes off. If the light goes off, you can start the vehicle again. If the light does not go off, call a Toyota dealer or qualified repair shop for assistance.
NOTICE Continued driving with the warning light on may damage the automatic transmission.
(l) “VSC TRAC” Warning Light This light warns that there is a problem somewhere in the vehicle stability control system or traction control system. The light will come on when the ignition key is turned to “ON” and will go off after a few seconds. If the light comes on while driving, the system does not work. However, as conventional braking operates when applied, there is no problem to continue your driving. In the following cases, contact your Toyota dealer:
- The warning light does not come on after the ignition key is turned to “ON”.
- The warning light remains on after the ignition key is turned to “ON”.
- The warning light comes on while driving. Two-wheel drive models only—The “TRAC OFF” indicator light will come on when the “VSC TRAC” warning light comes on even if the “TRAC OFF” switch is not pushed.
(m) Low Tire Pressure Warning Light This light warns that the tire inflation pressure is critically low. The light comes on when the ignition key is turned to the “ON” position. It goes off after a few seconds. This indicates that the low tire pressure warning system is functioning properly. If the light comes on while driving, adjust tire inflation pressure to the specified level. (See “Tires” on page 316 in Section 8.) After the tire inflation pressure is adjusted, push the tire pressure warning system reset switch for a few seconds and make sure the warning light goes off. If the light still remains or blinks once every second, have the low tire pressure warning system checked at your Toyota dealer. If the light blinks twice every second, the low tire pressure warning system needs to be initialized. For details, see “Tire pressure warning system” on page 131 in Section 1-7.
116
'n (n) Low Windshield Washer Fluid Level Warning Light (for vehicles sold in Canada)
The light warns that the windshield washer fluid level is too low. Add washer fluid at your earliest opportunity. (For instructions, see “Adding washer fluid” on page 303 in Section 7-3.)
(o) Engine Oil Replacement Reminder Light (for vehicles sold in U.S.A.)
This light acts as a reminder to replace the engine oil.
This light will come on when the ignition key is turned to “ON” and will go off after about a few seconds.
When you drive for about 7200 km (4500 miles) after the engine oil replacement, this light illuminates for about 3 seconds and then flashes for about 12 seconds with the ignition key turned to the “ON” position. If you continue driving without replacing the engine oil, and if the distance driven exceeds 8000 km (5000 miles), the light will come on after the ignition key is turned to “ON” position. The light will remain on thereafter.
If the light is flashing, we recommend that you replace the engine oil at an early opportunity depending on the driving and road conditions. If the light comes on, replace it as soon as possible.
The system must be reset after the engine oil replacement. Reset the system by the following procedure:
-
Turn the ignition key to the “OFF” position with the odometer reading shown. (For details, see “Odometer and two trip meters” on page 108 in this Section.)
-
Turn the ignition key to the “ON” position while holding down the trip meter reset knob.
Hold down the knob for at least 5 seconds. The odometer indicates “000000” and the light goes off.
If the system fails to reset, the light will continue flashing.
(p) Key Reminder Buzzer
This buzzer acts as a reminder to remove the key when you open the driver’s door with the ignition key in the “ACC” or “LOCK” position.
(q) Light Reminder Buzzer
This buzzer will sound if the headlight switch is left on and the driver’s door is opened with the key removed from the ignition switch.
117
CHECKING SERVICE REMINDER INDICATORS (except the low fuel level warning light and low windshield washer fluid level warning light)
- Apply the parking brake.
- Open one of the doors. The open door warning light should come on.
- Close the door. The open door warning light should go off.
- Turn the ignition key to “ON”, but do not start the engine. All the service reminder indicators except the open door warning light should come on. The “ABS” and “VSC TRAC” warning lights, low tire pressure warning light and engine oil replacement reminder light go off after a few seconds. The SRS warning light goes off after about 6 seconds. (The “TRAC OFF” indicator light and slip indicator light also come on and go off after a few seconds.)
If any service reminder indicator or warning buzzer does not function as described above, have it checked by your Toyota dealer as soon as possible.
118
SECTION 1 - 7
OPERATION OF INSTRUMENTS AND CONTROLS
Ignition switch, Transmission and Parking brake
- Ignition switch with steering lock ........ 120
- Automatic transmission ........ 121
- Manual transmission ........ 124
- Traction control system ........ 126
- Vehicle stability control system ........ 130
- Tire pressure warning system ........ 131
- Parking brake ........ 135
- Cruise control ........ 135
119

Ignition switch with steering lock
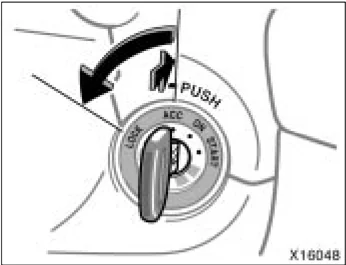
“START”—Starter motor on. The key will return to the “ON” position when released.
For starting tips, see page 227 in Section 3.
It is not a malfunction even if the needle of the tachometer, fuel gauge or engine coolant temperature gauge returns to the bottom position when the ignition switch is turned to the “START” position.
“ON”—Engine on and all accessories on.
This is the normal driving position.
It is not a malfunction even if the needle on the speedometer may move when the ignition switch is turned to the “ON” position.
“ACC”—Accessories such as the radio operate, but the engine is off.
If you leave the key in the “ACC” or “LOCK” position and open the driver’s door, a buzzer will remind you to remove the key.
“LOCK”—Engine is off and the steering wheel is locked. The key can be removed only at this position.
You must push in the key to turn it from “ACC” to the “LOCK” position. On vehicles with an automatic transmission, the selector lever must be in the “P” position before pushing the key.
Vehicles with engine immobilizer system—Once you remove the key, the engine immobilizer system is automatically set. (See “Engine immobilizer system” on page 13 in Section 1-2.)
When starting the engine, the key may seem stuck at the “LOCK” position. To free it, first be sure the key is pushed all the way in, and then rock the steering wheel slightly while turning the key gently.
CAUTION
For manual transmission: Never remove the key when the vehicle is moving, as this will lock the steering wheel and result in loss of steering control.
NOTICE
Do not leave the key in the “ON” position if the engine is not running. The battery will discharge and the ignition could be damaged.
120
Automatic transmission
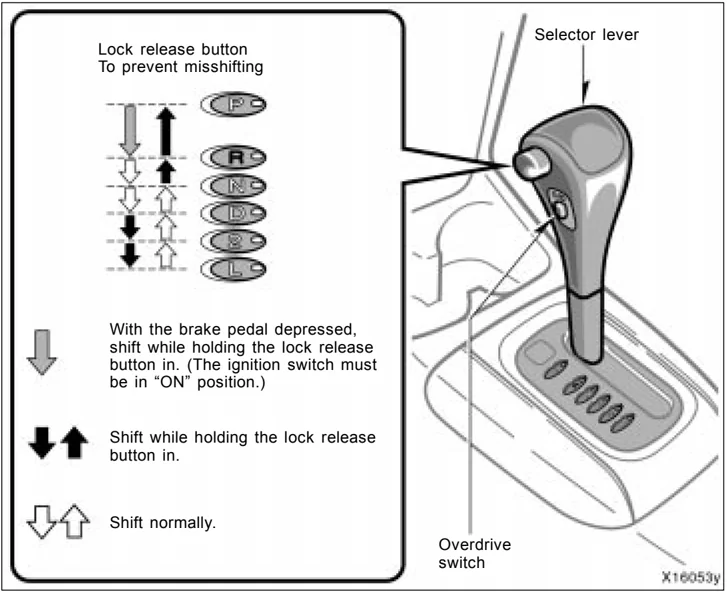
Lock release button To prevent misshifting
With the brake pedal depressed, shift while holding the lock release button in. (The ignition switch must be in “ON” position.)
Shift while holding the lock release button in.
Shift normally.
Selector lever
Overdrive switch X16053y
Your automatic transmission has a shift lock system to minimize the possibility of incorrect operation. This means you can only shift out of “P” position when the brake pedal is depressed (with the ignition switch in “ON” position and the lock release button depressed).
(a) Selector lever The shift position is also displayed on the instrument cluster.
P: Parking, engine starting and key removal R: Reverse N: Neutral D: Normal driving (with overdrive on) 2: Stronger engine braking L: Maximum engine braking
121
 X16028
(b) Overdrive switch
You can select either third gear (with overdrive off) or fourth gear (with overdrive on) by pushing this switch.
To turn the overdrive off, push the switch. The "O/D OFF" indicator light should come on. To turn the overdrive on again, push the switch again. The "O/D OFF" indicator light should go off.
Always drive your vehicle with the overdrive on for better fuel economy and quieter driving.
If the engine is turned off when the overdrive is off and restarted, the overdrive will be on automatically.
Vehicles with cruise control—When the cruise control is being used, even if you downshift the transmission by pushing and releasing the overdrive switch, engine braking will not be enabled because the cruise control is not cancelled.
For ways to decrease the vehicle speed, see “Cruise control” on page 135 in this Section.
(c) Normal driving
-
Start the engine as instructed in “How to start the engine” on page 228 in Section 3. The transmission must be in “P” or “N”.
-
With your foot holding down the brake pedal, shift the selector lever to “D”.
When the lever is in the “D” position, the automatic transmission system will select the most suitable gear for running conditions such as normal cruising, hill climbing, hard towing, etc.
Always turn the overdrive on for better fuel economy and quieter driving. If the engine coolant temperature is low, the transmission will not shift into the overdrive gear even with the overdrive on.
CAUTION
Never put your foot on the accelerator pedal while shifting.
- Release the parking brake and brake pedal. Depress the accelerator pedal slowly for smooth starting.
(d) Using engine braking
To use engine braking, you can downshift the transmission as follows:
● Push the overdrive switch. The “O/D OFF” indicator light will come on and the transmission will downshift to third gear.
● Shift into the “2” position. The transmission will downshift to second gear when the vehicle speed drops down to or lower than the following speed, and stronger engine braking will be enabled.
Two-wheel drive models 107 km/h (66 mph) Four-wheel drive models 101 km/h (62 mph)
122
● Shift into the “L” position. The transmission will downshift to first gear when the vehicle speed drops down to or lower than the following speed, and maximum engine braking will be enabled.
Two-wheel drive models 53 km/h (33 mph) Four-wheel drive models 50 km/h (31 mph)
Vehicles with cruise control—When the cruise control is being used, even if you downshift the transmission by pushing and releasing the overdrive switch, engine braking will not be enabled because the cruise control is not cancelled.
For ways to decrease the vehicle speed, see “Cruise control” on page 135 in this Section.
CAUTION Be careful when downshifting on a slippery surface. Abrupt shifting could cause the vehicle to skid or spin.
(e) Using “2” and “L” positions The “2” and “L” positions are used for strong engine braking as described previously.
With the selector lever in “2” or “L”, you can start the vehicle in motion as with the lever in “D”.
With the selector lever in “2”, the vehicle will start in first gear and automatically shift to second gear.
With the selector lever in “L”, the transmission is engaged in first gear.
◆Do not continue hill climbing or hard towing for a long time in the “2” or “L” position. This may cause severe automatic transmission damage from overheating. To prevent such damage, “D” position should be used in hill climbing or hard towing.
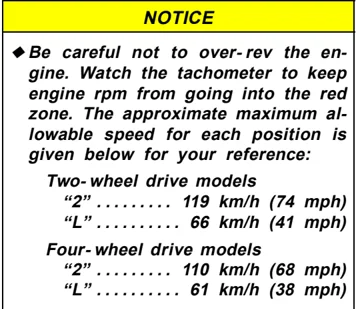
NOTICE ◆Be careful not to over-rev the engine. Watch the tachometer to keep engine rpm from going into the red zone. The approximate maximum allowable speed for each position is given below for your reference:
Two-wheel drive models
- “2” ........ 119 km/h (74 mph)
- “L” ........ 66 km/h (41 mph)
Four-wheel drive models
- “2” ........ 110 km/h (68 mph)
- “L” ........ 61 km/h (38 mph)
(f) Backing up
- Bring the vehicle to a complete stop.
- With the brake pedal held down with your foot, shift the selector lever to the “R” position.
NOTICE Never shift into reverse while the vehicle is moving.
123
(g) Parking
- Bring the vehicle to a complete stop.
- Pull the parking brake lever up fully to securely apply the parking brake.
- With the brake pedal pressed down, shift the selector lever to the “P” position.
CAUTION Never attempt to move the selector lever into “P” position under any circumstances while the vehicle is moving. Serious mechanical damage and loss of vehicle control may result.
(h) Good driving practice
- If the transmission repeatedly shifts up and down between third gear and overdrive when climbing a gentle slope, the overdrive should be turned off. Be sure to turn the switch on immediately afterward.
- When towing a trailer, in order to maintain engine braking efficiency, do not use overdrive.
CAUTION Always keep your foot on the brake pedal while stopped with the engine running. This prevents the vehicle from creeping.
NOTICE Always use the brake pedal or the parking brake to hold the vehicle on an upgrade. Do not attempt to hold the vehicle using the accelerator pedal, as this can cause the transmission to overheat.
(i) If you cannot shift the selector lever out of “P” position If you cannot shift the selector lever from the “P” position even though the brake pedal is depressed, use the shift lock override button. For instructions, see “If you cannot shift automatic transmission selector lever” on page 262 in Section 4.
Manual transmission

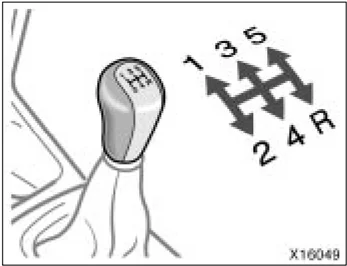
The shift pattern is as shown above. Press the clutch pedal down fully while shifting, and then release it slowly. Do not rest your foot on the pedal while driving, because it will cause clutch trouble. Do not use the clutch to hold the vehicle when stopped on an uphill grade—use the parking brake.
124
Recommended shifting speeds
The transmission is fully synchronized and upshifting or downshifting is easy.
For the best compromise between fuel economy and vehicle performance, you should upshift or downshift at the following speeds:
| gear | km/h (mph) |
|---|---|
| 1 to 2 or 2 to 1 | 24 (15) |
| 2 to 3 or 3 to 2 | 40 (25) |
| 3 to 4 or 4 to 3 | 64 (40) |
| 4 to 5 or 5 to 4 | 72 (45) |
Downshift to the appropriate gear if acceleration is needed when you are cruising below the above downshifting speeds.
Upshifting too soon or downshifting too late will cause lugging and, possibly, pinging. Regularly revving the engine to maximum speed in each gear will cause excessive engine wear and high fuel consumption.
Maximum allowable speeds
To get on a highway or to pass slower traffic, maximum acceleration may be necessary. Make sure you observe the following maximum allowable speeds in each gear:
Two-wheel drive models
| gear | km/h (mph) |
|---|---|
| 1 | 50 (31) |
| 2 | 94 (58) |
| 3 | 144 (89) |
| 4 | 186 (115) |
Four-wheel drive models
| gear | km/h (mph) |
|---|---|
| 1 | 43 (26) |
| 2 | 85 (53) |
| 3 | 131 (81) |
| 4 | 170 (106) |
NOTICE Do not downshift if you are going faster than the maximum allowable speed for the next lower gear.
Good driving practice
- If it is difficult to shift into reverse, put the transmission in neutral, release the clutch pedal momentarily, and then try again.
- When towing a trailer, in order to maintain engine braking efficiency, do not use fifth gear.
CAUTION Be careful when downshifting on a slippery surface. Abrupt shifting could cause the vehicle to skid or spin.
NOTICE Make sure the vehicle is completely stopped before shifting into reverse.
125
Traction control system (two-wheel drive models)
The traction control system automatically helps prevent the spinning of front wheels when the vehicle is started or accelerated on slippery road surfaces. When the ignition key is turned to “ON”, the system automatically turns on.
CAUTION
Under certain slippery road conditions, full traction of the vehicle and power against front wheels cannot be maintained, even though the traction control system is in operation. Do not drive the vehicle under any speed or maneuvering conditions which may cause the vehicle to lose traction control. In situations where the road surface is covered with ice or snow, your vehicle should be fitted with snow tires or tire chains. Always drive at an appropriate and cautious speed for the present road conditions.

NORMAL DRIVING MODE
Leave the system on during the ordinary driving so that it can operate when needed.
You may hear a sound in the engine compartment for a few seconds just after the vehicle begins to move. This means that the traction control system is in the self-check mode, but does not indicate a malfunction.
When the traction control system is operating, the following conditions occur:
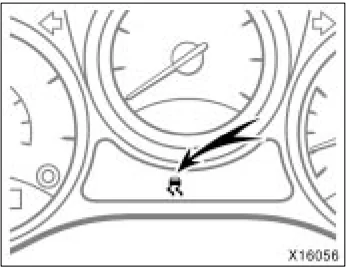
- The system controls the spinning of the front wheels. At this time, the slip indicator light blinks.
- You may feel vibration or noise in your vehicle, caused by operation of the brakes. This indicates the system is functioning properly.
The slip indicator light comes on for a few seconds when the ignition key is turned to “ON”. If the indicator light does not come on when the ignition is turned on, contact your Toyota dealer.
126
'05 Rav4_U (L/O 0409)
TRACTION CONTROL OFF MODE
If your wheels get stuck in a ditch when you are driving on a severe off road and sand, turn off the traction control system. This system that controls engine performance interferes with the process of freeing your wheels.
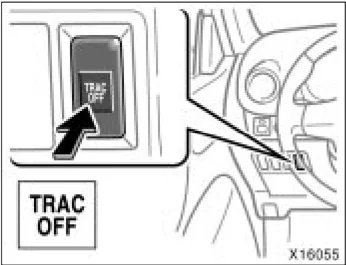
To turn off: Push “TRAC OFF” switch. The “TRAC OFF” indicator light will come on.
The vehicle stability control system is always activated, even if the traction control system is turned off.
To turn on: Push “TRAC OFF” switch once again.
The “TRAC OFF” indicator light will go off.
“TRAC OFF” indicator light comes on for a few seconds when the ignition key is turned to “ON”. It will come on again when you push the “TRAC OFF” switch to turn off the system.
In the following cases, contact your Toyota dealer:
- The indicator light does not come on when the ignition key is turned “ON”.
- The indicator light remains on after the ignition is turned on.
- The indicator light comes on with the normal driving mode while driving.
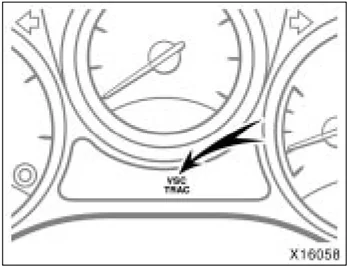
“VSC TRAC” warning light
This light warns that there is a problem somewhere in the traction control system or the vehicle stability control system.
The light will come on when the ignition key is turned to “ON” and will go off after a few seconds.
If the light comes on while driving, the system does not work. However, as conventional braking operates when applied, there is no problem to continue your driving.
127
In the following cases, contact your Toyota dealer:
- The warning light does not come on after the ignition key is turned to “ON”.
- The warning light remains on after the ignition key is turned to “ON”.
- The warning light comes on while driving.
The “TRAC OFF” indicator light will come on when the “VSC TRAC” warning light comes on even if the “TRAC OFF” switch is not pushed.
Traction control system (four-wheel drive models)
The traction control system automatically helps prevent the spinning of 4 wheels when the vehicle is started or accelerated on slippery road surfaces. When the ignition key is turned to “ON”, the system automatically turns on.
CAUTION
Under certain slippery road conditions, full traction of the vehicle and power against 4 wheels cannot be maintained, even though the traction control system is in operation. Do not drive the vehicle under any speed or maneuvering conditions which may cause the vehicle to lose traction control. In situations where the road surface is covered with ice or snow, your vehicle should be fitted with snow tires or tire chains. Always drive at an appropriate and cautious speed for the present road conditions.
X16058
NORMAL DRIVING MODE
Leave the system on during the ordinary driving so that it can operate when needed.
You may hear a sound in the engine compartment for a few seconds just after the vehicle begins to move. This means that the traction control system is in the self-check mode, but does not indicate a malfunction.
128
When the traction control system is operating, the following conditions occur:
- The system controls the spinning of the 4 wheels. At this time, the slip indicator light blinks.
- You may feel vibration or noise in your vehicle, caused by operation of the brakes. This indicates the system is functioning properly.
The slip indicator light comes on for a few seconds when the ignition key is turned to “ON”. If the indicator light does not come on when the ignition is turned on, contact your Toyota dealer.
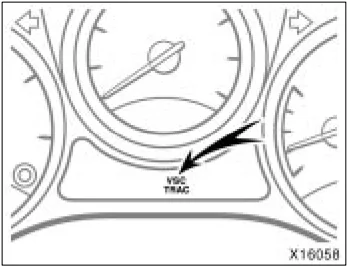
“VSC TRAC” warning light
This light warns that there is a problem somewhere in the traction control system or the vehicle stability control system.
The light will come on when the ignition key is turned to “ON” and will go off after a few seconds.
If the light comes on while driving, the system does not work. However, as conventional braking operates when applied, there is no problem to continue your driving.
In the following cases, contact your Toyota dealer:
- The warning light does not come on after the ignition key is turned to “ON”.
- The warning light remains on after the ignition key is turned to “ON”.
- The warning light comes on while driving.
129
Vehicle stability control system
The vehicle stability control system helps provide integrated control of the systems such as an anti-lock brake system, brake assist system, traction control, engine control, etc. This system automatically controls the brakes and engine to help prevent the vehicle from skidding when cornering on a slippery road surface or operating steering wheel abruptly.
This system activates when the vehicle speed is about more than 15 km/h (9 mph).
You may hear a sound in the engine compartment for a few seconds just after the vehicle begins to move. This means that the system is in the self-check mode, but does not indicate a malfunction.
CAUTION
- Do not rely excessively on the vehicle stability control system. Even if the vehicle stability control system is operating, you must always drive carefully and attentively to avoid serious injury. Reckless driving will result in an unexpected accident. If the slip indicator light flashes, an alarm sounds, special care should be taken while driving.
- Only use tires of specified size. The size, manufacturer, brand and tread pattern for all 4 tires should be the same. If you use the tires other than specified, or different type or size, the vehicle stability control system may not function correctly. When replacing the tires or wheels, contact your Toyota dealer. (See "Checking and replacing tires" on page 293 in Section 7-2.)
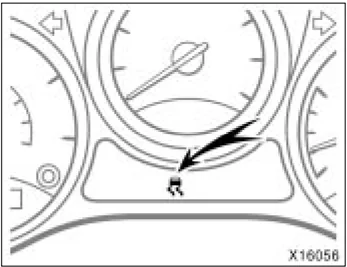
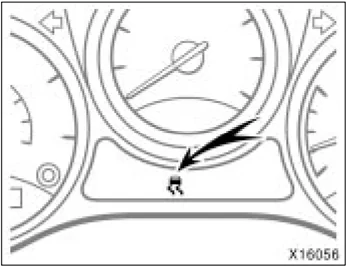
If the vehicle is going to skid during driving, the slip indicator light blinks and an alarm sounds intermittently. Special care should be taken while driving.
The slip indicator light comes on for a few seconds when the ignition key is turned to "ON". If the indicator light does not come on when the ignition is turned on, contact your Toyota dealer.
130
'05 Rav4_U (L/O 0409)
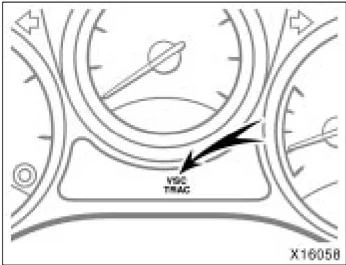
“VSC TRAC” warning light
This light warns that there is a problem somewhere in the vehicle stability control system or the traction control system.
The light will come on when the ignition key is turned to "ON" and will go off after a few seconds.
If the light comes on while driving, the system does not work. However, as conventional braking operates when applied, there is no problem to continue your driving.
In the following cases, contact your Toyota dealer:
- The warning light does not come on after the ignition key is turned to "ON".
- The warning light remains on after the ignition key is turned to "ON".
- The warning light comes on while driving.
Two-wheel drive models only—The "TRAC OFF" indicator light will come on when the "VSC TRAC" warning light comes on even if the "TRAC OFF" switch is not pushed.
Tire pressure warning system
The tire pressure warning system is designed to provide warning when tire inflation pressure is critically low while the vehicle is moving. The low tire pressure warning light comes on to inform you that such low tire pressure may hamper driving.
This system is not designed to operate when the vehicle is stopped. Therefore, check the tire inflation pressure regularly. The recommended cold tire inflation pressure, tire size and the vehicle capacity weight are on the tire and loading information label. (For instructions, see "Checking tire inflation pressure" on page 291 in Section 7-2.)
Installed tires should be of the specified size. They should be of the same size and construction. If tires other than the specified size are used, or if tires of different sizes or constructions are mixed, the tire pressure warning system will not function properly.
131
 X16059
LOW TIRE PRESSURE WARNING LIGHT This light comes on when the ignition key is turned to the “ON” position. It goes off after a few seconds. This indicates that the tire pressure warning system is functioning properly.
If the low tire pressure warning light comes on or blinks while driving, do the following.
If the warning light comes on:
- Adjust the tire inflation pressure to the specified level as soon as possible. (See “Tires” on page 316 in Section 8.)
- Push the tire pressure warning system reset switch for a few seconds and make sure the warning light goes off.
If the light remains on after the reset switch has been pushed, have the tire pressure warning system checked at your Toyota dealer.
If you have a flat tire, replace it with the spare tire. For details, see “If you have a flat tire” on page 247 in Section 4.
If the warning light blinks once every second: The low tire pressure warning system may be malfunctioning. Contact your Toyota dealer.
If the warning light blinks twice every second: The low tire pressure warning system needs to be initialized. Reset the system with the tire pressure warning system reset switch. (To reset the system, see “TIRE PRESSURE WARNING SYSTEM RESET SWITCH”. )
The tire pressure warning system does not function properly under certain circumstances. In the following cases, the low tire pressure warning light may not come on even if the tire inflation pressure is low, or it may come on when the tire inflation pressure is actually normal.
- Snow tires, or tire chains are used.
- The tire inflation pressure is excessively higher than specified, or tire inflation pressure suddenly drops due to bursting or other causes.
- The vehicle is driven on a slippery road surface such as rough or frozen roads.
- The vehicle speed is less than 30 km/h (19 mph) or more than 100 km/h (62 mph), and the driving duration is less than 5 minutes.
- The tires differ in tread pattern or manufacturer.
- The tires are not the specified size.
- The tread wear is very different among the installed tires.
- Rapid acceleration/deceleration or sharp turns is continued.
- Towing a trailer.
132
- The loading is over the limit or imbalanced.
- Initialization was not performed correctly after replacing or rotating tires or wheels.
- The outside temperature is below 0°C (32°F) or above 40°C (104°F).
CAUTION
When the tire pressure warning light comes on, observe the following instructions:
- Adjust the tire inflation pressure to the specified level as soon as possible.
- Avoid abrupt steering wheel maneuvering and braking. If the vehicle tires deteriorate, you could lose control of the steering wheel or the brakes, causing death or serious injury.
Note: (!) The tire pressure monitoring system on your vehicle will warn you when one of your tires is significantly under-inflated and when some combinations of your tires are significantly under-inflated. However, there are other combinations of significantly under-inflated tires for which your tire pressure monitoring system may not warn you. These other combinations are relatively common, accounting for approximately half the instances in which vehicles have significantly under-inflated tires. For example, your system may not warn you when both tires on the same side or on the same axle of your vehicle are significantly under-inflated. It is particularly important, therefore, for you to check the tire pressure in all of your tires regularly and maintain proper pressure.

TIRE PRESSURE WARNING SYSTEM RESET SWITCH
The tire pressure warning system need to be initialized in the following conditions:
- When the low tire pressure warning light blinks twice every second
- After replacing or rotating tires or wheels
When initializing the system, the present tire condition is stored as a standard.
133
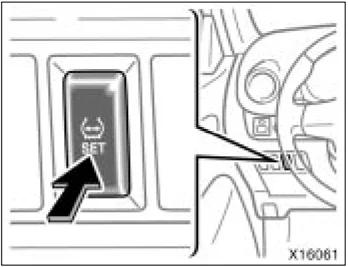
To initialize the system, perform the following:
- Park the vehicle at a safe place and apply the parking brake. Stop the engine.
- Adjust the pressure of all the installed tires to the specified level. (See "Tires" on page 316 in Section 8.)
- Turn the ignition key to "ON". If the low tire pressure warning light comes on, push the reset switch for a few seconds and make sure the warning light goes off.
- Push and hold the reset switch until the low tire pressure warning light blinks three times.
Initialization is completed after driving at the speeds of 30 km/h (19 mph) or over for more than one hour. If the following driving conditions are satisfied, initialization will be completed in about one hour.
- The vehicle speed is between 50 km/h (31 mph) and 100 km/h (62 mph).
- The roads are dry, smooth and straight.
- The number of passengers is 1 or 2 (including driver).
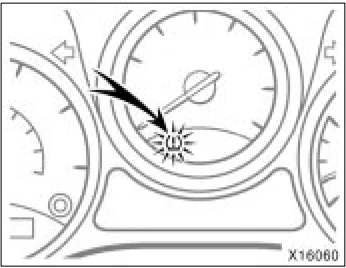
When initializing the system, make sure the low tire pressure warning light blinks three times. If the warning light does not blink three times, initializing will be failed and the tire pressure warning system will not function properly.
Do not push the reset switch without adjusting the tire inflation pressure to the specified level. Otherwise, the low tire pressure warning light may not come on even if the tire pressure is low, or it may come on when the tire inflation pressure is actually normal.
If you push the reset switch while the vehicle is moving, initialization is not performed.
If the low tire pressure warning light does not blink when you push and hold the reset switch, have the low pressure warning system checked at your Toyota dealer.
When the warning light blinks twice every second while driving, you may be unable to reset the system. In this case, set the system again according to the above procedure.
134
Parking brake
Type A
Type B
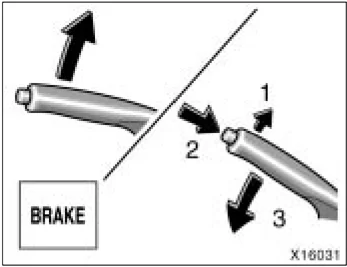
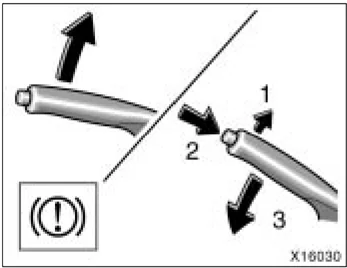
When parking, firmly apply the parking brake to avoid inadvertent creeping. To set: Pull up the lever. For better holding power, first depress the brake pedal and hold it while setting the parking brake. To release: Pull up the lever slightly (1), press the lock release button (2), and lower (3). To remind you that the parking brake is set, the parking brake reminder light in the instrument panel remains on until you release the parking brake.
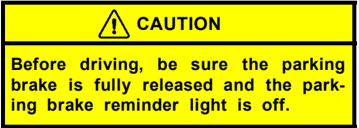
CAUTION Before driving, be sure the parking brake is fully released and the parking brake reminder light is off.
Cruise control
The cruise control allows you to cruise the vehicle at a desired speed over 40 km/h (25 mph) even with your foot off the accelerator pedal. Your cruising speed can be maintained up or down grades within the limits of engine performance, although a slight speed change may occur when driving up or down the grades. On steeper hills, a greater speed change will occur so it is better to drive without the cruise control.
CAUTION
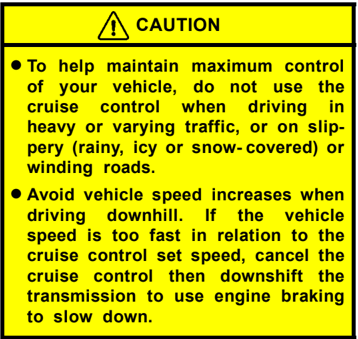
- To help maintain maximum control of your vehicle, do not use the cruise control when driving in heavy or varying traffic, or on slippery (rainy, icy or snow-covered) or winding roads.
- Avoid vehicle speed increases when driving downhill. If the vehicle speed is too fast in relation to the cruise control set speed, cancel the cruise control then downshift the transmission to use engine braking to slow down.
135
 X16083
TURNING THE SYSTEM ON To operate the cruise control, push the "ON- OFF" switch. This turns the system on. The indicator light in the instrument panel shows that you can now set the vehicle at a desired cruising speed. Another push will turn the system completely off.
CAUTION To avoid accidental cruise control engagement, keep the "ON-OFF" switch off when not using the cruise control.
 X16084
SETTING AT A DESIRED SPEED On vehicles with automatic transmission, the transmission must be in "D" before you set the cruise control speed.
Bring your vehicle to the desired speed, push the lever down in the "- SET" direction and release it. This sets the vehicle at that speed. If the speed is not satisfactory, tap the lever up for a faster speed, or tap it down for a slower speed. Each tap changes the set speed by 1.6 km/h (1.0 mph). You can now take your foot off the accelerator pedal.
If you need acceleration—for example, when passing—depress the accelerator pedal enough for the vehicle to exceed the set speed. When you release it, the vehicle will return to the speed set prior to the acceleration.
CAUTION For manual transmission: While driving with the cruise control on, do not shift to neutral without depressing the clutch pedal, as this may cause engine racing or overrevving.
CANCELLING THE PRESET SPEED You can cancel the preset speed by: a. Pulling the lever in the "CANCEL" direction and releasing it. b. Depressing the brake pedal. c. Depressing the clutch pedal (manual transmission). d. Pushing "ON-OFF" switch.
If the vehicle speed falls below about 40 km/h (25 mph), the preset speed will automatically cancel out.
136
'05 Rav4_U (L/O 0409)
If the vehicle speed drops 16 km/h (10 mph) below the preset speed, the preset speed will also automatically cancel out.
If the preset speed automatically cancels out other than for the above cases, have your vehicle checked by your Toyota dealer at the earliest opportunity.
RESETTING TO A FASTER SPEED
Push the lever up in the "+ RES" direction and hold it. Release the lever when the desired speed is attained. While the lever is held up, the vehicle will gradually gain speed.
However, a faster way to reset is to accelerate the vehicle and then push the lever down in the "- SET" direction.
RESETTING TO A SLOWER SPEED
Push the lever down in the "- SET" direction and hold it. Release the lever when the desired speed is attained. While the lever is held down, the vehicle speed will gradually decrease.
However, a faster way to reset is to depress the brake pedal and then push the lever down in the "- SET" direction.
On vehicles with automatic transmission, even if you turn off the overdrive switch with the cruise control on, engine braking will not be enabled because the cruise control is not cancelled. To decrease the vehicle speed, reset to a slower speed with the cruise control lever or depress the brake pedal. If you use the brake pedal, cruise control is cancelled.
RESUMING THE PRESET SPEED
If the preset speed is cancelled by pulling the control lever or by depressing the brake pedal or clutch pedal, pushing the lever up in the "+ RES" direction will restore the speed set prior to cancellation.
However, once the vehicle speed falls below about 40 km/h (25 mph), the preset speed will not be resumed.
CRUISE CONTROL FAILURE WARNING
If the "CRUISE" indicator light in the instrument cluster flashes when using the cruise control, push the "ON-OFF" switch to turn the system off and then push it again to turn it on.
If any of the following conditions then occurs, there is some trouble in the cruise control system.
- The indicator light does not come on.
- The indicator light flashes again.
- The indicator light goes out after it comes on.
If this is the case, contact your Toyota dealer and have your vehicle inspected.
137
138