Audio system
Search
▶ Press SEEK+ or -SEEK button to tune in the next receivable weather band station.
If no weather band station is received after three consecutive scans of the complete frequency range, then the scan stops at the channel with which it began and NO WB FOUND appears in the display.
If this happens, switch back to standard radio mode.
Scan search
- Starting scan search ▶ Press SC soft key. SC will appear in the display. The radio briefly tunes in all receivable weather band stations.
- Ending scan search ▶ Press SC soft key or SEEK+ or -SEEK. The weather band station last played will be selected and SC disappears from the display.
Introduction to satellite radio* (USA only)
SIRIUS satellite radio provides 100 channels of digital-quality radio, among others music, sports, news, and entertainment, free of commercials. SIRIUS satellite radio uses a fleet of high-power satellites to broadcast 24 hours per day, coast to coast, in the contiguous U.S.
This diverse, satellite-delivered programming is available for a monthly subscription fee.
For more information and service availability call the SIRIUS Service Center (▷ page 216), or contact www.siriusradio.com.
211
Audio system
i Additional satellite radio equipment and a subscription to a satellite radio service provider are required for the satellite radio operation described here.
Contact an authorized Mercedes-Benz Center for details and availability for your vehicle.
Note that categories and channels shown in illustrations are dependent on programming content delivered by the service provider. Programming content is subject to change. Therefore, channels and categories shown in illustrations and descriptions contained in this manual may differ from the channels and categories delivered by the service provider.
i Satellite radio service may be unavailable or interrupted from time to time for a variety of reasons, such as environmental or topographic conditions and other things beyond the service provider's or our control. Service might also not be available in certain places (e.g., in tunnels, parking garages, or within or next to buildings) or near other technologies.
Program categories
The channels are categorized. Categories allow you to tune to stations broadcasting a certain type of program (category mode) (▷ page 214).
Calling up the SAT main menu
▶ Press SAT soft key.
SAT is displayed in the upper left-hand corner of the display.
Prior to activation of the satellite radio service (▷ page 212).
After activation of satellite radio service (▷ page 213).
Prior to activation of the satellite radio service
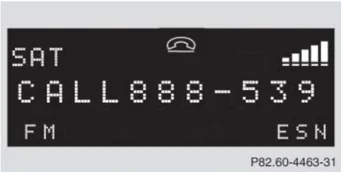
The telephone number of the SIRIUS Service Center (888-539-7474) is displayed.
212
Audio system
▶ Press ESN soft key.
The twelve-digit electronic serial number (ESN) of the SAT tuner* installed in your vehicle is displayed.
This information is required to call the SIRIUS Service Center for an activation request.
i Credit card information may also be required for your application.
The activation process takes approximately 5 to 10 minutes after calling the SIRIUS Service Center.
After activation of the satellite radio service
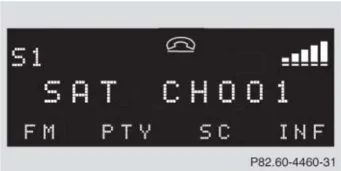
The satellite radio main menu appears. The radio station selected last is audible, provided it can be received.
i The system will tune to a default station if no station had been selected previously.
P82.60-4460-31
The first channel 001 is called up and the PTY system changes to All categories.
If no station can be received, ACQUIRING appears in the display.
If the Satellite radio service is not activated, ACQUIRING will also appear in the radio display and NO SAT will appear in the multifunction display.
Selecting a station
The following options are available:
- Selecting a station using the selected category (▷ page 214).
- Tuning via station presets (▷ page 213).
- Tuning via scan search (▷ page 215).
- Tuning via manual channel input (▷ page 214).
- Tuning via the program category list (▷ page 214).
Tuning via station presets
Ten satellite radio station presets are available.
You can access the presets via number keys.
213
Audio system
Accessing via number keys
Enter number of preset you wish to select, e.g. 1.
The radio plays the station stored under this number and the PTY function changes to the category corresponding to the station.
Tuning via manual channel input
Example: tuning in channel 16
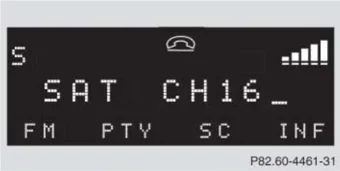
► Press button. Input line appears in the main radio menu.
► Use number keys to enter desired channel within 8 seconds, e.g. 1. 6 MNO The system tunes to channel 16. The station you have selected begins to play.
You can only enter available channel numbers.
Tuning via the program category list
The category list contains all currently receivable categories of programs. It is arranged alphabetically.
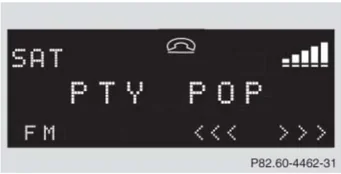
• Selecting a category ► Press PTY soft key.
P82.60-4462-31
The current PTY category of the station is displayed.
► Press <<< or >>> soft key. This switches between the individual categories.
When changing the category, the channel selected last in the new category becomes audible.
214
Audio system
The system will automatically switch to a station of the selected category if the currently selected station is not of the selected category. Otherwise, the currently selected station remains tuned.
- Tuning a station within the selected category
The channels identified for the currently selected category are arranged numerically. Only one entry is visible at a time.
► Press SEEK+ or -SEEK button briefly. The next station within the category is started.
or
► Press and hold SEEK+ or -SEEK button for approx. 3 seconds until desired station has been reached.
Tuning via scan search
Scan search is characterized as follows:
- Scan search plays a channel for approx. 8 seconds and then skips to the next channel within the current category.
- Scan search can be terminated manually.
► Press SC soft key. The search starts. SC appears in the display.
► Press SC soft key again. The search stops.
Obtaining additional text information
Additional text information (artist, title) related to the current channel can be displayed.
► Press INF soft key. The title being played is displayed.
► Press INF soft key again. The name of the artist performing the title being played is displayed.
If a button is not pressed within 4 seconds, the radio will return to the standard display.
215
Audio system
Storing stations
- Tune in desired station.
- Press and hold desired station button 1 to 0 until a brief signal tone is heard.
The frequency is stored on the selected station button.
The radio saves the current station at the memory preset selected. The memory preset selected appears in the status line, e.g. S3.
There are ten presets available.
An existing entry is overwritten in the memory list when a new entry is given.
Calling up the ESN information menu
- Press INF soft key.
- Press ESN soft key.
The twelve-digit electronic serial number (ESN) of the SAT tuner* installed in your vehicle is displayed.
- Press RET soft key to exit the menu.
CD mode
Safety precautions
Warning!
The single CD player and the CD changer* are Class 1 laser products. There is a danger of invisible laser radiation if the housing is opened or damaged.
Do not open the housing. The single CD player and the CD changer* do not contain any parts that can be serviced by the user. For safety reasons, have any service work which may be necessary performed only by qualified personnel.
216
Audio system
Warning!
In order to avoid distraction which could lead to an accident, the driver should insert CDs with the vehicle at a standstill and operate the audio system only if permitted by road, weather and traffic conditions. Bear in mind that at a speed of just 30 mph (approximately 50 km/h), your car covers a distance of 44 feet (approximately 14 m) every second.
General notes
The system may not be able to play audio CDs with copy protection.
Playing copied CDs may cause malfunctions during playback.
!
If you affix stickers to the CDs, they can become warped due to the heat that develops in the CD drive or CD changer*. In certain situations, the CDs can then no longer be ejected and cause damage to the drive. Such damage is not covered by the Mercedes-Benz Limited Warranty.
!
Your CD drive or CD changer* has been designed to play CDs which correspond to the EN 60908 standard. You can therefore only use CDs with a maximum thickness of 1.3 mm.
If you insert thicker data carriers, e.g. ones that have data on both sides (one side with DVD data, the other side with audio data), they cannot be ejected and will damage the drive.
Do not use CDs with an 8 cm diameter, not even with a CD adapter. Attempting to play CDs with an 8 cm diameter or playing such CDs with an adapter may cause damage to the CD drive. Such damage is not covered by the Mercedes-Benz Limited Warranty.
Should excessively high or low temperatures occur while in CD changer mode*, CD TEMP will appear in the display, and the CD will be muted until the temperature has reached an acceptable level for the system to continue operation.
The single CD player and the CD changer* play audio CDs.
217
Audio system
Tips on handling CDs
- Handle CDs carefully to prevent interference during playback.
- Avoid scratches, fingerprints and dust on the CDs.
- Do not write on CDs or apply any labels or other material to them.
- Clean CDs from time to time with a commercially available cleaning cloth. Never wipe the CD in a circular motion; instead, wipe it in a straight line starting in the center and moving outward. Do not use solvents, anti-static sprays, etc. for cleaning.
- Replace the CD in its case after use.
- Protect CDs from heat and direct sunlight.
MP3
The CD changer* can play audio CDs as well as CDs with MP3 files.
Information on MP3 data carriers
CD media, CD burning software and CD writers are available in great variety. Due to this variety, it cannot be guaranteed that the CD changer will be able to play every user-written CD.
The burning process can lead to data errors and aging of the medium may result in data loss. Therefore, the CD changer may be restricted in its ability to play MP3 data carriers; it may play them with reduced sound quality, or it may not be able to play them at all.
Problems may be encountered during playback of user-written CDs with a storage capacity of more than 700 MB. These CDs do not meet valid standards as of this printing.
Compatible MP3 data carriers
The CD changer can read the following data carriers in MP3 mode:
- CD-DA
- CD-R
- CD-RW
Compatible file systems and compression methods
Use Romeo or Joliet. Depending on file format used, up to 128 characters are possible.
The following compression methods are compatible:
- MP3
- WMA
- WAV
218
Audio system
Compatible bit and sampling rates
Fixed and variable bit rates of up to 320 kBit/s are possible.
The following table lists possible sampling rates:
| MPEG1 Audio Layer3 | 44.1 KHz, 48 KHz, 32 KHz |
|---|---|
| MPEG2 Audio Layer3 | 22.5 KHz, 24 KHz, 16 KHz |
| MPEG2.5 Audio Layer3 | 11.025 KHz, 12 KHz, 8 KHz |
| WMA | 32 KHz, 44.1 KHz, 48 KHz |
i Only use MP3 tracks with a bit rate of 128 kBit/s or higher and with the specified sampling rates.
The use of rates other than those specified may lead to noticeably inferior sound quality.
Information on copyright
The music tracks that you create for use in MP3 mode or that you play in MP3 mode are subject to copyright laws under applicable international and national regulations.
In many countries, the reproduction of copyrighted materials is not permitted, even if only for personal use, without the express prior consent of the copyright holder.
Please check the current copyright laws for your country and comply with them.
These restrictions do not apply, for example, to your own compositions and recordings, or for recordings for which authorization has been obtained from the copyright holder.
MP3 playback
You can play an MP3 CD on the CD changer* as you would any standard audio CD. All of the functions described for the CD changer also apply for the playback of MP3 CDs. Keep in mind that the single CD player in the audio system unit is not able to read MP3 CDs.
The first 99 tracks on the CD, including tracks in subdirectories, are recognized and played. Any additional tracks will not be played.
i Due to the branched data structure, playback of the first track may be delayed slightly.
219
Audio system
Operating the single CD player in the audio system unit
Loading a CD
The single CD player in the audio system unit has capacity for one CD. The CD slot for loading the drive is located underneath the soft keys.
- Make sure the system is switched on.
- Insert CD into CD slot. The label side of the CD must face upwards.
The system automatically pulls the CD into the CD slot. The audio CD begins to play.
! If a CD is already loaded, it must be ejected before inserting a new CD. Inserting a second CD in the slot with another CD still loaded will cause damage to the CD drive not covered by the Mercedes-Benz Limited Warranty.
If a CD has been inserted incorrectly or cannot be read, WRONG CDO will appear in the display.
Ejecting a CD
- Make sure the system is switched on.
- Press EJECT button.
The system ejects the CD. NO CD will appear in the display.
- Remove CD from slot.
If you do not take the CD out of the CD slot within approx. 15 seconds, the system automatically pulls the CD back in and plays it.
If a CD is pulled back in, press EJECT button for 5 seconds; the CD will then be ejected.
Operational readiness of CD changer*
If a CD changer* has been installed in the vehicle, it can be operated from the front control panel of the audio system. A loaded magazine must be installed to play CDs.
The CD changer* is located in the glove box.
Loading/unloading the CD magazine
The CD changer* may not be able to play audio CDs with copy protection.
- Slide changer door to the right and press ▲ button.
- Magazine will be ejected.
220
Audio system
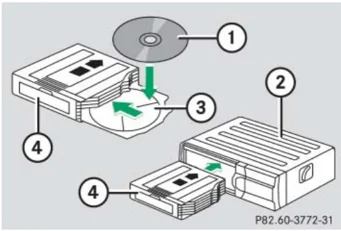
① CD ② CD changer ③ CD tray ④ CD magazine
► Remove magazine ④ and pull CD tray ③ fully out.
► Place CD ① in recess of tray, label side up.
► Push tray into magazine in direction of arrow.
CDs which have been inserted improperly or are unreadable will not be played.
► Push magazine into CD changer* ② in direction of arrow and close sliding door.
Playing CDs
Single CD player in the audio unit
► Press CD button.
CD 0 will appear in the upper left-hand corner of the display.
The CD will resume playback at the point where it was switched off.
CD changer*
► Press CDC button.
CD and the selected magazine slot number appear in the upper left-hand corner of the display.
If you have not removed a CD since the last time the CD audio source was activated, the last CD listened to will begin to play at the point where it was switched off.
After the last track on a CD has finished, the next CD is automatically played.
221
Audio system
Playing tracks
You have the following options:
- Audio system with CD changer*: selecting CDs
- Direct track entry
- Track skip forward/reverse
- Fast forward/reverse
- Scan
- Random tracks
- Repeat track
Selecting CDs in the audio unit with CD changer*
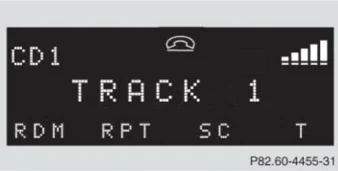
► You can select from among the inserted CDs with buttons 0 to 6.
0 = CD player in the audio unit
1 to 6 = CDs in the CD changer*
The magazine slot number of the selected CD appears next to CD in the display, and the number of the currently played track appears next to TRACK.
If there is no CD in the selected magazine slot, NO CD appears in the display with the corresponding slot number.
Direct track entry

You can make a direct selection from among the tracks on a CD.
► Press * button.
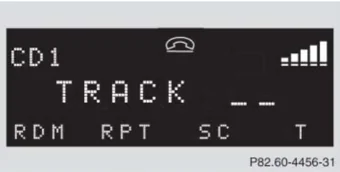
► Enter track number using buttons 1 to 0.
The number of the track being played appears next to TRACK in the display.
You can only enter available track numbers.
222
Audio system
Skipping tracks forward/backward
- Skipping tracks forward
- ► Press SEEK+ button briefly. The next track will be played.
- Skipping tracks backward
- ► Press -SEEK button briefly. If the track has been playing for more than 10 seconds, the unit skips back to the beginning of the track currently playing. If less than 10 seconds have been played, the unit skips back to the beginning of the previous track.
Pressing the -SEEK or SEEK+ button repeatedly will result in multiple tracks being skipped.
Fast forward/reverse
- Fast forward
- ► Press and hold SEEK+ button until desired point has been reached.
- Reverse
- ► Press and hold -SEEK button until desired point has been reached.
i The track number and the relative time of the track is shown in the display during the search.
Scan
- Starting scan
- ► Press SC soft key. SC will appear in the display. Each track on the current CD will be played for approx. 8 seconds in ascending order.
- Ending scan
- ► Press SC soft key or -SEEK or SEEK+.
Random play The random function (RDM) plays the tracks of the current CD in random order.
i When you start the RDM function, the RPT function is automatically switched off.
- Switching on random
- ► Press RDM soft key. RDM appears in the display. A randomly selected track is played.
- Switching off random
- ► Press RDM soft key again.
223
Audio system
Repeat
The track being played is repeated until the repeat function is switched off.
When you start the RPT function, the RDM function is automatically switched off.
- Switching on repeat
- Press RPT soft key. RPT appears in the display.
- Switching off repeat
- Press RPT soft key again.
Pause function
The CD changer mode is interrupted by an incoming call on the telephone* (▷ page 229).
- Switching on pause function
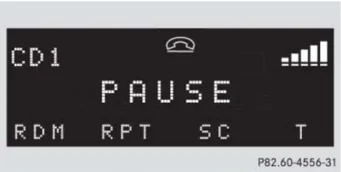
-
Press MUTE button. The CD changer mode is interrupted and PAUSE appears in the display.
-
Switching off pause function
- Press MUTE button. The CD changer mode is active again.
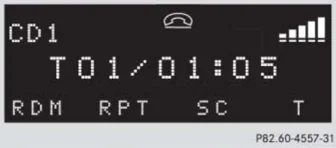
Track and time display

-
Press T soft key. The number of the track being played and the elapsed playing time appear in the display.
-
Press T soft key again. The total number of tracks and the total playing time of the CD appear in the display.
-
Press T soft key. The standard CD playback menu appears in the display.
224
Audio system
GSM network phones
Using your Mercedes-Benz specified mobile telephone*, a number of functions and operating steps can be performed and displayed in the audio system display.
Further operating instructions not covered here can be found in the operating instructions for the multifunction steering wheel and the cellular telephone*.
If your audio system is set up for telephone operation, the [phone icon] symbol will appear in the display.
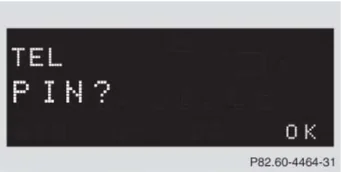
When you insert your Mercedes-Benz specified mobile telephone* into the telephone cradle, you will be prompted to enter your PIN for 30 seconds (▷ page 225). This display disappears when you press any button.
When your mobile telephone is inserted into the telephone cradle, you will see the reception strength in the upper right-hand corner of the display.
Switching on the telephone
Switching on the telephone
▶ Press TEL button.
If the telephone was previously switched off, PROCESSING appears in the display and you will then be prompted to enter your PIN.
Switching off the telephone
▶ Press TEL button for approx. 3 seconds.
PROCESSING appears in the display until the telephone is off. Afterward, PHONE OFF appears in the display.
PIN entry

▶ Enter PIN number using buttons 1 to 9.
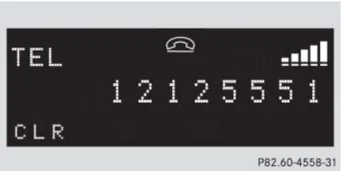
▶ If necessary, correct number entered with the CLR soft key. Press soft key briefly to delete the last digit entered; press soft key and hold to delete the complete number.
▶ Press OK soft key after entering correct PIN.
▶ READY or ROAMING will appear in the display.
225
Audio system
If the PIN is entered incorrectly three times, NEED PUK will appear in the display. Enter PUK via your telephone. Please refer to the separate telephone operating instructions for more information.
Adjusting the volume
- Turn rotary control of button during a telephone call.
The volume will increase or decrease depending on the direction turned.
The volume can be adjusted separately for telephone mode and audio mode.
Adjusting sound
- Adjust sound during a telephone call. Sound adjustment (▷ page 203).
Placing a call
Entering a telephone number and starting the dialing process

- Enter desired telephone number using buttons 1 to 0.
The number can have up to 32 digits, but only twelve of these are visible in the display.
-
If necessary, correct number entered with the CLR soft key. Press soft key briefly to delete the last digit entered; press soft key and hold to delete the complete number.
-
After correct telephone number has been entered, press button.
If the telephone number has been saved together with a name in the telephone book, the name will appear in the display.
Phone book
The numbers stored in the phone book of the telephone can be called up either by name or number.
In addition, incoming calls are stored in the phone book.
226
Audio system
i This is only possible, however, when the call information transmitted includes the number of the person calling. If the telephone number is not transmitted, NO NUMBER will be stored in the phone book.
- Searching and calling up telephone book entries by name
You can access your mobile telephone's phone book using the audio system. You can access both the main entries and the sub-entries of your phone book.
 P82.60-4559-31
or
▶ Press MEM soft key or press button ▲ or ▼.
▶ Press desired numerical key 2 ABC to 9 WXYZ.
The stored entries are selected according to the alphabetical order of the initial letters (e.g. for S-Schneider, press button 7 PQRS four times).
or
▶ Press and hold button ▲ or ▼.
The system jumps from one initial letter to the next in ascending or descending order.
▶ Press and hold button ▲ or ▼ until desired initial letter has been reached.
or
▶ Press button ▲ or ▼ repeatedly until desired entry has been reached.
The stored entries are selected in alphabetical order with the sub-entries.
i Several sub-entries can be stored for each main entry (name). These entries are marked by a corresponding abbreviation that appears in the upper left-hand corner of the display. The following abbreviations for sub-entries are possible:
CEL = Mobile phone HOM = Home WOR = Work FAX = Fax PAG = Pager TEL = Main
▷▷
227
Audio system
▶ When you have selected a number, press [phone icon] button. The call will be made.
-
Viewing the telephone number of a telephone book entry ▶ Search for desired entry. ▶ Press NUM soft key. The telephone number of the phone book entry appears in the display.
-
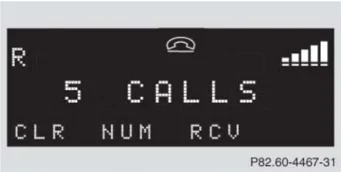
Returning calls received

P82.60-4467-31
▶ Press MEM soft key or press button [up arrow] or [down arrow].
▶ Press RCV soft key (received calls). The number of received calls and then the call last received appear briefly in the display.
▶ Select desired telephone number with button [up arrow] or [down arrow]. The letter R and the number of the memory position appear in the upper left-hand corner of the display. The numbers are stored in the order of the calls received.
▶ When you have selected a number, press [phone icon] button. The call will be made.
-
Speed dial If you have stored telephone numbers as speed dial numbers in your telephone, you can also enter these with buttons [1] to [0] on the radio head unit. ▶ Press desired button [1] to [0] briefly. ▶ Press [phone icon] button. The call will be made.
-
Turbo dial If you have stored telephone numbers as turbo dial numbers in your telephone, you can also enter these with buttons [1] to [0] on the radio head unit. ▶ Press desired button [1] to [0] until the call is made.
228
Audio system
Redial
If the number you have dialed is busy, you can again place calls to the last ten telephone numbers dialed using the redial function.
If you have activated the automatic redial function on your telephone, the number of the person being called is automatically redialed after a short waiting period if there is a busy signal. Refer to the separate operating instructions for the mobile telephone.
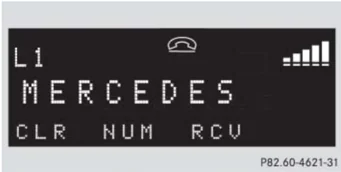
- Manual redial
P82.60-4621-31
▶ Press button. The telephone number last dialed will appear in the display.
▶ Select desired telephone number with button or . The letter L and the number of the memory position appears in the left-hand corner of the display. The numbers are stored in the order of the calls received.
▶ When you have selected a number, press button. The call will be made.
Accepting an incoming call
If the telephone is active in the background (reception symbol is visible in the display), the audio source is muted when an incoming call is received. A ringing tone can be heard and the caller's telephone number, or the name under which the telephone number has been saved in the phone book, appears in the display. If the caller's number is not transmitted with the call, CALL will appear in the display.
▶ Press button. The call is accepted.
229
Audio system
Muting a call
It is possible to mute a call; the caller is then no longer able to hear you.
- Mute on
- Press MUT soft key.
- MIC MUTE will appear in the display.
- Mute off
- Press MUT soft key again.
Terminating a call
- Press [phone hang-up icon] button.
The current call is terminated and the muted audio source becomes active again.
Talking with two callers at the same time
If you wish to receive or place another call during an already active call, you can accept or place the second call and switch between the callers or combine them into one call. Note that the features described here are depending on availability from your mobile phone service provider.
- Placing/accepting a second call
- Place new call by entering telephone number manually.
- Press [phone answer icon] button.
You are connected to the second caller; the first caller is kept on hold.
or
- Press [phone answer icon] button to accept a second call.
You will be notified of the second call acoustically, but you will not see this in the display.
You are connected with the second caller; the first caller is kept on hold.
- Switching between calls
- Press [2 ABC button] and [phone answer icon] buttons.
This switches between the calls. The non-active call is kept on hold.
230
• Terminating a call ► Press [phone icon] button. The current call is terminated. You are again connected with the caller previously placed on hold.
• Combining two calls ► Press [3 DEF] and [phone icon] buttons. The calls are combined into one call.
• Terminating a combined call ► Press [phone icon] button. The connection to both callers is terminated.
TDMA or CDMA network phones
Using your Mercedes-Benz specified mobile telephone*, a number of functions and operating steps can be performed and displayed in the audio system display.
Further operating instructions not covered here can be found in the operating instructions for the multifunction steering wheel and the mobile telephone*.
If your audio system is set up for telephone operation, the [phone icon] symbol will appear in the display.
When you insert your Mercedes-Benz specified mobile telephone* into the telephone cradle, you will be prompted to enter your PIN for 30 seconds (▷ page 231). This display disappears when you press any button.
When your mobile telephone is inserted into the telephone cradle, you will see the reception strength in the upper right-hand corner of the display.
Controls in detail Audio system
Switching on the telephone
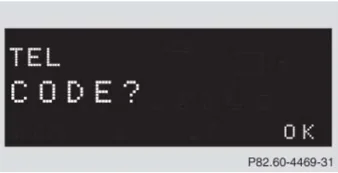
Switching on the telephone ► Press TEL button. If you have programmed an unlock code for the telephone, you must now enter the code.

► Enter code using buttons [1] to [0]. ► If necessary, correct number entered with the CLR soft key. Press soft key briefly to delete the last digit entered; press soft key and hold to delete the complete number.
231