Control system
▷▷ The selection marker is on the current setting.
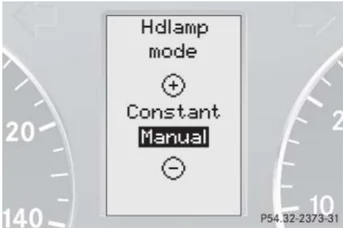
▶ Press button $+$ or $-$ to select manual operation (Manual) or daytime running lamp mode (Constant) activated.
With daytime running lamp mode activated and the exterior lamp switch in position 0 or AUTO, the low beam headlamps are switched on when the engine is running.
In low ambient light conditions the following lamps will switch on additionally:
- Parking lamps
- Tail lamps
- License plate lamps
- Side marker lamps
For more information on the daytime running lamp mode, see “Lighting” (\triangleright page 118).
For safety reasons, resetting the settings to factory settings (\triangleright page 140) while driving will not deactivate the daytime running lamp mode.
The following message appears in the multifunction display:
Lighting - Cannot be completely reset to factory sets. while driving.
Set locator lighting
With the locator lighting feature activated and the exterior lamp switch in position AUTO, the following lamps will switch on during darkness when the vehicle is unlocked with the SmartKey:
- Parking lamps
- Tail lamps
- License plate lamps
- Side marker lamps
- Front fog lamps
The locator lighting switches off when the driver’s door is opened.
If you do not open a door after unlocking the vehicle with the SmartKey, the lamps will switch off automatically after approximately 40 seconds.
▶ Move the selection marker with button $+$ or $-$ to the Lighting submenu.
150
Control system
▶ Press button [icon: up arrow] or [icon: down arrow] repeatedly until the message Surround lighting appears in the multifunction display.
The selection marker is on the current setting.
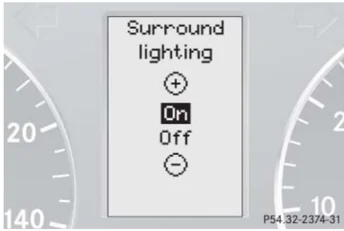
▶ Press button [icon: plus] or [icon: minus] to switch the locator lighting function On.
▶ Turn the exterior lamp switch to position AUTO when exiting the vehicle (▷ page 118).
The locator lighting feature is activated.
Set night security illumination (Headlamps delayed shut-off)
Use this function to set whether or not the exterior lamps illuminate during darkness after exiting the vehicle and all doors closed.
With the delayed shut-off feature activated and the exterior lamp switch in position AUTO before the engine is turned off, the following lamps will switch on when the engine is turned off and remain lit for approximately 15 seconds:
- Parking lamps
- Tail lamps
- License plate lamps
- Side marker lamps
- Front fog lamps
If after turning off the engine you do not open a door or do not close an opened door, the lamps will automatically switch off after 60 seconds.
ℹ You can reactivate this function within 10 minutes by opening a door.
▶ Move the selection marker with button [icon: plus] or [icon: minus] to the Lighting submenu.
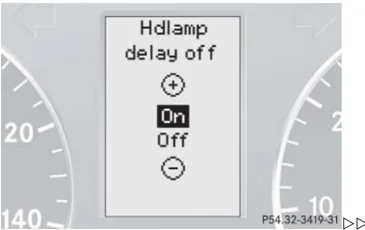
▶ Press button [icon: up arrow] or [icon: down arrow] repeatedly until the message Hdlamp delay off appears in the multifunction display.
The selection marker is on the current setting.
151
Control system
▷ Press button [icon: +] or [icon: -] to switch the delayed shut-off feature off or on.
► Turn the exterior lamp switch to position AUTO before turning off the engine (▷ page 118).
The headlamps delayed shut-off feature is activated.
You can temporarily deactivate the delayed shut-off feature:
Before exiting the vehicle, turn the SmartKey in the starter switch to position 0.
Then turn it to position 2 and back to position 0.
The delayed shut-off feature is deactivated. It will reactivate as soon as you reinsert the SmartKey in the starter switch.
Set interior lighting delayed shut-off
Use this function to set whether or not the interior lighting to remains lit during darkness for approximately 10 seconds after you have removed the SmartKey from the starter switch.
► Move the selection marker with button [icon: +] or [icon: -] to the Lighting submenu.
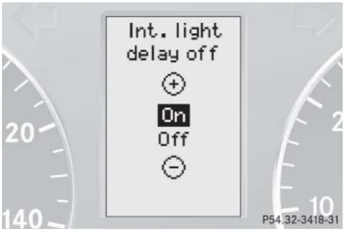
► Press button [icon: up arrow] or [icon: down arrow] repeatedly until the message Int. light delay off appears in the multifunction display.
The selection marker is on the current setting.

► Press button [icon: +] or [icon: -] to switch the delayed shut-off feature off or on.
Vehicle submenu
Access the Vehicle submenu via the Settings menu. Use the Vehicle submenu to make general vehicle settings.
The following function is available:
Set automatic locking
Use this function to activate or deactivate the automatic central locking. With the automatic central locking system activated, the vehicle is centrally locked at vehicle speeds of approximately 9 mph (15 km/h).
► Move the selection marker with button [icon: +] or [icon: -] to the Vehicle submenu.
Control system
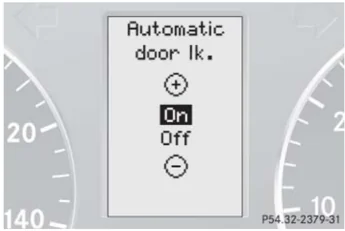
► Press button [up arrow icon] or [down arrow icon] repeatedly until the message Automatic door lk. appears in the multifunction display.
The selection marker is on the current setting.

► Press button [+] or [−] to switch the automatic central locking On or Off.
Convenience submenu
Access the Convenience submenu via the Settings menu. Use the Convenience submenu to change the settings for a number of convenience features.
The following functions are available:
| Function | Page |
|---|---|
| Activate easy-entry/exit feature* | 153 |
| Set parking position* for exterior rear view mirror | 154 |
Activate easy-entry/exit feature*
Use this function to activate and deactivate the easy-entry/exit feature (▷ page 42).
Warning! ⚠️
You must make sure no one can become trapped or injured by the moving steering wheel when the easy-entry/exit feature is activated.
To cancel steering wheel movement, do one of the following:
• Move steering column stalk* (▷ page 41). • Press memory position switch* (▷ page 116).
Do not leave children unattended in the vehicle, or with access to an unlocked vehicle. Children could open the driver's door and unintentionally activate the easy-entry/exit feature, which could result in an accident and/or serious personal injury.
153
Control system
▶ Move the selection marker with button [icon: +] or [icon: -] to the Convenience submenu.
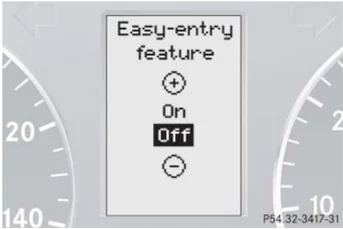
▶ Press button [icon: up arrow] or [icon: down arrow] repeatedly until the message Easy-entry feature appears in the multifunction display.
The selection marker is on the current setting.

▶ Press button [icon: +] or [icon: -] to switch the easy-entry feature On or Off.
Set parking position* for exterior rear view mirror
Use the Mirror set, parking aid function to select whether the passenger-side exterior rear view mirror should be turned downward during parking maneuvers when reverse gear R is engaged. For additional information, see "Activating exterior rear view mirror parking position*" (\triangleright page 172).
▶ Move the selection marker with button [icon: +] or [icon: -] to the Convenience submenu.
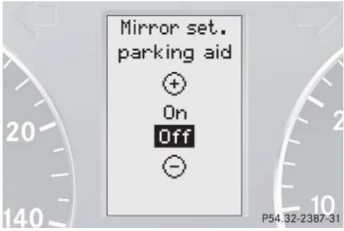
▶ Press button [icon: up arrow] or [icon: down arrow] repeatedly until the message Mirror set. parking aid appears in the multifunction display.
The selection marker is on the current setting.

▶ Press button [icon: +] or [icon: -] to switch function On or Off.
Control system
Trip computer menu
Use the trip computer menu to call up statistical data on your vehicle.
The following information is available:
| Function | Page |
|---|---|
| Fuel consumption statistics after start | 155 |
| Fuel consumption statistics since last reset | 156 |
| Distance to empty | 156 |
Fuel consumption statistics after start
- Press button □□ or □□ repeatedly until the first function of the trip computer menu appears in the multifunction display.
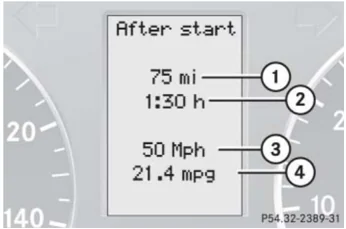
- Press button □ or □ repeatedly until the message After start appears in the multifunction display.

- Distance driven since start
- Time elapsed since start
- Average speed since start
- Average fuel consumption since start
All statistics stored since the last engine start will be reset approximately 4 hours after the SmartKey in the starter switch is turned to position 0 or removed from the starter switch.
Resetting will not occur if you turn the SmartKey back to position 1 or 2 within this time period.
155
Control system
Fuel consumption since last reset
- Press button or repeatedly until the first function of the trip computer menu appears in the multifunction display.
- Press button or repeatedly until the message After reset appears in the multifunction display.
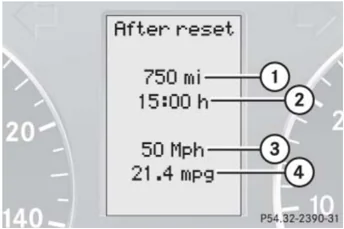
① Distance driven since last reset ② Time elapsed since last reset ③ Average speed since last reset ④ Average fuel consumption since last reset
Resetting fuel consumption statistics
- Press button or repeatedly until the first function of the trip computer menu appears in the multifunction display.
- Press button or repeatedly until the reading that you want to reset appears in the multifunction display.
- Press and hold the reset button in the instrument cluster (▷ page 127) until the value is reset to 0.
Distance to empty
- Switch on the ignition (▷ page 33).
- Press button or repeatedly until the first function of the trip computer menu appears in the multifunction display.
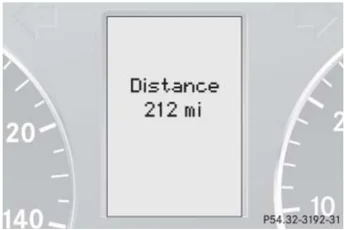
- Press button or repeatedly until the message Distance appears in the multifunction display.
The calculated range based on the current fuel tank level appears in the multifunction display.
156
Control system
TEL menu*
Warning!
A driver’s attention to the road must always be his/her primary focus when driving. For your safety and the safety of others, we recommend that you pull over to a safe location and stop before placing or taking a telephone call. If you choose to use the telephone while driving, please use the hands-free device and only use the telephone when weather, road and traffic conditions permit.
Some jurisdictions prohibit the driver from using a cellular telephone while driving a vehicle.
Bear in mind that at a speed of just 30 mph (approximately 50 km/h), your vehicle is covering a distance of 44 feet (approximately 14 m) every second.
Never operate radio transmitters equipped with a built-in or attached antenna (i.e. without being connected to an external antenna) from inside the vehicle while the engine is running. Doing so could lead to a malfunction of the vehicle’s electronic system, possibly resulting in an accident and personal injury.
You can use the functions in the TEL menu to operate your telephone, provided it is connected to a hands-free system and switched on.
- Switch on the telephone and Audio or COMAND*.
- Press button [icon] or [icon] on the steering wheel repeatedly until the message TEL appears in the multifunction display.
Which messages will appear in the multifunction display depends on whether your telephone is switched on or off:
- If the telephone is off, the message Phone off appears in the multifunction display.
- If the telephone is on:
The telephone will then search for a network. During this time the multifunction display is empty.
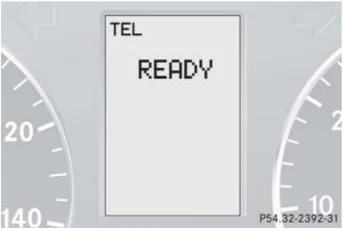
As soon as the telephone has found a network, the message READY appears in the multifunction display.

This standby message indicates that your telephone is ready for use and you can operate it using the control system.
157
Control system
Answering a call
When your telephone is ready to receive calls, you can answer a call at any time. In the multifunction display you will then see the message:
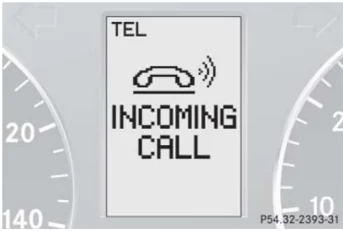
▶ Press button .
You have answered the call. The duration of the call appears in the multifunction display.
Ending a call
▶ Press button .
You have ended the call. The standby message appears in the multifunction display.
Dialing a number from the phone book
If your telephone is ready to receive calls, you may select and dial a number from the phone book at any time.
▶ Press button or repeatedly until the message TEL appears in the multifunction display.
▶ Press button or .
The control system reads the phone book which is stored in the telephone. This may take up to 30 seconds. The message Please wait appears in the multifunction display.
When the message Please wait disappears, the phone book has been loaded.
▶ Press button or repeatedly until the desired name appears in the multifunction display.
The stored names are displayed in ascending or descending alphabetical order.
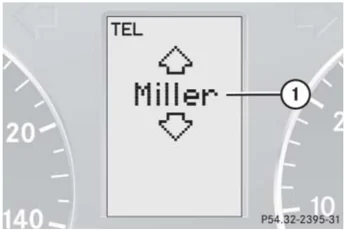
① Name from the phone book
158
Control system
i If you press and hold button or for longer than 1 second, the system scrolls rapidly through the list of names until you release the button again.
Cancel the quick search mode by pressing button .
- Press button .
The system dials the selected phone number.
- If the connection is successful, the name of the party you called and the duration of the call will appear in the multifunction display.
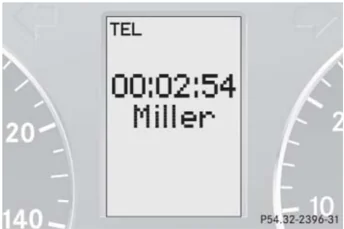
- If no connection is made, the control system stores the dialed number in the redial memory.
Redialing
The control system stores the most recently dialed phone numbers. This eliminates the need to search through your entire phone book.
- Press button or repeatedly until the message TEL appears in the multifunction display.
- Press button . The first number in the redial memory appears in the multifunction display.
- Press button or repeatedly until the desired name appears in the multifunction display.
- Press button . The control system dials the selected phone number.
159
Manual transmission
Manual transmission is standard equipment on select models and not available on all models.
For information on driving with a manual transmission, see “Manual transmission” (▷ page 48).
Warning!
For vehicles equipped with a manual transmission, getting out of your vehicle with the gearshift lever not engaged in first or reverse gear and parking brake engaged is dangerous.
Also, when parked on an incline, an engaged first or reverse gear alone may not prevent your vehicle from moving, possibly hitting people or objects.
Always set the parking brake in addition to engaging first or reverse gear (▷ page 58). When parked on an incline, turn front wheels towards the road curb.
Do not park this vehicle in areas where combustible materials such as grass, hay or leaves can come into contact with the hot exhaust system, as these materials could be ignited and cause a vehicle fire.
Warning!
When leaving the vehicle, always remove the SmartKey from the starter switch, take it with you, and lock the vehicle. Do not leave children unattended in the vehicle, or with access to an unlocked vehicle. Children could move the gearshift lever, which could result in an accident and/or serious injury.
Warning!
On slippery road surfaces, never downshift in order to obtain braking action. This could result in drive wheel slip and reduced vehicle control. Your vehicle’s ABS will not prevent this type of loss of control.
160
Manual transmission
 P26.60-2222-31
Gearshift pattern for manual transmission
! When you are shifting into the 5th or 6th gear, make sure that you press the gearshift lever to the right. Otherwise, you could accidentally shift into the 3rd or 4th gear and damage the transmission.
Downshifting gears leading to overrevving the engine can result in engine damage that is not covered by the Mercedes-Benz Limited Warranty.
Never hold the vehicle stopped on a hill by using the clutch pedal. The clutch may be damaged which is not covered by the Mercedes-Benz Limited Warranty.
Do not exceed the engine speed limits. Refer to tachometer (▷ page 129) for engine speeds.
Shifting into reverse
! Only shift into reverse gear R when the vehicle is stationary, as the transmission could otherwise be damaged.
▶ Stop the vehicle completely.
▶ Fully depress clutch pedal.
▶ Move the gearshift lever to neutral position (no gear selected).
▶ Move the gearshift lever to the left until you feel a certain resistance.
▶ Push the gearshift lever past this resistance.
▶ Then move the gearshift lever forward into position R.
161
Automatic transmission*
Automatic transmission is standard equipment on select models and available as optional equipment on select other models.
For more information on driving with an automatic transmission see “Automatic transmission*” (▷ page 49).
Your vehicle’s transmission adapts its gear shifting process to your individual driving style by continually adjusting the shift points up or down. These shift point adjustments are performed based on current operating and driving conditions.
If the operating conditions change, the automatic transmission reacts by adjusting its shift program.
During the brief warm-up, transmission upshifting is delayed. This allows the catalytic converter to heat up more quickly to operating temperature.
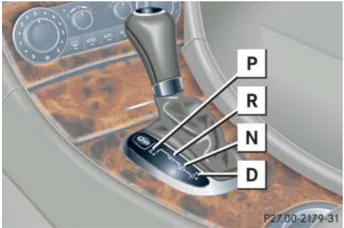
Gearshift pattern for automatic transmission
The automatic transmission selects individual gears automatically, depending on:
- the gear selector lever position D (▷ page 164) with gear ranges (▷ page 166)
- the selected program mode (C/S) (▷ page 167)
- the position of the accelerator pedal (▷ page 165)
- the vehicle speed
162
Automatic transmission*
! Allow engine to warm up under low load use. Do not place full load on the engine until the operating temperature has been reached.
Shift into reverse gear R or parking position P only when the vehicle is stopped.
Avoid spinning of a drive wheel for an extended period when driving off on slippery road surfaces. This may cause serious damage to the drivetrain which is not covered by the Mercedes-Benz Limited Warranty.
When the gear selector lever is in position D, you can influence transmission shifting by:
- limiting the gear range
- changing gears manually
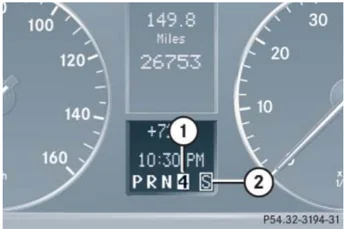
① Current gear range/gear selector lever position ② Current program mode
The current gear range/gear selector lever position and program mode (C/S) appear in the multifunction display.
An additional indication of the current gear selector lever position can be found on the cover of the shifting-gate.
The indicators come on when you activate a switch (e.g. unlocking the vehicle or opening a door) and go out after approximately 15 minutes.
Warning!
It is dangerous to shift the gear selector lever out of P or N if the engine speed is higher than idle speed. If your foot is not firmly on the brake pedal, the vehicle could accelerate quickly forward or reverse. You could lose control of the vehicle and hit someone or something. Only shift into gear when the engine is idling normally and when your right foot is firmly on the brake pedal.
163
Automatic transmission*
Gear selector lever position
| Effect | |
|---|---|
| P Park position | Gear selector lever position when the vehicle is parked. Place gear selector lever in position P only when vehicle is stopped. The park position is not intended to serve as a brake when the vehicle is parked. Rather, the driver should always set the parking brake in addition to placing the gear selector lever in position P to secure the vehicle. |
| R Reverse gear | Place gear selector lever in position R only when vehicle is stopped. |
| N Neutral | No power is transmitted from the engine to the drive axle. When the brakes are released, the vehicle can be moved freely (pushed or towed).To avoid damage to the transmission, never engage N while driving.If the ESP® is deactivated or malfunctioning:Move gear selector lever to N only if the vehicle is in danger of skidding, e.g. on icy roads. |
| D Drive | The transmission shifts automatically. All forward gears are available. |
The SmartKey can only be removed from the starter switch with the gear selector lever in position P. With the SmartKey removed, the gear selector lever is locked in position P.
If the vehicle’s electrical system is malfunctioning, the gear selector lever could remain locked in position P (▷ page 392).
164
Automatic transmission*
! Coasting the vehicle, or driving for any other reason with gear selector lever in N can result in transmission damage that is not covered by the Mercedes-Benz Limited Warranty.
Warning! Getting out of your vehicle with the gear selector lever not fully engaged in position P is dangerous. Also, position P alone is not intended to or capable of preventing your vehicle from moving, possibly hitting people or objects.
Always set the parking brake in addition to shifting to position P (> page 58).
When parked on an incline, turn the front wheels towards the road curb.
Do not park this vehicle in areas where combustible materials such as grass, hay or leaves can come into contact with the hot exhaust system, as these materials could be ignited and cause a vehicle fire.
Warning! When leaving the vehicle, always remove the SmartKey from the starter switch, take it with you, and lock the vehicle. Do not leave children unattended in the vehicle, or with access to an unlocked vehicle. Children could move the gear selector lever from position P, which could result in an accident and/or serious personal injury.
Driving tips
Accelerator position Your driving style influences the transmission's shifting behavior: Less throttle Earlier upshifting More throttle Later upshifting
Kickdown Use kickdown when you want maximum acceleration.
► Press the accelerator past the point of resistance. The transmission shifts into a lower gear.
► Ease on the accelerator when you have reached the desired speed. The transmission shifts up again.
165
Automatic transmission*
Stopping
When you stop briefly, e.g. at traffic lights: ► Leave the transmission in gear. ► Hold the vehicle with the brake.
When you stop longer with the engine idling and/or on an hill: ► Set the parking brake. ► Move the gear selector lever to position P.
Maneuvering
When you maneuver in tight areas, e.g. when pulling into a parking space: ► Control the vehicle speed by gradually releasing the brakes. ► Accelerate gently. ► Never abruptly step on the accelerator.
Working on the vehicle
Warning! When working on the vehicle, set the parking brake and move gear selector lever to position P. Otherwise the vehicle could roll away.
Gear ranges
With the gear selector lever in position D, you can select a gear range for the automatic transmission to operate within.
You can limit the gear range by pressing the gear selector lever to the left (D-), and reverse the gear range limit by pressing the gear selector lever to the right (D+).
The selected gear range appears in the multifunction display (▷ page 163). If you press on the accelerator when the engine has reached its rpm limit, the transmission will upshift beyond any gear range limit selected.
166
Automatic transmission*
\begin{tabular}{|l|p{0.7\textwidth}|} \hline & \textbf{Effect} \ \hline \textbf{6} & The transmission shifts through sixth gear only (applies to vehicles with 7-speed automatic transmission only). \ \hline \textbf{5} & The transmission shifts through fifth gear only (applies to vehicles with 7-speed automatic transmission only). \ \hline \textbf{4} & The transmission shifts through fourth gear only. \ \hline \textbf{3} & The transmission shifts through third gear only. With this selection you can use the braking effect of the engine. \ \hline \end{tabular}
\begin{tabular}{|l|p{0.7\textwidth}|} \hline & \textbf{Effect} \ \hline \textbf{2} & The transmission shifts through second gear only. Allows the use of engine's braking power when driving: \newline \bullet on steep downgrades \newline \bullet in mountainous regions \newline \bullet under extreme operating conditions \ \hline \textbf{1} & The transmission operates in first gear only. For maximum use of engine's braking effect on very steep or lengthy downgrades. \ \hline \end{tabular}
Automatic shift program
The program mode selector switch is located on the lower part of the center console.
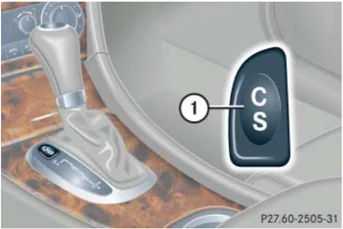
① Program mode selector switch C Comfort For comfort driving S Sport For standard driving
The current gear selector lever position and the selected program mode (C/S) are indicated in the multifunction display (\triangleright page 163).
167
Automatic transmission*
! Never change the program mode when the gear selector lever is out of position P. This could result in a change of driving characteristics for which you may not be prepared.
i The last selected program mode (C or S) is switched on when the engine is restarted.
► Press program mode selector switch ① repeatedly until the letter of the desired program mode appears in the multifunction display.
Select C for comfort driving:
- The vehicle starts out in second gear (both forward and reverse) for gentler starts. This does not apply if full throttle is applied or gear range 1 is selected.
- Traction and driving stability are improved on icy roads.
- Upshifts occur earlier even when you give more gas. The engine then operates at lower rpms and the wheels are less likely to spin.
One-touch gearshifting
Even with an automatic transmission, you can change the gears manually and limit or extend the gear range for automatic shifting with the gear selector lever in position D.
! Allow engine to warm up under low load use. Do not place full load on the engine until the operating temperature has been reached.
Shift into reverse gear R or parking position P only when the vehicle is stopped.
Avoid spinning of a drive wheel for an extended period when driving off on slippery road surfaces. This may cause serious damage to the drivetrain which is not covered by the Mercedes-Benz Limited Warranty.
168
Automatic transmission*
Downshifting
Warning!
On slippery road surfaces, never downshift in order to obtain braking action. This could result in drive wheel slip and reduced vehicle control. Your vehicle’s ABS will not prevent this type of loss of control.
- Briefly press the gear selector lever to the left in the D- direction.
The transmission will shift from the current gear to the next lower gear as permitted by the shift program. This action simultaneously limits the gear range of the transmission (▷ page 166).
To avoid overrevving the engine when the gear selector lever is moved to the D- direction, the transmission will not shift to a lower gear if the engine’s max. speed would be exceeded.
Upshifting
- Briefly press the gear selector lever to the right in the D+ direction.
The transmission will shift from the current gear to the next higher gear as permitted by the shift program. This action simultaneously extends the gear range of the transmission.
Canceling gear range limit
- Press and hold the gear selector lever in the D+ direction until D reappears in the multifunction display.
The transmission will shift from the current gear range directly to gear range D.
Shifting into optimal gear range
- Press and hold the gear selector lever in the D- direction.
The transmission will automatically select the gear range suited for optimal acceleration and deceleration. This may involve shifting down one or more gears.
Emergency operation (Limp Home Mode)
If vehicle acceleration worsens or the transmission no longer shifts, the transmission is most likely operating in limp home (emergency operation) mode. In this mode only second gear and reverse gear can be activated.
- Stop the vehicle in a safe location.
- Move gear selector lever to P.
- Turn off the engine.
- Wait at least 10 seconds before restarting.
- Restart the engine.
- Move gear selector lever to position D (for second gear) or R.
- Have the transmission checked at an authorized Mercedes-Benz Center as soon as possible.
169