Automatic climate control* (Canada only)
!
Automatic climate control* (Canada only)
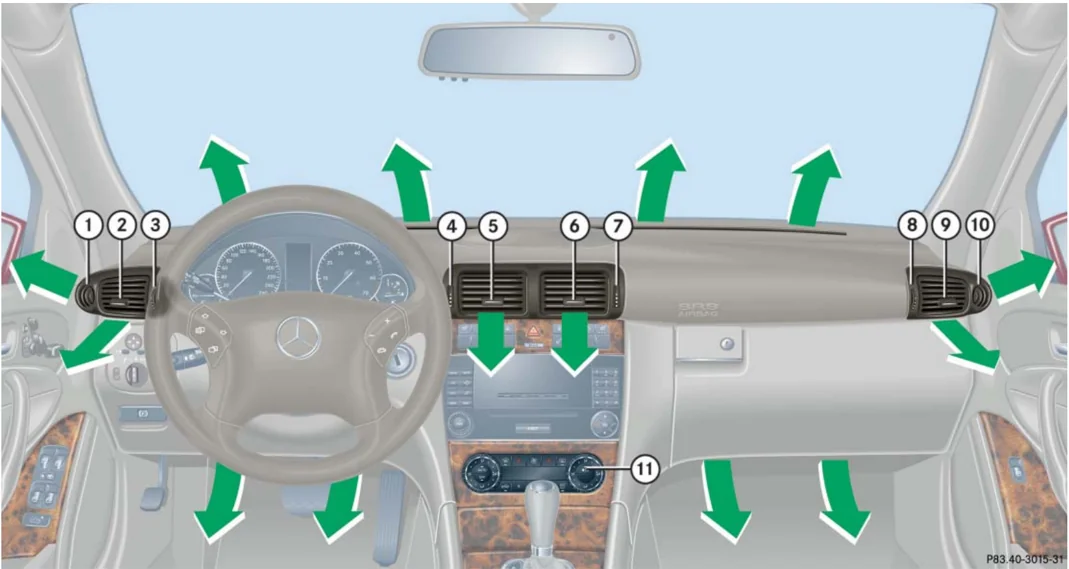
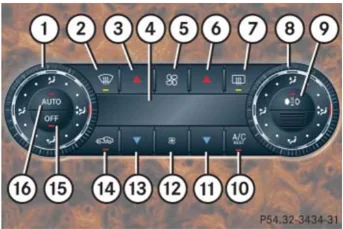
 Automatic climate control panel
| Item | Item | ||
|---|---|---|---|
| ① | Left side defroster vent, fixed | ① | Left side air distribution control |
| ② | Left side air vent, adjustable | ② | Front defroster |
| ③ | Thumbwheel for air volume control for left side air vent | ③ | Temperature control, left, raising |
| ④ | Thumbwheel for air volume control for left center air vent | ④ | Display |
| ⑤ | Left center air vent, adjustable | ⑤ | Air volume control, raising |
| ⑥ | Right center air vent, adjustable | ⑥ | Temperature control, right, raising |
| ⑦ | Thumbwheel for air volume control for right center air vent | ⑦ | Rear window defroster |
| ⑧ | Thumbwheel for air volume control for right side air vent | ⑧ | Right side air distribution control |
| ⑨ | Right side air vent, adjustable | ⑨ | Charcoal filter |
| ⑩ | Right side defroster vent, fixed | ⑩ | AC cooling on/off Residual heat/ventilation |
| ⑪ | Automatic climate control panel | ⑪ | Temperature control, right, lowering |
| ⑫ | Air volume control, lowering | ||
| ⑬ | Temperature control, left, lowering | ||
| ⑭ | Air recirculation | ||
| ⑮ | Automatic climate control on/off (complete system) | ||
| ⑯ | Air distribution and air volume (automatic mode) |
For draft-free ventilation, move the sliders for the air vents ②, ⑤, ⑥, and ⑨ to the middle position.
187
Automatic climate control* (Canada only)
The automatic climate control is operational whenever the engine is running. You can operate the climate control system in either the automatic or manual mode. The system cools or heats the interior depending on the selected interior temperature and the current outside temperature.
Warning! When operating the automatic climate control, the air that enters the passenger compartment through the air vents can be very hot or very cold (depending on the set temperature). This may cause burns or frostbite on unprotected skin in the immediate area of the air vents. Always keep sufficient distance between unprotected parts of the body and the air vents. If necessary, use the air distribution control (▷ page 190) to direct the air to air vents in the vehicle interior that are not in the immediate area of unprotected skin.
Nearly all dust particles, pollutants and odors are filtered out before outside air enters the passenger compartment through the air distribution system.
The air conditioning will not engage (no cooling) if the mode A/C is deactivated (▷ page 196).
Warning! Follow the recommended settings for heating and cooling given on the following pages. Otherwise the windows could fog up, impairing visibility and endangering you and others.
Severe conditions (e.g. strong air pollution) may require replacement of the filter before its scheduled interval. A clogged filter will reduce the air volume to the interior.
If the vehicle interior is hot, ventilate the interior before driving off, see "Summer opening feature" (▷ page 243). The automatic climate control will then adjust the interior temperature to the set value much faster.
Keep the air intake grille in front of the windshield free of snow and debris.
Do not obstruct air flow by placing objects on the air flow-through exhaust slots below the rear window.
188
Automatic climate control* (Canada only)
Deactivating the automatic climate control system
Deactivating
- Press button OFF (▷ page 187). The indicator lamp on the button comes on. The automatic climate control system is deactivated.
When the air conditioning is switched off, the outside air supply and circulation are also switched off. Only choose this setting for a short time. Otherwise the windows could fog up.
Reactivating
- Press button OFF (▷ page 187). The indicator lamp on the button goes out.
Operating the climate control system in automatic mode
When operating the automatic climate control system in automatic mode, you will only rarely need to adjust the temperature, air volume and air distribution. In automatic mode, cooling with dehumidify is switched on. This function can be switched off if necessary.
The automatic climate control system can be switched on or off separately for the left and right sides of the passenger compartment, as required.
Activating
- Press button AUTO (▷ page 187) while the engine is running. The indicator lamp on the button comes on. The air volume and air distribution are adjusted automatically.

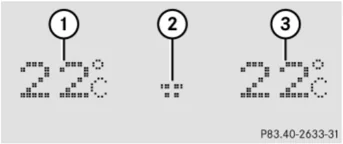
① Temperature, left ② Blower speed ③ Temperature, right
- Use temperature controls ③ and ⑬ or ⑥ and ⑪ (▷ page 187) to separately adjust the air temperature on each side of the passenger compartment. The temperature of the vehicle interior is adjusted automatically.
189
Automatic climate control* (Canada only)
Deactivating
- Press button AUTO (▷ page 187) again.
The indicator lamp on the button goes out. The automatic operation of air volume and air distribution switches off.
Setting the temperature
Use temperature controls ③ and ⑬ for the left side or ⑥ and ⑪ for the right side (▷ page 187) to separately adjust the air temperature on each side of the passenger compartment. You should raise or lower the temperature setting in small increments, preferably starting at 22°C (72°F). The climate control will adjust to the set temperature as fast as possible.
Increasing
- Press temperature button ③ and/or ⑥ (▷ page 187) until the desired temperature appears in the control panel display ④ (▷ page 187).
The automatic climate control system will correspondingly adjust the interior air temperature.
Decreasing
- Press temperature button ⑪ and/or ⑬ (▷ page 187) until the desired temperature appears in the control panel display ④ (▷ page 187).
The automatic climate control system will correspondingly adjust the interior air temperature.
Adjusting air distribution
Use air distribution controls ① and ⑧ (▷ page 187) to separately adjust the air distribution on each side of the passenger compartment. The following symbols are found on the controls:
| Symbol | Function |
|---|---|
| Directs air through the center, side and rear passenger compartment air vents | |
| Directs air to the windshield and the side defroster vents | |
| Directs air into the entire vehicle interior | |
| Directs air to the footwells |
190
Automatic climate control* (Canada only)
► Turn air distribution control ① or ⑧ (▷ page 187) to the desired symbol. The indicator lamp on the button AUTO (▷ page 187) goes out. The automatic air distribution is switched off. The air distribution is controlled according to the selected control setting.
ℹ You can also turn the air distribution control to a position between two symbols.
Opening center and side air vents
► Turn thumbwheels ③, ④, ⑦ and ⑧ (▷ page 186) upward. The center air vents ⑤ and ⑥ and side air vents ② and (▷ page 187) are open.
Closing center and side air vents
► Turn thumbwheels ③, , ⑦ and (▷ page 186) downward. The center air vents ⑤ and ⑥ and side air vents ② and ⑨ (▷ page 186) are closed.
Adjusting air volume
Use button AUTO (▷ page 187) for automatic mode or air volume controls [icon] or [icon] (▷ page 187) to adjust air volume manually. Seven blower speeds are available.
► Press button [icon] to decrease or [icon] (▷ page 187) to increase air volume to the desired level. The indicator lamp on the button AUTO goes out. The automatic air distribution remains switched on.
Front defroster
You can use this setting to defrost the windshield, for example if it is iced up. You can also defog the windshield and the side windows.
ℹ Keep this setting selected only until the windshield or the side windows are clear again.
Activating
► Press button [icon] (▷ page 187). The indicator lamp on the button comes on.
191
Automatic climate control* (Canada only)
The air conditioning switches automatically to the following functions:
- cooling on to dehumidify
- maximum blowing and heating power
- air flows onto the windshield and the front side windows
- the air recirculation mode is switched off
Deactivating
▶ Press button (▷ page 187) again. The indicator lamp on the button goes out.
The previous settings are once again in effect.
i The cooling remains switched on.
Windshield fogged on the outside
Keep this setting selected only until the windshield is clear again.
▶ Switch the windshield wipers on (▷ page 54).
If the automatic mode of the climate control is switched off:
▶ Turn air distribution control ① or ⑧ to or (▷ page 187).
Maximum cooling MAXCOOL
If the left and right air distribution controls as well as the airflow volume control are set to AUTO (▷ page 187) and there is a high need for cooling, the display "MAXCOOL" appears.
This provides the fastest possible cooling of the vehicle interior (when side windows and tilt/sliding sunroof* are closed).
Air recirculation mode
Switch to air recirculation mode to prevent unpleasant odors from entering the vehicle from the outside (e.g. before driving through a tunnel). This setting cuts off the intake of outside air and recirculates the air in the passenger compartment.
Warning!
Fogged windows impair visibility, endangering you and others. If the windows begin to fog on the inside, switching off the air recirculation mode immediately should clear interior window fogging. If interior window fogging persists, make sure the air conditioning (▷ page 187) is activated, or press button .
192
Automatic climate control* (Canada only)
Activating
▶ Press button [icon] (> page 187). The indicator lamp on the button comes on.
i The air recirculation mode is activated automatically at high outside temperatures.
The indicator lamp on the button [icon] is not lit when the air recirculation mode is automatically switched on.
A quantity of outside air is added after approximately 30 minutes.
Warning!
Never operate the side windows and the tilt/sliding sunroof* if there is the possibility of anyone being harmed by the closing procedure.
In the event that the closing procedure causes potential danger, the closing of the side windows can be immediately halted by pressing or pulling the respective window switch. The closing of the tilt/sliding sunroof* can be immediately halted by moving the tilt/sliding sunroof* switch in the overhead control panel in any direction.
The closing of the side windows and tilt/sliding sunroof* can be reversed by again pressing and holding the button [icon].
i Press and hold button [icon] for approx. 2 seconds. The side windows and tilt/sliding sunroof* will close. You can release button [icon] once the closing procedure has begun. The windows and tilt/sliding sunroof* continue closing until they are fully closed.
193
Automatic climate control* (Canada only)
Deactivating
▶ Press button [icon] (> page 187) again. The indicator lamp on the button goes out.
The air recirculation mode is deactivated automatically:
- after 5 minutes if the outside temperature is below approximately 5°C (41°F)
- after 5 minutes if the air conditioning is turned off
- after 30 minutes if the outside temperature is above approximately 5°C (41°F)
Press and hold button [icon] for approx. 2 seconds. The side windows and or tilt/sliding sunroof* will return to their previous position. You can release button [icon] once the opening procedure has begun. The windows and tilt/sliding sunroof* continue opening until they have reached their previous position.
A window or tilt/sliding sunroof* will only return to its previous position if it has not been moved to another position using the respective window switch or tilt/sliding sunroof* switch after it was closed with button [icon]. A window or tilt/sliding sunroof* that was moved will remain in its current position if button [icon] is used to re-open the remaining windows or tilt/sliding sunroof*.
Charcoal filter
An activated charcoal filter markedly reduces bad odors and removes pollutants from air entering the passenger compartment. The charcoal filter can be activated or deactivated.
The system switches automatically to the air recirculation mode, if the
- charcoal filter is switched on
- carbon monoxide (CO) or nitrogen oxide (NOx) concentration of the outside air increases beyond a predetermined level
The automatic air recirculation mode does not function if the A/C mode is deactivated (indicator lamp on button [icon] not lit), or if the outside temperature has fallen below 5°C (41°F).
194
Automatic climate control* (Canada only)
Activating
▶ Press button [icon] (> page 187). The indicator lamp on the button comes on.
i The activated charcoal filter should be switched off when windows fog up on the inside, or if the passenger compartment needs to be quickly heated or cooled down.
i The activated charcoal filter should be switched off when windows fog up on the inside, or if the passenger compartment needs to be quickly heated or cooled down.
Warning!
Never operate the side windows and the tilt/sliding sunroof* if there is the possibility of anyone being harmed by the closing procedure.
In the event that the closing procedure causes potential danger, the closing of the side windows can be immediately halted by pressing or pulling the respective window switch. The closing of the tilt/sliding sunroof* can be immediately halted by moving the tilt/sliding sunroof* switch in the overhead control panel in any direction.
The closing of the side windows and tilt/sliding sunroof* can be reversed by again pressing and holding the button [icon].
Deactivating
▶ Press button [icon] (> page 187). The indicator lamp on the button goes out.
i Press and hold button [icon] for approx. 2 seconds. The side windows and or tilt/sliding sunroof* will return to their previous position. You can release button [icon] once the opening procedure has begun. The windows and tilt/sliding sunroof* continue opening until they have reached their previous position.
A window or tilt/sliding sunroof* will only return to its previous position if it has not been moved to another position using the respective window switch or tilt/sliding sunroof* switch after it was closed with button [icon]. A window or tilt/sliding sunroof* that was moved will remain in its current position if button [icon] is used to re-open the remaining windows or tilt/sliding sunroof*.
195
Automatic climate control* (Canada only)
Air conditioning
The cooling function, only operational when the engine is running, cools the vehicle interior down to the selected temperature. The cooling function also dehumidifies the air in the vehicle interior, thus preventing the windows from fogging up.
Condensation may drip out from underneath the vehicle. This is normal and not an indication of a malfunction.
Warning!
If you turn off the cooling function, the vehicle will not be cooled when weather conditions are warm. The windows can fog up more quickly. Window fogging may impair visibility and endanger you and others.
Deactivating
It is possible to deactivate the air conditioning (cooling) function of the automatic climate control system. The air in the vehicle will then no longer be cooled or dehumidified.
- Press button A/C REST (▷ page 187). The indicator lamp on the button goes out. The cooling function switches off after a short delay.
Activating
Moist air can fog up the windows. You can dehumidify the air with the air conditioning.
- Press button A/C REST (▷ page 187) again. The indicator lamp on the button comes on.
The air conditioning uses the refrigerant R134a. This refrigerant is free of CFCs which are harmful to the ozone layer.
! If the air conditioning cannot be turned on again, this indicates that the air conditioning is losing refrigerant. The compressor has turned itself off.
Have the air conditioning checked at the nearest authorized Mercedes-Benz Center.
196
Automatic climate control* (Canada only)
Residual heat and ventilation
With the engine switched off, it is possible to continue to heat or ventilate the interior for up to 30 minutes. This feature makes use of the residual heat produced by the engine.
i How long the system will provide heating depends on
- the coolant temperature
- the temperature set by the operator
The blower will run at speed setting 1 regardless of the air distribution control setting.
Activating
▶ Switch off the ignition (▷ page 33). ▶ Press button A/C REST (▷ page 187). The indicator lamp on the button comes on.
Deactivating
▶ Press button A/C REST (▷ page 187). The indicator lamp on the button goes out.
The residual heat is automatically turned off:
- when the ignition is switched on
- after about 30 minutes
- if the battery voltage drops
Rear passenger compartment adjustable air vents
The air conditioning for the rear passenger compartment is controlled via the automatic climate control panel (▷ page 187).
i The temperature at the center air vents for the rear passenger compartment ① and ③ is the same as at the dashboard center air vents.
197
Automatic climate control* (Canada only)
The air vents for the rear passenger compartment are located in the rear center console.
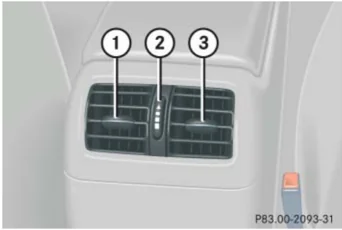
① Left center air vent ② Thumbwheel for air volume control for center air vents ③ Right center air vent
Adjusting air distribution
▶ Push the slide for the left center vent ① or right center vent ③ to the left, right, up, or down.
The air flow is directed in the corresponding direction.
For draft-free ventilation, push slides ① and ③ upward.
Adjusting air volume
▶ Turn thumbwheel ② up or down.
The air volume is increased or decreased.
198
Audio system
▼ Audio system
Audio and telephone, operation
These instructions are intended to help you become familiar with your Mercedes-Benz audio system. They contain useful tips and a detailed description of the user functions.
Warning!
In order to avoid distraction which could lead to an accident, the driver should enter system settings with the vehicle at a standstill and operate the system only when road and traffic conditions permit. Always pay full attention to traffic conditions first before operating system controls while driving.
Bear in mind that at a speed of just 30 mph (approximately 50 km/h), your car is covering a distance of 44 feet (approximately 14 m) every second.
Operating safety
Warning!
Any alterations made to electronic components can cause malfunctions.
The radio, amplifier, CD changer*, satellite radio*, and telephone* are interconnected. When one of the components is not operational or has not been removed/replaced properly, the function of other components may be impaired.
This condition might seriously impair the operating safety of your vehicle.
We recommend that you have any service work on electronic components carried out by an authorized Mercedes-Benz Center.
199
Audio system
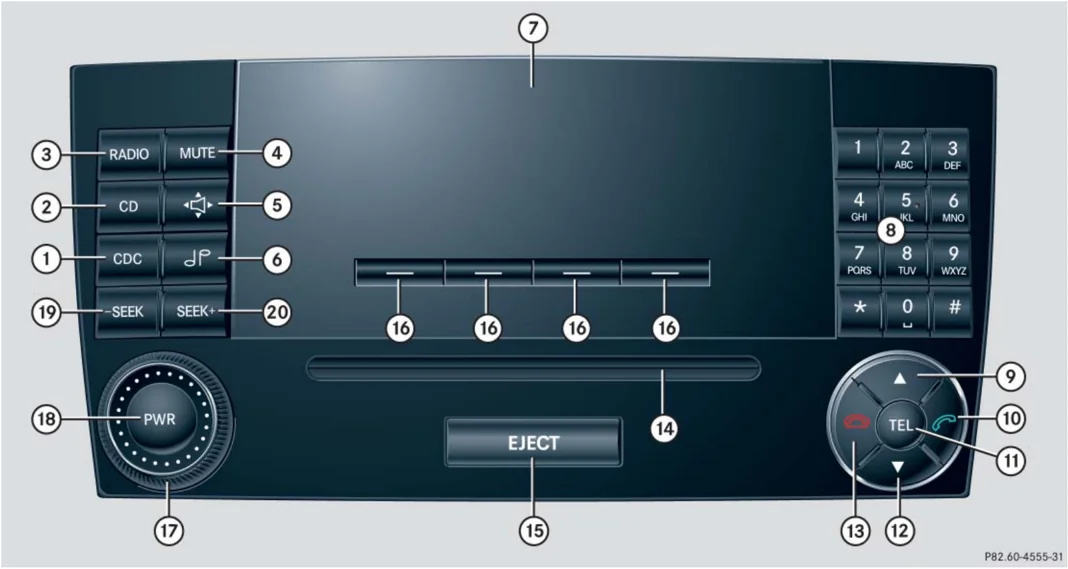
Operating and display elements
P82.60-4555-31
200
Audio system
201
Audio system
Button and soft key operation
In these instructions, the alphanumeric keypad (right side of radio panel) and the function buttons (left side of radio panel) are referred to as “buttons”. The four keys below the display panel are referred to as “soft keys”.
! Do not press directly in the display face. Otherwise, the display will be damaged.
Operation
Switching the unit on/off
Switching on
▶ Turn the SmartKey in the starter switch to position 1 or 2.
▶ If the audio system was on as you removed the SmartKey from the starter switch, the audio system will automatically come back on as you turn the SmartKey to position 1 or 2.
or
▶ Press PWR button.
If the radio is switched on without the key in the starter switch, it will automatically switch off again after approx. 30 minutes.
If your vehicle is equipped with a telephone, the display may prompt you to enter your PIN (GSM network) or code (TDMA or CDMA network).
202
Audio system
Switching off
- Remove SmartKey from starter switch. or
- Press [PWR] button.
i Should excessively high temperatures occur while the audio system is being operated, the display will dim. If temperatures continue to rise, HIGH TEMP will appear in the display, after which the audio system will be switched off for a cooling-down period.
Adjusting the volume
- Turn rotary control of [VOL] button. The volume will increase or decrease depending on the direction turned.
i If your vehicle equipment includes a Mercedes-Benz specified mobile telephone*, you can adjust its volume separately from the volume of the audio system while the telephone is being used.
Adjusting sound functions
The bass and treble functions are called up by pressing the [TONE] button. Settings for bass and treble are stored separately for the AM and FM wavebands, weather band, CD mode and telephone mode.
Bass
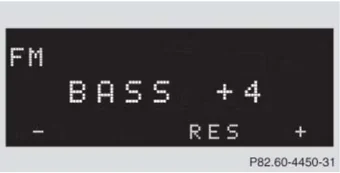
- Press [TONE] button repeatedly until BASS appears in the display.
P82.60-4450-31
- Press + or - soft key to increase or decrease tone level accordingly. or
- Press RES soft key briefly to reset bass tones to their center level. The radio switches back to the standard radio menu 8 seconds after the last soft key is pressed.
203
Audio system
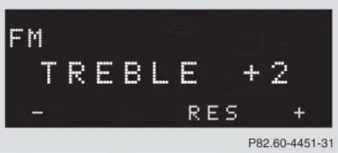
Adjusting treble
▶ Press button repeatedly until TREBLE appears in the display.

▶ Press + or - soft key to increase or decrease tone level accordingly.
or
▶ Press RES soft key briefly to reset treble tones to their center level.
The radio switches back to the standard radio menu 8 seconds after the last soft key is pressed.
Sound system*
You can either program the sound settings manually (▷ page 203) or choose settings via preset sound characteristics.
You can select from among the following settings:
- STANDARD: conventional stereo sound.
- SURROUND: the sound is set for better three-dimensional acoustic characteristics.
- SPEECH: the sound is optimized for the spoken word.
▶ Press button repeatedly until STANDARD, SURROUND, or SPEECH appears in the display.
▶ Press <<< or >>> soft key repeatedly until the desired sound setting has been reached.
The sound is set accordingly.
or
▶ Press RES soft key briefly.
The sound setting is reset depending on the sound source activated.
- Radio mode: STANDARD
- CD/AUX mode: SURROUND
- Telephone: SPEECH
The radio switches back to the standard radio menu 8 seconds after the last soft key is pressed.
Audio system
Returning sound functions to factory settings
► Press button to call up settings menu in the display.

► Press RES soft key briefly; the respective sound function is reset to its center level.
or
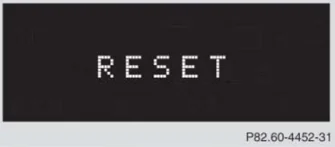
► Press and hold RES soft key until RESET appears in the display.
The sound settings for bass and treble are returned to their center level and the volume is set to a predefined level.
Vehicles with sound system*: The sound setting is reset depending on the sound source activated.
- Radio mode: STANDARD
- CD/AUX mode: SURROUND
- Telephone: SPEECH
The radio switches back to the standard radio menu 4 seconds after the last soft key is pressed.
Adjusting volume distribution
Call up fader and balance functions by pressing the button.
Fader
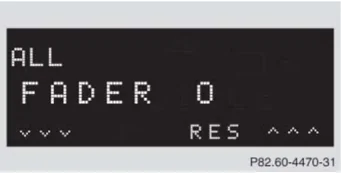
► Press button repeatedly until FADER appears in the display.
► Press or soft key.
The volume is distributed accordingly between the front and rear of the vehicle.
or
► Press RES soft key briefly.
The fader is reset to its center level.
The radio switches back to the standard radio menu 8 seconds after the last soft key is pressed.
205
Audio system
Adjusting balance
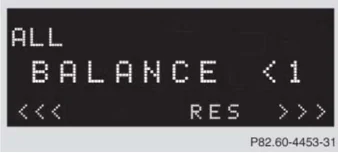
▶ Press button repeatedly until BALANCE appears in the display.

▶ Press <<< or >>> soft key. The volume is distributed between the left and right sides of the vehicle.
or
▶ Press RES soft key briefly. The balance is reset to its center level. The radio switches back to the standard radio menu 8 seconds after the last button is pressed.
Returning volume distribution to factory settings
▶ Press button to call up settings menu in the display.
▶ Press RES soft key briefly; the respective volume distribution is reset to its center (flat) level.
or
▶ Press and hold RES soft key until RESET appears in the display. The volume distribution settings for fader and balance are set to their center level. The radio switches back to the standard radio menu 4 seconds after the last soft key is pressed.
Telephone* muting
If your vehicle equipment includes a Mercedes-Benz specified mobile telephone*, you can adjust its volume separately from the volume of the audio system while the telephone is being used.
206
Audio system
Connecting an external audio source (AUX) to the radio*
An optional dealer-installed cinch-connector* for connecting an external audio source may become available for your vehicle model. Feature description is based on preliminary information at time of printing. Contact an authorized Mercedes-Benz Center for availability.
You can adjust the volume (▷ page 203), the sound settings (▷ page 203) and the volume distribution (▷ page 205) for the AUX input.
Calling up AUX mode
▶ Press and hold CDC button until AUX appears in the display.
Canceling AUX mode
▶ Press any audio source button.
Radio operation
Selecting radio mode
▶ Press RADIO button.
Calling up wavebands
You can choose from among the FM, AM, and WB wavebands.
Weather band (▷ page 210).
ℹ️
-
FM waveband: 87.7 ........ 107.9 MHz
-
AM waveband: 530 ........ 1710 KHz
Calling up wavebands for radios without SAT
▶ Press FM or AM soft key to switch between FM and AM.
The FM and AM wavebands are called up one after another.
or
▶ Press WB soft key.
The weather band menu is called up.
The waveband currently selected appears in the upper left-hand corner of the display.
207
Audio system
Calling up wavebands for radios with SAT
- Press FM, AM, or WB soft key repeatedly until desired waveband has been selected.
The FM, AM, and WB wavebands are called up one after another.
The waveband currently selected appears in the upper left-hand corner of the display.
Selecting a station
The following options are available for selecting a station:
- Direct frequency input (▷ page 208)
- Manual tuning (▷ page 209)
- Automatic seek tuning (▷ page 209)
- Scan search (▷ page 209)
- Station memory (▷ page 209)
- Automatic station memory (Autostore) (▷ page 210)
The station search proceeds in the following frequency increments:
- 200 kHz in FM range
- 10 kHz in AM range
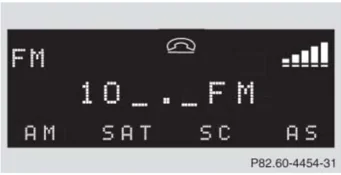
Direct frequency input
- Select desired waveband.
P82.60-4454-31
- Press * button.
- Enter desired frequency with buttons 1 to 0.
You can only enter frequencies within the respective waveband.
If a button is not pressed within 4 seconds, the radio will return to the last station tuned.
208
Audio system
Manual tuning
- Select desired waveband.
- Press SEEK+ or -SEEK button for approx. 3 seconds.
- Press button repeatedly until desired frequency has been reached.
Step-by-step station tuning takes place in ascending or descending order. Each time the button is pressed, the radio tunes further by 0.2 MHz. During manual tuning, the radio is muted.
Automatic seek tuning
- Select desired waveband.
- Press SEEK+ or -SEEK button briefly.
The radio will tune to the next highest or next lowest receivable frequency.
If no station is received after two consecutive scans of the complete frequency range, then the scan stops at the frequency from which it began.
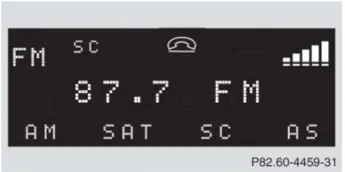
Scan search
- Starting scan search
- Select desired waveband.

- Press SC soft key.
SC will appear in the display. The radio briefly tunes in all receivable stations on the waveband selected.
- Ending scan search
- Press SC soft key or SEEK+ or -SEEK.
The station last played will be selected and SC disappears from the display.
Station memory
You can store ten AM and ten FM stations in the memory.
- Storing stations
- Tune in desired station.
- Press and hold desired station button 1 to 0 until a brief signal tone is heard.
The frequency is stored on the selected station button.
- Calling up stations
- Press desired station button 1 to 0 briefly.
209
Audio system
Autostore – automatic station memory
The Autostore memory function provides an additional memory level. The station memory for manually stored stations is not overwritten.
- Calling up Autostore memory level and storing stations
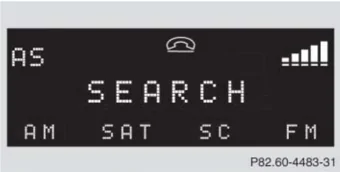
Press AS soft key briefly.
The radio switches to the Autostore memory level. AS and SEARCH appear in the display and the radio finds the ten stations with the strongest signals. These stations are stored on the station buttons 1 to 0 in order of signal strength.
- Calling up stations
Press desired station button 1 to 0.
- Leaving the Autostore memory level
Press FM or AM soft key briefly.
Interrupting radio mode
The radio mode is interrupted by an incoming call on the telephone* (▷ page 229).
- Mute on
Press MUTE button.
The radio mode is interrupted and MUTED appears in the display.
- Mute off
Press MUTE button.
The radio mode is again active.
Weather band

Press WB soft key.
The weather band station last received is tuned in.
Selecting a weather band station directly
Select desired weather band station with buttons 1 to 7 PQRS.
If a station cannot be tuned in, a search is automatically started.
210