Lights
HEADLAMP CONTROL ☼
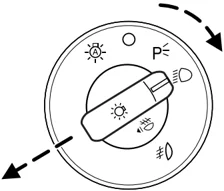
Rotate the headlamp control clockwise to the first position to turn on the parking lamps. Rotate clockwise to the second position to also turn on the headlamps.
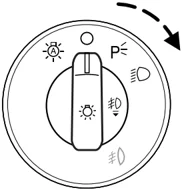
Autolamp control (if equipped) ☼
The autolamp system provides light sensitive automatic on-off control of the exterior lights normally controlled by the headlamp control.
The autolamp system also keeps the lights on for approximately 20 seconds or on vehicles equipped with a message center, you can select a delay from 0–180 seconds, after the ignition switch is turned to OFF.
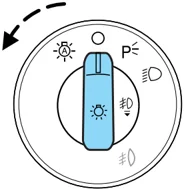
- To turn autolamps on, rotate the control counterclockwise.
- To turn autolamps off, rotate the control clockwise to OFF.
If your vehicle is not equipped with a message center, then the auto lamps can be programmed manually by:
- Start with the ignition in OFF and the autolamps selected ON.
- Deselect (switch off) the autolamps.
- Put the ignition in RUN.
- Put the ignition in OFF.
- Select the autolamps (switch on).
Steps 2 through 5 must be performed within a 10 second period. At this point, the headlamps and park lamps will turn on.
- Deselect the autolamps after the desired autolamp delay time (maximum of 3 minutes)
At this point, the headlamps and park lamps will turn off.
42
Lights
Foglamp control (if equipped)
The headlamp control also operates the foglamps. The foglamps can be turned on only when the headlamp control is in the , or position and the high beams are not turned on.
Pull headlamp control towards you to turn foglamps on. The foglamp indicator light will illuminate if the ignition is in the ON position.

Daytime running lamps (DRL) (if equipped)
Turns the headlamps on with a reduced output.
In order for the DRLs to function:
- the ignition must be in the ON position and
- the headlamp control is in the OFF, parking lamp or autolamp position.
Always remember to turn on your headlamps at dusk or during inclement weather. The Daytime Running Lamp (DRL) system does not activate with your tail lamps and generally may not provide adequate lighting during these conditions. Failure to activate your headlamps under these conditions may result in a collision.
High beams
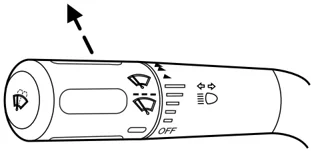
Push the lever toward the instrument panel to activate. Pull the lever towards you to deactivate.

43
Lights
Flash to pass
Pull toward you slightly to activate and release to deactivate.
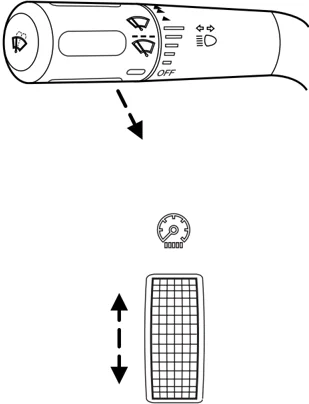
PANEL DIMMER CONTROL
Use to adjust the brightness of the instrument panel and all applicable switches in the vehicle during headlamp and parklamp operation.
Move the control to the full upright position, past detent, to turn on the interior lamps.
Move the control to the full down position, past detent, to prevent the interior lights from illuminating when the doors are opened.
VERTICAL AIM ADJUSTMENT
- Park the vehicle directly in front of a wall or screen on a level surface, approximately 25 feet (7.6 meters) away.
- (1) Eight feet
- (2) Center height of lamp to ground
- (3) Twenty-five feet
44
Lights
- (4) Horizontal reference line
- Measure the height from the center of your headlamp (indicated by a 3.0 mm circle on the lens) to the ground and mark a 8 foot (2.4 meter) horizontal reference line on the vertical wall or screen at this height (a piece of masking tape works well).
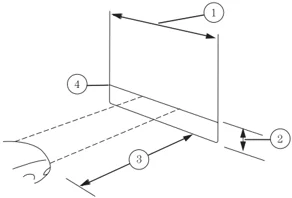
- Turn on the low beam headlamps to illuminate the wall or screen and open the hood. Cover one of the headlamps so no light hits the wall.
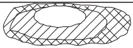
- On the wall or screen you will observe a light pattern with a distinct horizontal edge towards the right. If this edge is not at the horizontal reference line, the beam will need to be adjusted so the edge is at the same height as the horizontal reference line.
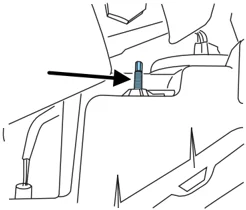
- Locate the vertical adjuster on each headlamp, then use a 4 mm socket/wrench to turn the adjuster either counterclockwise (to adjust down) or clockwise (to adjust up) aligning the upper edge of the light pattern up to the horizontal line.
- HORIZONTAL AIM IS NOT REQUIRED FOR THIS VEHICLE AND IS NON-ADJUSTABLE.
- Repeat step 3–5 for the other headlamp.
- Close the hood and turn off the lamps.
45
Lights
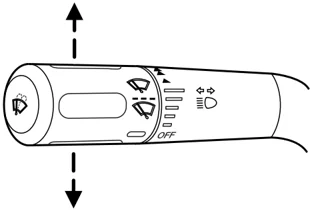
TURN SIGNAL CONTROL ⇧⇩
- Push down to activate the left turn signal.
- Push up to activate the right turn signal.
INTERIOR LAMPS
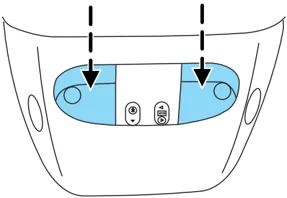
Map lamps
To turn on the map lamps, press the control next to each lamp.
Rear dome lamp (if equipped)
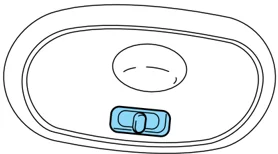
The dome lamp lights when the control is in the DOOR (left) position, any door is open, the instrument panel switch is pushed past the detent and when any of the remote entry controls are pressed while the ignition is off.
The rear dome lamp can be turned ON (center) or OFF (right) by sliding the control.
46
Lights
Rear map lamp (if equipped)
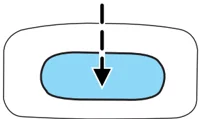
The rear map lamp lights are located on the end of the overhead rail system. The lamps can be turned on or off by pushing on the lens.
Dome/courtesy lamps (if equipped)
The dome lamp lights when:
- any door is opened.
- the instrument panel dimmer switch is rotated up until the courtesy lamps come on.
- any of the remote entry controls are pressed and the ignition is OFF.
The reading portion, the two outer lights, can only be toggled on and off at the lamp.
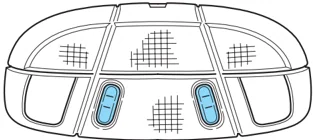
Courtesy/reading/cargo lamps (if equipped)
The dome portion of the lamp, the center light, can be turned on when the headlamp control is rotated fully up or when any door is opened.
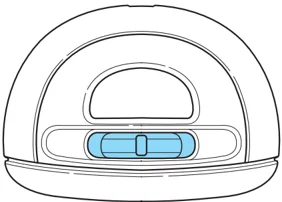
With the ignition key in the ACC or ON position, the rear dome lamp can be turned ON or OFF by sliding the control.
47
Lights
BULBS
Replacing exterior bulbs
Check the operation of all the bulbs frequently.
Using the right bulbs
Replacement bulbs are specified in the chart below. Headlamp bulbs must be marked with an authorized "D.O.T." for North America and an "E" for Europe to assure lamp performance, light brightness and pattern and safe visibility. The correct bulbs will not damage the lamp assembly or void the lamp assembly warranty and will provide quality bulb burn time.
Lights
Replacing headlamp bulbs
- Make sure that the headlamp control is in the OFF position and open the hood.
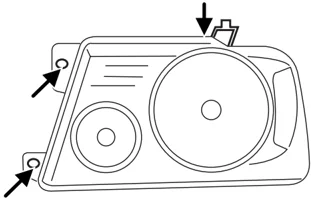
- At the top and inboard side of the headlamp, loosen the three retaining screws.
- Once the three retaining screws have been removed, disengage the tab at the top center of the headlamp assembly by lifting it up.
- Slide headlamp assembly forward disconnecting the snap attachment at the fender and disconnect the electrical connector from the bulb by pulling rearward.
- Remove the bulb by turning it counterclockwise, then pull it straight out.
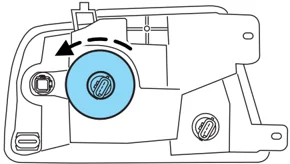
Handle a halogen headlamp bulb carefully and keep out of children’s reach. Grasp the bulb only by its plastic base and do not touch the glass. The oil from your hand could cause the bulb to break the next time the headlamps are operated.
Install the new bulb in reverse order.
49
Lights
Replacing front parking lamp/turn signal/sidemarker bulbs
- Make sure the headlamp control is in the OFF position and open the hood.
- At the top and inboard side of the headlamp, loosen the three retaining screws.
- Once the three retaining screws have been removed, disengage the tab at the top center of the headlamp assembly by lifting it up.
- Slide the headlamp assembly forward disconnecting the snap attachment at the fender.
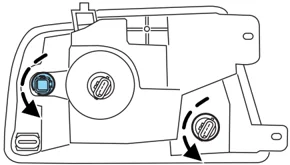
- Remove bulb socket from the lamp assembly by turning it counterclockwise and then pull the bulb straight out.
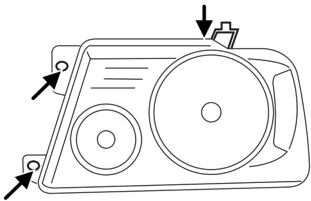
Install the new bulb(s) in reverse order.
Replacing tail/brake/turn signal/backup lamp bulbs
- Make sure the headlamp control is in the OFF position.
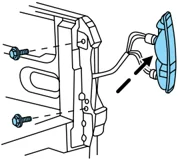
- Open the tailgate to expose the lamp assembly screws and remove the two screws from the tail lamp assembly.
50
Lights
- Carefully pull the lamp assembly straight rearward from the tailgate pillar to disengage two hidden snap-in retainers. (Flare side tail lamps are not equipped with snap-in retainers.)
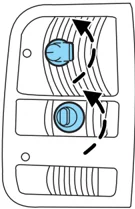
- Remove bulb socket from the lamp assembly by turning it counterclockwise.
- Pull bulb straight out of socket and press in the new bulb.
Install the new bulb(s) in reverse order.
Replacing high-mount brake and cargo lamp bulbs
Make sure the headlamp control is in the OFF position.
- Remove the two screws and move the lamp assembly away from the vehicle to expose the bulb sockets.
- Remove the bulb socket by rotating counterclockwise and pulling it out of the lamp assembly.
- Pull the bulb straight out of the socket and push in the new bulb.
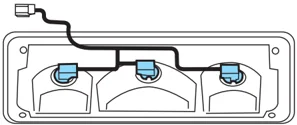 Install the new bulbs in reverse order.
 Install the new bulbs in reverse order.
Replacing foglamp bulbs (if equipped)
- Make sure the headlamp control is in the OFF position.
- Remove the bulb socket from the foglamp by turning counterclockwise.
- Disconnect the electrical connector from the foglamp bulb.
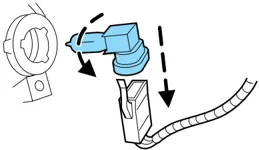 Install the new bulb in reverse order.
 Install the new bulb in reverse order.
51
Lights
Replacing exterior mounted mirror turn signal indicator lamp bulbs
For bulb replacement, see a dealer or qualified technician.
Replacing license plate lamp bulbs
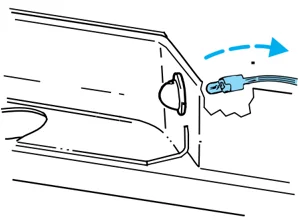
The license plate bulbs are located behind the rear bumper. To change the license plate lamp bulbs:
- Reach behind the rear bumper to locate the bulb.
- Twist the bulb socket counterclockwise and carefully pull to remove it from the lamp assembly.
- Pull out the old bulb from the socket and push in the new bulb.
- Install the bulb socket in lamp assembly by turning it clockwise.
52
Driver Controls
MULTI-FUNCTION LEVER
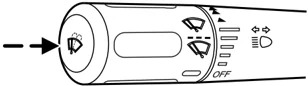
Windshield wiper: Rotate the end of the control away from you to increase the speed of the wipers; rotate towards you to decrease the speed of the wipers.
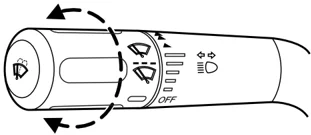
Speed dependent wipers (if equipped): When the wiper control is on, the speed of the wipers will automatically adjust with the vehicle speed. The faster your vehicle is travelling the faster the wipers will go.
Windshield washer: Push the end of the stalk:
- briefly: causes a single swipe of the wipers without washer fluid.
- a quick push and hold: the wipers will swipe three times with washer fluid.
- a long push and hold: the wipers and washer fluid will be activated for up to ten seconds.
CHANGING THE WIPER BLADES
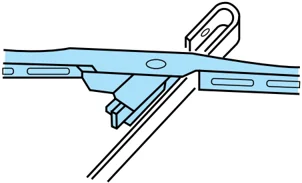
- Pull the wiper arm away from the vehicle. Turn the blade at an angle from the wiper arm. Push the lock pin manually to release the blade and pull the wiper blade down toward the windshield to remove it from the arm.
- Attach the new wiper to the wiper arm and press it into place until a click is heard.
- Replace wiper blades every 6 months for optimum performance.
53
Driver Controls
TILT STEERING WHEEL (IF EQUIPPED)
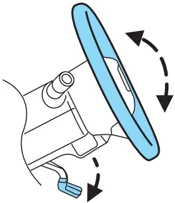
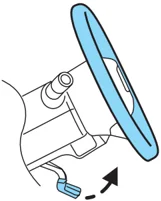
Pull the lever down to unlock the steering column. While the lever is in the down position, tilt the steering column to its desired orientation.
While holding the steering column, pull the lever up to its original position to lock the steering column.
Never adjust the steering column when the vehicle is moving.
ILLUMINATED VISOR MIRROR (IF EQUIPPED)
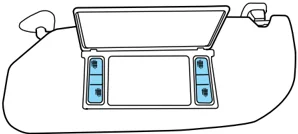
Lift the mirror cover to turn on the visor mirror lamps.
OVERHEAD CONSOLE (IF EQUIPPED)
The appearance of your vehicle’s overhead console will vary according to your option package.
If your vehicle is equipped with a overhead console rail system, there are several features that can operated.
54
Driver Controls
- To open the bins, move the center latch forward which will allow the door to be opened.
- The latches on the side of the bins are to enable the user to remove the bin or add a dealer purchased feature.
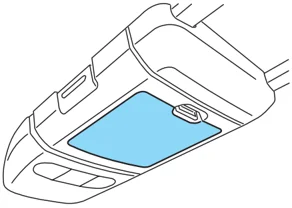
Sliding the bins on the rails may cause damage to the headliner. The removable bins are to be snapped into place not slid.
Storage compartment
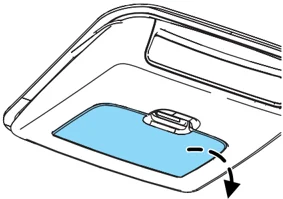
Press the latch to open the storage compartment. The door will open slightly and can be moved to full open.
The storage compartment may be used to secure sunglasses or a similar object.
Overhead Storage Bins
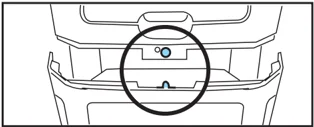
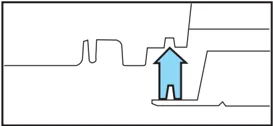
- When on the overhead rail, adjacent bins must be pinned together. Bins adjacent to the End Cap must be pinned to the End Cap. Bins without pin attachments should not be placed on the overhead rail.
- Failure to pin the bins together can allow the bins to become separated from the rail under certain conditions.
55
Driver Controls
Bin Removal
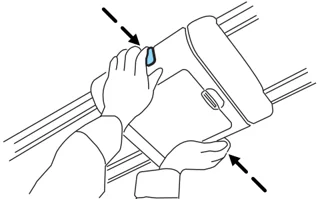
Attach and remove bins from the rail using the following instructions: Place both palms on the underside of the storage bin, avoiding the storage bin door.
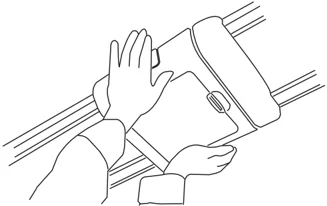
Push upwards with palms.
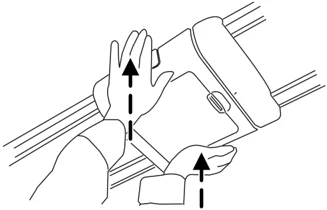
While pushing upwards with palms, grip the side latches with fingers and squeeze.
56
Driver Controls
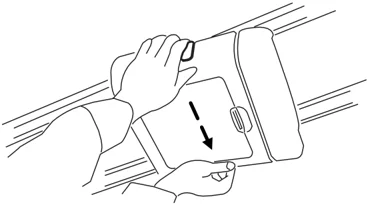
With pressure applied with palms and side latches squeezed down, pull downward on the entire storage bin and remove.
AUXILIARY POWER POINT
Power outlets are designed for accessory plugs only. Do not hang any type of accessory or accessory bracket from the plug. Improper use of the power outlet can cause damage not covered by your warranty.

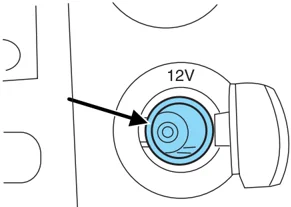
The auxiliary power point is located on the instrument panel.
Do not plug optional electrical accessories into the cigarette lighter. Use the power point.
Do not use the power point for operating the cigarette lighter element.
The Maximum power each power point can supply depends on the fuse rating. For example: a 20A fuse should supply a maximum of 240 Watts, a 15A fuse should supply a maximum of 180 Watts and a 10A fuse should supply a maximum of 120 Watts. Exceeding these limits will result in a blown fuse.
Always keep the power point caps closed when not being used.
57
Driver Controls
An additional auxiliary power point is located on the lower rear side of the center console. The power point is accessible from the rear seats.

CENTER CONSOLE (IF EQUIPPED)
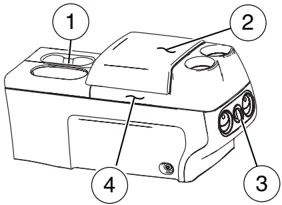
The center console offers several useful storage features. These include:
- Cupholders
- Tissue holder in lid
- Power point
- Large utility compartment has Coin holder slots, PalmPilot™/PDA holder, and Pen holder
Use only soft cups in the cupholder. Hard objects can injure you in a collision.
CELL PHONE USE
The use of Mobile Communications Equipment has become increasingly important in the conduct of business and personal affairs. However, drivers must not compromise their own or others’ safety when using such equipment. Mobile Communications can enhance personal safety and security when appropriately used, particularly in emergency situations. Safety must be paramount when using mobile communications equipment to avoid negating these benefits.
Mobile Communication Equipment includes, but is not limited to cellular phones, pagers, portable email devices, in vehicle communications systems, telematics devices and portable two-way radios.
58
Driver Controls
A driver’s first responsibility is the safe operation of the vehicle. The most important thing you can do to prevent a crash is to avoid distractions and pay attention to the road. Wait until it is safe to operate Mobile Communications Equipment.
POWER WINDOWS (IF EQUIPPED)
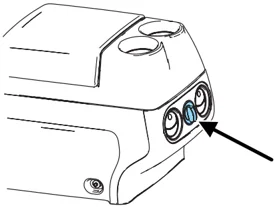
Do not leave children unattended in the vehicle and do not let children play with the power windows. They may seriously injure themselves.
When closing the power windows, you should verify they are free of obstructions and ensure that children and/or pets are not in the proximity of the window openings.
Press and hold the bottom part of the rocker switch to open the window. Press and hold the top part of the rocker switch to close the window.

One touch down
Allows the driver’s window to open fully without holding the control down. Press completely down on the bottom part of the rocker switch and release quickly. Press the top part of the rocker switch to stop.

59
Driver Controls
Window lock (if equipped)
The window lock feature allows only the driver to operate the power windows.
To lock out all the window controls except for the driver's press the left side of the control.
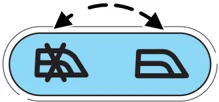
NOTE: The rear window switches will not illuminate when the window control is in the LOCKED position.
Press the right side to restore the window controls.
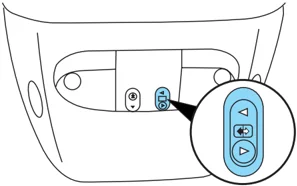
Power Sliding Back Window (if equipped)
To operate the power sliding back window, the ignition switch must be in the Run or Accessory position.
- Press and hold the bottom part of the rocker switch to open window all the way to the full open position.
- Press and hold the top part of the rocker switch to close the window.
All rear seat occupants and/or cargo must be properly restrained and clear of the back window opening before operating the power sliding back window.
Accessory delay (if equipped)
With accessory delay, the window switches may be used for up to ten minutes after the ignition switch is turned to the OFF position or until any door is opened.
MIRRORS
Automatic dimming rear view mirrors (if equipped)
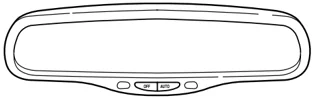
Your vehicle is equipped with an inside rear view mirror with an auto-dimming function. The electronic day/night mirror will change from
60
Driver Controls
the normal state to the non-glare state when bright lights (glare) reach the inside rear view mirror. When the inside rear view mirror detects bright light from behind the vehicle, the inside rear view mirror will automatically adjust (darken) to minimize glare.
Do not block the sensor on the backside of the inside rear view mirror since this may impair proper system performance.
Press the control to turn the mirror OFF or AUTO.
The mirror will automatically return to the normal state whenever the vehicle is placed in R (Reverse)(when the mirror is on) to ensure a bright clear view when backing up.
Power side view mirrors ☑
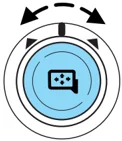
The ignition must be in the ACC or ON position to adjust the power side view mirrors.
To adjust your mirrors:
- Rotate the control clockwise to adjust the right mirror and rotate the control counterclockwise to adjust the left mirror.
- Move the control in the direction you wish to tilt the mirror.
- Return to the center position to lock mirrors in place.
Heated outside mirrors (if equipped)
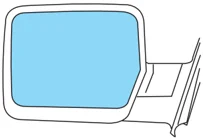
Heated mirrors remove ice, mist and fog. To activate the heated mirrors, press the rear defrost button R located on the climate control panel.
Refer to Rear Window Defrost in the Climate Controls chapter for more information.
61
Driver Controls
On vehicles not equipped with rear defrost, press the heated mirror control located on the climate control panel, refer to the Climate Controls chapter for more information.

Do not remove ice from the mirrors with a scraper or attempt to readjust the mirror glass if it is frozen in place. These actions could cause damage to the glass and mirrors.
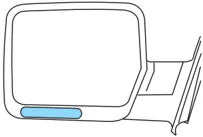
Exterior mounted mirror turn signal indicator (if equipped)
When the vehicle turn signal is activated, the lower portion of the mirror housing will blink.
This feature provides an indicator to the driver that the vehicle turn signal is working properly.
Fold-away mirrors
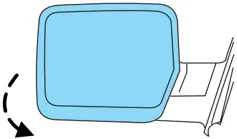
Fold the side mirrors in carefully before driving through a narrow space, like an automatic car wash.
POWER ADJUSTABLE FOOT PEDALS (IF EQUIPPED)
The accelerator and brake pedal should only be adjusted when the vehicle is stopped and the gearshift lever is in the P (Park) position.
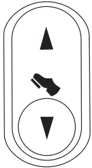
Press and hold the rocker control to adjust accelerator and brake pedal.
- Press the bottom of the control to adjust the pedals toward you.
- Press the top of the control to adjust the pedals away from you.
62
Driver Controls
The adjustment allows for approximately 3 inches (76 mm) of maximum travel.
Never adjust the accelerator and brake pedal with feet on the pedals while the vehicle is moving.
SPEED CONTROL (IF EQUIPPED)
With speed control set, you can maintain a speed of 30 mph (48 km/h) or more without keeping your foot on the accelerator pedal. Speed control does not work at speeds below 30 mph (48 km/h).
Do not use the speed control in heavy traffic or on roads that are winding, slippery or unpaved.
Setting speed control
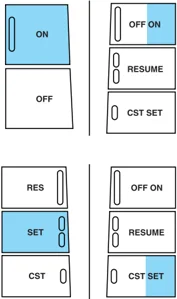
The controls for using your speed control are located on the steering wheel for your convenience.
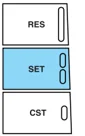
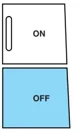
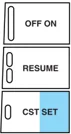
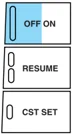
- Press the ON control and release it.
- Accelerate to the desired speed.
- Press the SET control and release it.
- Take your foot off the accelerator pedal.
- The indicator light on the instrument cluster will turn on.

Note:
- Vehicle speed may vary momentarily when driving up and down a steep hill.
- If the vehicle speed increases above the set speed on a downhill, you may want to apply the brakes to reduce the speed.
- If the vehicle speed decreases more than 10 mph (16 km/h) below your set speed on an uphill, your speed control will disengage.
63
Driver Controls
Resuming a set speed
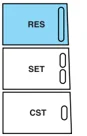
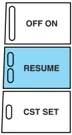
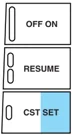
Press the RES/RESUME control and release it. This will automatically return the vehicle to the previously set speed. The RES/RESUME control will not work if the vehicle speed is not faster than 30 mph (48 km/h).
Increasing speed while using speed control
There are two ways to set a higher speed:
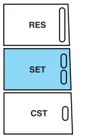
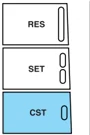
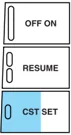
- Press and hold the SET control until you get to the desired speed, then release the control. You can also use the SET control to operate the Tap-Up function. Press and release this control to increase the vehicle set speed in small amounts by 1 mph (1.6 km/h).
- Use the accelerator pedal to get to the desired speed. When the vehicle reaches that speed press and release the SET control.
Reducing speed while using speed control
There are two ways to reduce a set speed:
- Press and hold the CST (coast) control until you get to the desired speed, then release the control. You can also use the CST control to operate the Tap-Down function. Press and release this control to decrease the vehicle set speed in small amounts by 1 mph (1.6 km/h).
64
Driver Controls
- Depress the brake pedal until the desired vehicle speed is reached, press the SET control.
Turning off speed control
There are two ways to turn off the speed control:
- Depress the brake pedal or the clutch pedal (if equipped). This will not erase your vehicle's previously set speed, if RES/RESUME is then selected, the vehicle will return to the previously set speed.
- Press the speed control OFF control. This will erase your vehicle's previously set speed.
Note: When you turn off the speed control or the ignition, your speed control set speed memory is erased.
STEERING WHEEL CONTROLS (IF EQUIPPED)
These controls allow you to operate some radio and climate control features.
Audio control features
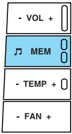
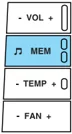
Press ♫ to select:
- AM, FM1, FM2,
- CD, or
- DVD (if equipped).
In AM, FM1, or FM2 mode:
- Press MEM to select preset stations within the selected radio band.
In CD mode:
- Press MEM to select the next selection on the CD.
65
Driver Controls
In any mode:
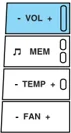
- Press VOL + or – to adjust volume.
Climate control features
Press TEMP + or - to adjust temperature.
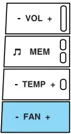
Press FAN + or - to adjust fan speed.
MOON ROOF (IF EQUIPPED)
The moon roof control is located on the overhead console.
Do not let children play with the moon roof. They may seriously hurt themselves.
Note: The moon roof will open to the “comfort” position first before opening all the way. The “comfort” position helps to alleviate rumbling wind noise which may happen in the vehicle with the roof fully opened.
66